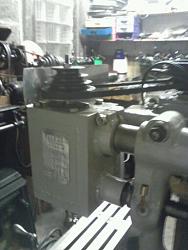
A horizontal miller is ok but sometimes I needed the extra versatility of a vertical.
The milling attachment was made from 7/8 plate cut with a slitting saw and welded on 3 sides. the back plate was put on the lathe ang a hole to fit over the overarm was machined, a separate pinch collar was partially welded to this to allow a secure clamping action. A second hole in the back plate allowed a 2 morse taper end off a worn drill to be welded in to positively locate in the horizontal mill arbor spindle, and a protecting collar welded on .
The top and bottom plate were turned to fit 1 inch bore taper bearings and the bottom one welded in place . The top is bolted down with locating dowels to keep everything in line.
The arbor shaft was turned from a spare lump of old steel from the scrap box. the most tricky part was turning out the internal 2 MT to a accept store bought 1/2 inch end mill holder. This was done by chucking a 2MT
between centers and dialing in the lathe top slide with a dial gauge to get the correct angle . Turning the rest to fit the bearing was next followed by drilling through to take a 3/8 draw bar made from silver steel. End float adjustment is by shims under th top bearing onto a step on the shaft.
front and top swarf covers keep chips and crud out
A scrap bench top drill provided a 1/4 horse motor pulleys and switch gear.
On first run it ran a 1 inch wide cutter into mild steel ( not too quicky though )no problem. The whole head an motor comes off in a minute and the mill returned to horizontal in another couple. Happy swarfing


 LinkBack URL
 About LinkBacks


 Reply With Quote


Bookmarks