metric_taper recently started a thread on the topic of height gauge add-ons, to which I added some comments. See http://www.homemadetools.net/forum/s...ding-60204-new
That reminded me of a modification that I did to a vernier height gauge to turn it into a digital height gauge.
I have no issues with reading a vernier scale of any sort but as my eyes age I have found that to read the height gauge scale I had to pick it up to have a good look. That gets tedious if you have a lot of measurements to do. One of things that I like most about digital instruments is that you can take a reference measurement and then simply push a button to set a zero.
i have previously made digital height gauges by cutting the jaws off digital calipers and fitting what's left to a steel base block, but although useful for many tasks, compared to a real height gauge they come up short.
I have had a Mitutoyo vernier height gauge, with all of the nice features of a quality instrument, so it would be nice if an easy way could be found to add a digital readout. There is an easy way which is also pretty cheap.
Digital scales for fitting to the Z axis of a mill are readily available at reasonable prices thanks to our friends in China. i had one laying around which I bought once because I knew that it would come in handy. I had been unable to find a use for it though, my mill was otherwise equipped. i dug it out of hiding and offered it up to the height gauge and saw that it was a trivial exercise to fit it to the height gauge.
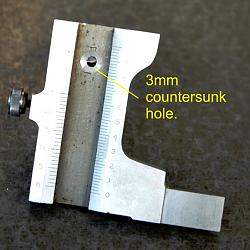
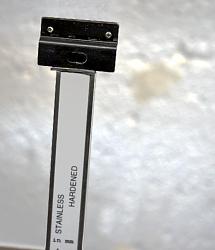
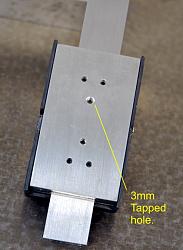
I drilled a countersunk hole in the back of the slider from the height gauge to allow a 3mm screw to attach the console of the digital scale. there are two tapped holes on the back of said console but I choose to use only one hole to allow some alignment freedom. The lower end of the slide simply rests on the base of the height gauge, and the top of the slide is held down by a slightly modified version of one of the mounting brackets that came with the readout. It was as if the bracket was made for my application. Between this bracket and the slide is a small piece of rubber, cut from an old inner tube (remember tubed tyres?), this holds the slide in place vertically whilst allowing small amounts of lateral displacement to avoid any binding as the height setting is used. It took me 1/2 hour, start to finish and works great. I just love the arbitrary zero setting ability. If I run out of battery I simply revert back to reading the vernier scale.

On the left is shown the main part of the digital setup, note that the bottom of the slide abuts against the height gauge base. On the right we see the slide top mounting, just under the bracket you can see the piece of rubber which allows a little movement to avoid binding.

Here we can see the pre-tapped holes in the back of the digital console. I only use the top one to allow some alignment freedom to help avoid binding. The other photo shows the counter-sunk hole in the original slide to attach the console. A counter-sunk screw is necessary for clearance to allow the vertical motion to proceed as normal.


 LinkBack URL
 About LinkBacks


 Reply With Quote


Bookmarks