Free 186 More Best Homemade Tools eBook:  
Get tool plans

User Tag List

Results 1 to 7 of 7

Thread: Unimat SL Lathe Headstock Alignment

  1. #1
    Supporting Member Paul Jones's Avatar
    Join Date
    May 2014
    Location
    Del Mar, California
    Posts
    1,231
    Thanks
    5,810
    Thanked 1,461 Times in 657 Posts

    Paul Jones's Tools

    Unimat SL Lathe Headstock Alignment

    I have been using "Unimatt Buddy Pin" (yes two Ts) for my general headstock alignments for many years and I highly recommend it for those using the Unimat SL 1000. It is fast and can get the alignment extremely close for most work. See the photo below

    Unimat SL Lathe Headstock Alignment-product-unimatt-buddy-pin-used-unimat-sl-headstock-alignment.jpg

    Earlier this week I reviewed the YouTube video by Tom Lipton where he shows how he aligned the lathe headstock after leveling the whole lathe. Tom uses a 2.5” dia. 6061 aluminum rod held in the chuck to make test cuts. The rod should have a sufficient diameter so it doesn't flex due to its own weight (very thick walled pipe also works). Tom removes material from most of the center length so just short sections on the two ends are left for making test cuts. Comparing the ODs at both ends measures the headstock alignment and how much to adjust. The lathe must be precisely leveled to ensure there is no twist in the lathe bed that can affect the headstock alignment.

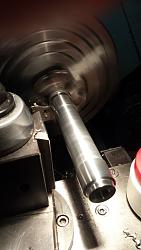
    I made a similar 6061-T6 aluminum test bar but only 1.125" in dia. and 5.25" long for aligning the 3" swing Unimat headstock. The test bar has an M12X1 internal thread for mounting directly on the Unimat spindle (but could modified to a small diameter on one end for holding in the 3 or 4 jaw chucks). I made the test bar with my 12" swing lathe and decided to check this lathe before I cut-off the part for use on the Unimat. I used a Mitutoyo 1" to 2" digital micrometer to make the measurements over a 5" center-to-center distance. Using a blue Sharpie to blue the surface, I machined off a few tenths, and after waiting for the part to cool (and turned off the halogen work light), finally measured several times. Each time the difference measured at either was 0.00010" or 0.00015". I was using a carbide insert tool and probably should have used a honed HSS tool to keep the part from being pushed away rather than cut (and perhaps a larger bar of aluminum). The 12" swing lathe had been re-leveled a couple months ago and I think the 12" swing lathe spindle alignment meets my typical level of precision.

    Unimat SL Lathe Headstock Alignment-machining-unimat-sl-headstock-alignment-test-bar.jpg

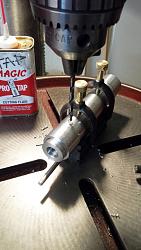
    Before mounting the test bar on the Unimat, I drilled a 4mm hole for a tommy bar needed to tighten and remove the test bar from the spindle.

    Unimat SL Lathe Headstock Alignment-drilling-4mm-tommy-bar-holes-unimat-test-bar.jpg

    Mounting the test bar on the M12X1 threaded spindle is an excellent way to directly measure the headstock alignment without using lathe chucks. I have used the “Rollie's Dad's Method” for checking the headstock alignment on my 7” swing mini lathe (and using shims under the headstock to make alignment adjustments). The method works great because the math works no matter what type of machine you are checking. However, the Unimat chucks are too small to make this technique practical so I used direct mounting on the Unimat spindle.

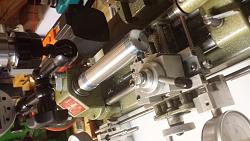
    Unimat SL Lathe Headstock Alignment-taking-light-cuts-headstock-test-bar.jpg

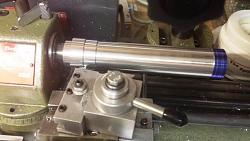
    This time I used a honed HSS insert from Arthur R Warner (a direct replacement for carbide inserts that fits the same insert tool holder) to lightly machine the test bar. I used a blue Sharpie to color the surface to make sure both the surfaces at the headstock and tailstock ends were actually machined.


    Unimat SL Lathe Headstock Alignment-blue-surface-sharpie-take-very-light-cuts-both-ends.jpg


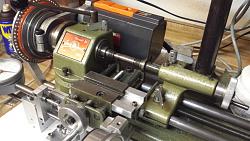
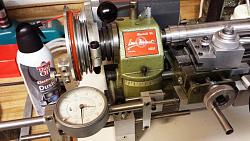
    Measuring the difference between the machined diameters and divided by two provides the approximate distance to swing the Unimat headstock. The Unimat lathe has a headstock that can be rotated for machining tapers and is locked in place with a special set screw. Using this features also allows aligning the headstock. However, the headstock pivoting point is near the center of the headstock and not at the spindle end where one of the measurements was taken - hence the approximation.

    Unimat SL Lathe Headstock Alignment-unimat-headstock-can-rotated-locked.jpg

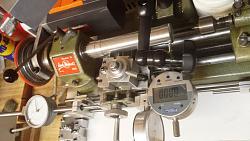
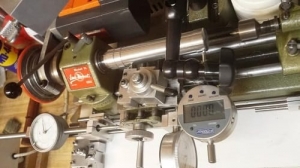
    The process takes several iterations and the alignment can be set to within 0.0001 to 0.0002” in alignment over 5”. In addition, future alignments can be started from the now machined test bar and the process will be much faster. In some cases just aligning with the machined test bar will be good enough.

    Unimat SL Lathe Headstock Alignment-adjusting-unimat-headstock-alignment-digital-di.jpg

    I hope this helps others who may need to align their Unimat headstock.

    Thank you,

    Paul

    186 More Best Homemade Tools eBook
    Last edited by Paul Jones; Mar 25, 2016 at 01:47 PM.

  2. The Following 7 Users Say Thank You to Paul Jones For This Useful Post:

    DIYSwede (Jun 7, 2019), emu roo (Sep 24, 2024), jjr2001 (Sep 1, 2016), kbalch (Mar 21, 2016), mklotz (Oct 17, 2016), PJs (Mar 22, 2016), Vyacheslav.Nevolya (Mar 24, 2016)

  3. #2
    Content Editor
    Supporting Member
    DIYer's Avatar
    Join Date
    Aug 2013
    Posts
    3,055
    Thanks
    793
    Thanked 1,885 Times in 1,682 Posts
    Thanks Paul! We've added your Unimat Headstock Alignment Method to our Measuring and Marking category, as well as to your builder page: Paul Jones' Homemade Tools. Your receipt:


    2,000+ Tool Plans
    Last edited by Jon; Oct 23, 2021 at 02:18 AM.

  4. #3
    PJs
    PJs is offline
    Supporting Member PJs's Avatar
    Join Date
    Sep 2014
    Location
    Northern CA
    Posts
    1,844
    Thanks
    8,420
    Thanked 1,128 Times in 724 Posts

    PJs's Tools
    Thank you Paul for this follow up posting and great write up. Sorry I hadn't responded till now but was caught up in something for a few days. I looked at that Unimatt Buddy Pin after the last post and it's a real nice "get it done" tool, especially for the price.

    The process can be quite complex when you think of all the variables of pitch, roll and yaw with the bed, head/spindle, chuck, cross slide, tail stock etc. etc. I also like the Rollie Dad method for it's simplicity as well. I found it on John Moran's site just after I got my mini. Like John says these are not Hardinge HLV-H's but you and I both like to get the best out of them and ourselves. A few tenths over a 5.25" run is pretty impressive!!

    I'm also considering all of this for the extended bed on mine and all the work I've put into it thus far...but its been fun. I'm considering having an MT3 taper on the spindle end of a ground rod of the appropriate length that could be drawn into the spindle, then using the Rollie Dad method, then use a MT2 Center in the tail stock on the other end to dial both in? Love to know yours or other HMT folks thoughts on this?

    Not sure I agree with Tom on the big round bar because of the catanary/cantilever effect no matter what size bar, but it is minimized by the larger diameter, aluminum and obviously good for short runs like yours. Also AL round bar is generally extruded and can have some structural uniformity and other issue during extrusion. Plus it seems to me to put a load (~.6lbs) on the bearings with that much (~4.7X +) hanging out or off the spindle.

    Curious how you adjust the head vertically if necessary to get parallel to the way bars? Shims fore or aft? That seems a pain if you have to rotate the head and change shims...

    Sorry for the book but I'm always inspired by your work and thought processes. Thanks! ~PJ
    ‘‘Always do right. This will gratify some people and astonish the rest.’’
    Mark Twain

  5. The Following User Says Thank You to PJs For This Useful Post:

    Paul Jones (Mar 24, 2016)

  6. #4
    Supporting Member Paul Jones's Avatar
    Join Date
    May 2014
    Location
    Del Mar, California
    Posts
    1,231
    Thanks
    5,810
    Thanked 1,461 Times in 657 Posts

    Paul Jones's Tools
    PJs,

    Thank you for your follow-up information. I think your idea of a ground test bar with MT3 end placed in the lathe spindle is an excellent method. Room temperature and heating from work lights become an important factor when measuring in the 0.0001" ranges. I have a 12" ground test bar with a MT3 end. Send me a PM if you want to borrow it.

    I used the 6061-T6 aluminum bar because it machines very accurately with a honed HSS cutting tool and has no visible shavings from the tool "spring" after three passes with the same locked cross slide dial setting. Also I wanted the test bar to directly mount on the headstock spindle so I can use it again after aligning the headstock and not always go through the machining and micrometer measurements. I measured the Unimat horizontal accuracy and it is very good and no shims are needed. The main reason I do the accuracy measurements is to understand the limits of my machine tools and to be able to work within these limiting factors and avoid surprises.

    My 12" swing lathe with a D1-4 spindle with an internal MT5 taper in the spindle bore. I have a very accurate MT3 to MT5 adapter and a 12" hardened and ground straight steel test bar with a MT3 taper end (it is specified to be within 0.0002" from end-to-end). I had used the steel test bar to prove the 12" swing lathe spindle is both horizontally and vertically within a few tenths along the first 12" from the spindle (do this only after accurately leveling the lathe) and the lathe ways do not have a contributing factor. I am the third owner of this 12" swing lathe built in 1987 and it is in great shape despite needing new paint. I just wanted to know its TIR from the spindle so I can work around its limitations and not blame the machine tool for my mistakes.

    Thanks for the information.

    Paul
    Last edited by Paul Jones; Mar 25, 2016 at 01:55 PM.

  7. The Following User Says Thank You to Paul Jones For This Useful Post:

    PJs (Mar 24, 2016)

  8. #5
    PJs
    PJs is offline
    Supporting Member PJs's Avatar
    Join Date
    Sep 2014
    Location
    Northern CA
    Posts
    1,844
    Thanks
    8,420
    Thanked 1,128 Times in 724 Posts

    PJs's Tools
    Thanks Paul for the info and generous offer. I've got a ways to go with the squaring of the saddle and the new extended cross slide in X,Y & Z (.0005 -.0008) and really want to make some new gibs out of better material, plus shimming the new rack to better meet the drive gear. Then it will be time to tear it down....although not sure what I will find on the bottom of the old headstock and how it mates to the v-way and bed. The v-way on the new extended cross slide was a mess. It had ~1.5thou rock corner to corner and not touching about 1/3 the length nor parallel to the bed by about 2 thou. A lot of hand work with out a mill! Picked up a B&S tenths DTI on ebay a while back in excellent shape and now when I put the bed and components on the granite I'm seeing things in a new light!

    I get it now on the AL test bar. Once you get it to where it is now you should be able to chuck it up and adjust accordingly. Makes perfect sense. Absolutely right about the temps with tenths measurement. I have had to wait ~10-20 minutes some times after working the bed and cross slide...it's good though to give my fingers a rest.

    That 2 bar system on your Unimat SL is pretty impressively square after all these years. You've sure taken good care and done lots of good thing to and with it!

    You've confirmed for me this tapered end test bar is the way to go since you've used it on both machines now to such great tolerances! Thanks again...very much! ~PJ
    ‘‘Always do right. This will gratify some people and astonish the rest.’’
    Mark Twain

  9. The Following User Says Thank You to PJs For This Useful Post:

    Paul Jones (Mar 24, 2016)

  10. #6
    Supporting Member Paul Jones's Avatar
    Join Date
    May 2014
    Location
    Del Mar, California
    Posts
    1,231
    Thanks
    5,810
    Thanked 1,461 Times in 657 Posts

    Paul Jones's Tools
    Yes, I take very good care of the Unimat SL that I bought new in 1970. I have replaced the lead screws and the headstock bearings and now thinking about replacing the bearings again (uses an unusual magneto style bearings). The machine has been modified and improved but only used for small machine work.

    Good luck on the mini lathe alignment. Adding up all the time, I think I spent several days aligning my mini lathe (it is the lathe painted dark green in many of the photos I have posted on HMT). Shimming the headstock using RDM (Rollie Dad method) takes many hours because it is a slow iterative process that depends a lot on the amount of torque applied to the three headstock hold-down bolts. Use a torque wrench to be more consistent from iteration to iteration. Also check all the gears in the headstock while it is off the lathe and replace the gears that are in bad shape. Once you have the headstock perfectly aligned with the lathe ways, you will find the tailstock is no longer aligned and is sitting too low (you will find the headstock shims raise the spindle center line and another reason it takes so long because of unintended consequences). I had to rebuild the tailstock with shims and added a way to micro-adjust the side-to-side movement for spindle to tailstock alignment (see Homemade Tailstock Fine Screw Adjustment ). When things don't make sense in the process it is a good time to stop and think it through. In the end you will find the extra effort was worthwhile.

    The B&S tenths DTI will be an excellent addition. Also a great way to check with a small granite plate the precision of used parallels, V-blocks and other items from eBay purchases. I like the old homemade precision tools that were carefully made by toolmaker and include the makers initials and date placed in a recess on the tool.

    Thanks for all of your information, Paul
    Last edited by Paul Jones; Mar 24, 2016 at 02:18 PM.

  11. The Following User Says Thank You to Paul Jones For This Useful Post:

    PJs (Mar 24, 2016)

  12. #7
    PJs
    PJs is offline
    Supporting Member PJs's Avatar
    Join Date
    Sep 2014
    Location
    Northern CA
    Posts
    1,844
    Thanks
    8,420
    Thanked 1,128 Times in 724 Posts

    PJs's Tools
    Great tips on the alignment process. For some reason it didn't register that you bought it new. Nice that you know exactly where its been and done! Interesting, a Magneto style bearing. Is the bearing pressed to a shoulder on the spindle to keep it in the race? Never used them before but saw them years ago in a military magneto I got in a pile of stuff at auction.

    Thanks for the good luck. With all the time I have in it now a couple of days won't matter much. ~¿@ The torque wrench is great idea to get it consistent every time a shim change. Thanks, I hadn't thought of that yet. Also like your micro adjust tail stock and may do something similar soon as I can see things will float some going back together with aligning. I will be checking the gears and internal components as well as hoping to replace the std rollers with some tapered rollers.

    My metrology stuff is a bit spars but getting there. I have a 3"x18"x24 granite surface plate that the new bed just fits on and use my 12" digital height gauge (Std Gauge/low line B&S) with a DTI for most things but run out of room sometimes with the size of the base. A surface gauge might be better but haven't found one for the right price/quality. Also have decent Parallels and 1,2,3 blocks but no v-blocks yet and would like to have a right angle plate when I can.

    Me too on the Toolmaker tools. When I got the DTI I also got a 16R blade for my Starrett square/angle finder given to me years ago...perfect shape and excellent price. Just need the center finder now for the set. E-bay can be good!

    Thanks for all the tips, tricks and conversation! ~PJ


    2,000+ Tool Plans
    ‘‘Always do right. This will gratify some people and astonish the rest.’’
    Mark Twain

  13. The Following User Says Thank You to PJs For This Useful Post:

    Paul Jones (Mar 25, 2016)

Thread Information

Users Browsing this Thread

There are currently 1 users browsing this thread. (0 members and 1 guests)

Tags for this Thread

Bookmarks

Posting Permissions

  • You may not post new threads
  • You may not post replies
  • You may not post attachments
  • You may not edit your posts
  •