I previously posted an article about making an ER16 collet chuck for my 3” swing Unimat SL 1000 lathe (see Homemade Unimat ER16 Collet Chuck ). In that article the majority of the chuck machining including the 8 degree taper was performed on a larger 12” swing lathe. In this article the final 8 degree taper machining is performed using the Unimat (see http://www.homemadetools.net/forum/m...00-lathe-10111 ). Doing the machining taper with the Unimat has an improved TIR since the chuck is custom fitted to the Unimat M12X1 threaded spindle. I also want to provide more details on how to machine this high precision collet chuck.
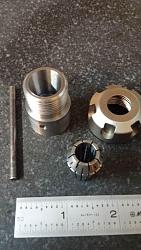
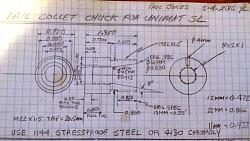
The photo below shows the finished ER16 collet chuck in the center surrounded by a collet nut produced from Shars and a Technik high precision ER16 collet. I machined the ER16 collet from a round bar of 1” diameter 1144 Stressproof steel. The ER16 collet chuck is 0.970 in diameter and 1.350” long, internal thread M12X1 with 12mm x 5mm counterbore for the Unimat spindle and M22x1.5 external thread for a standard ER16 collet nut. The 16 degree included angle (8 degree taper) fits the standard ER16 collets (see plans at end of this article).
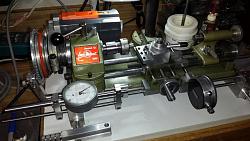
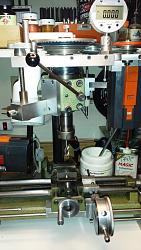
Shown below are photos of the finished Unimat ER16 Collet Chuck with the collet chuck installed on the Unimat SL 1000 lathe and also on the vertical milling head that I had added to the lathe setup.
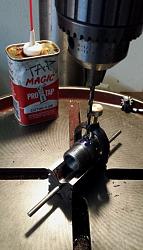
As machined before, the ER16 collet chuck was initially created using a 12” swing lathe mainly because this lathe has a quick change gear box capable of cutting inch and metric threads. Using single point thread cutting, the larger lather produced the M22X1.5 thread required for a collet nut (Shars part no. 202-1524). Also a M12X1 HSS tap produced the internal thread required for the Unimat spindle. The 8 degree taper for the ER16 collets was machined using the lathe compound and set up with a +/- 5 minute Vernier 6" precision angle protractor (see Homemade Unimat ER16 Collet Chuck ). The tapered opening to the collet chuck was left about 0.015” undersized to allow final concentric machining on the Unimat lathe. The 11 mm hole for the M12x1 thread was bored to ensure concentricity and straightness and taped through the tapered hole-end of the chuck while still in the 12” lathe chuck and prior to parting-off.
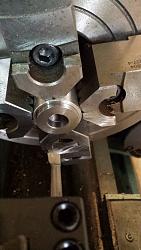
The last operation on the larger lathe after parting-off the partially machined collet chuck from the 1144 Stressproof steel rod involved reversing the part for counterboring a 12 mm dia. x 5 mm deep recess required for mounting the chuck on the Unimat spindle. This operation required holding the chuck in a press-fit aluminum sleeve to protect the outside finish and was created when the first version of the collet chuck was made. The protruding external edge of the collet chuck was indicated to within 0.0002” in a 4-jaw chuck before machining the 12 mm counterbore ID with 5 mm deep recess. Using several spring passes of the boring bar, the 12 mm counterbore ID was checked with a 0.472-" gage pin before removing the collet chuck from the 4-jaw chuck. The 12 mm recess fits precsely on the 12 mm shoulder of the Unimat SL spindle and helps to precisely mount chucks on the Unimat spindle.
Before moving the chuck to finish machining on the Unimat SL 1000 lathe, a single 4 mm dia. tommy bar hole was drilled in the body of the chuck to allow easy mounting and unmounting on the lathe spindle.
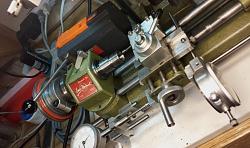
After this operation, the remaining machining and grinding is performed on the Unimat SL 1000 lathe. The Unimat has a headstock that can be rotated to machine tapers because the lathe lacks a compound for doing this type of operation. I had to remove the indexing plate from the rear of the headstock spindle (see Homemade Indexing Plate for Unimat SL Lathe ) in order to provide clear access the headstock locking bolt.
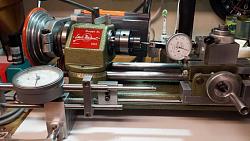
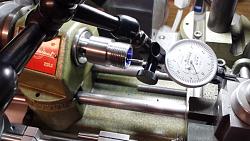
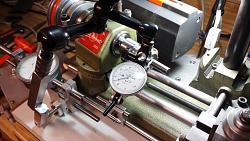
I have an older and now obsolete E16 collet chuck (predecessor to the ER16 design) that I originally bought in 1970 when I bought the lathe. It is extremely precise and it also has an internal 8 degree taper. I used this chuck to set the 8 degree angle using an Interapid 0.0001” dial test indicator (I consider these the gold standard for tenths DTI’s) and measuring along the full range of the internal tapered surface and adjusting the headstock until no movement could be seen on the DTI dial.
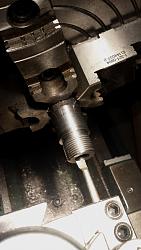
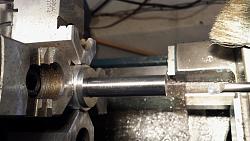
Using a small boring bar POSITIONED UPSIDE DOWN in the QCTP tool holder, I machined the final dimensions of the 8 degree collet taper from the rear side of the chuck’s internal taper. This was the only way to provide easy access to the boring bar with the headstock swung in this position. I used a little Tap Magic cutting oil and machined an extremely smooth surface. I used a blue Sharpie fine point marking pen to “blue” the internal taper surface, honed the boring bar, and then took several spring passes for the final cut.
The work paid off with an indicated TIR of virtually no movement measured near the outer edge of the tapered surface using the Interapid 0.0001” DTI. However, the true TIR is very dependent upon the quality and age of the ER16 collets. My best new collets with a stated TIR of 0.0002” produced at best 0.0003” TIR in the chuck using a gage pin for the measurement surface. With age, the Unimat headstock bearings introduce more TIR error so I am probably luckier than smart to have obtained this level of precision. Measuring the TIR of the new ER16 collet Chuck with my used ER16 collets produces a TIR of 0.0005" and this is probably the best I can expect in normal use. However, later I discovered while mounting and dismounting the collet chuck, the TIR ranged from 0.0003” to 0.0005”. Still very good for what I will need but I wanted better.
Grinding the ID of the Collet Chuck:
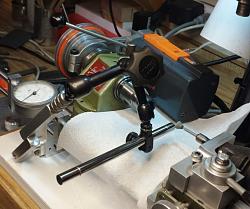
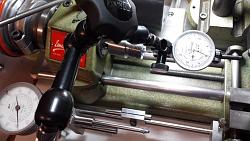
Also, while I had the Unimat head setup at 8 degree angle, I use a Dremel tool with a small silicon carbide stone to “dress” the inner surface of the newly created ER16 collet chuck. The Dremel silicon carbide grinding stone was dressed with a diamond dresser before starting the grinding operation. I used the dial indicator adjustable extension arm I made for the Unimat (see Homemade Dial Indicator Adjustable Arm Extension ) to hold the diamond dresser. This adjustable extension arm has multiple uses for the lathe and milling head for setup and QC.
Before grinding, I blued the inner surface with a blue Sharpie (these seem to be wetter than the black color Sharpies) so I would know how much to grind off when exposing a new surface and hopefully a concentric surface. I doubled check the TIR before grinding and this time measured 0.0005” TIR. I suspect the TIR differences are due to how snuggly the collet chuck is mounted on the 12 mm x1 threaded spindle.
The grinding continued with several in and out passes until the grinding wheel “sparked out”. In this case with unhardened steel, the grinding experiment did not improved the TIR and remained at 0.0001” without the collet. The TIR still indicated a TIR around 0.0005” when using the collet and gage pin for measuring combined TIR. This is the same combined TIR produced by the HSS boring bar. Still very good and the grinding technique would be very useful for a hardened steel ER16 collet chuck custom ground for this lathe’s spindle. That is an experiment for another time.
Finally, below is a photo of the hand drawn plans for the Unimat SL collet chuck for the viewers who would like to make this chuck.
Thank you for looking,
Paul Jones


 LinkBack URL
 About LinkBacks


 Reply With Quote


Bookmarks