Free 186 More Best Homemade Tools eBook:  
Get 2,500+ tool plans, full site access, and more.

User Tag List

Page 3 of 5 FirstFirst 1 2 3 4 5 LastLast
Results 21 to 30 of 48

Thread: Treadmill motor adaptation for Bridgeport type mill.

  1. #21
    Supporting Member machiningfool's Avatar
    Join Date
    Jul 2015
    Location
    Seffner Florida
    Posts
    266
    Thanks
    0
    Thanked 273 Times in 146 Posts

    machiningfool's Tools
    Well I spent all day trying to install the mill motor in the casing with no success. I have done it before, but that was along time ago. I finally watched a video on how to do it and forgot that there is a way to compress the variable speed pulley spring, so I bought some bolts and tomorrow I will begin again. There is little room between the case and pulley to stretch the belt on, so by spreading the pulley apart, It will be easier. Funny, I have done it before without compressing the spring, but I was younger and I had help. Robert Brown-machiningfool

    186 More Best Homemade Tools eBook

  2. #22
    Supporting Member machiningfool's Avatar
    Join Date
    Jul 2015
    Location
    Seffner Florida
    Posts
    266
    Thanks
    0
    Thanked 273 Times in 146 Posts

    machiningfool's Tools
    Aha, I figured it out. I have been beating my head against the wall. The way it is done is this, first compress the spring on the lower half of the pulley, then remove the C ring and then the bottom half of the pulley slides off of the shaft, then I take that half of the pulley and set it in the casing under the variable speed belt. Once that is done, the motor, with the top half of the pulley, is lowered into the case. The shaft goes through the lower pulley and then through an inspection hole in the bottom of the case. The C ring is then replaced through the inspection hole, then the two bolts compressing the spring are removed and the installation is complete. I didn't discover this until I compressed the spring with the two bolts and discovered that I could then remove the C ring and the bottom half of the pulley would slide off of the shaft. This is a no sweat install compared to trying to force the belt on without taking the two halves of the pulley apart, whew! I knew there had to be an easier way to do it. Robert Brown-machiningfool

    2,500+ Tool Plans

  3. #23
    Supporting Member machiningfool's Avatar
    Join Date
    Jul 2015
    Location
    Seffner Florida
    Posts
    266
    Thanks
    0
    Thanked 273 Times in 146 Posts

    machiningfool's Tools

    Installing Lugan 3 hp. variable speed motor.

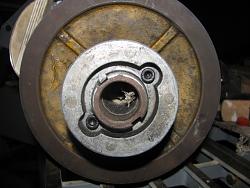
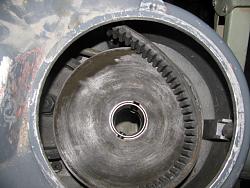
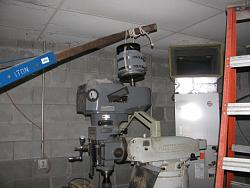
    The above post correctly describes the sequence of the install, but I will say, I have been working all day installing the motor, it is not easy, even the prescribed way. First one of the keyways came out when I was lowering the motor and I didn't know it, so when I tried to reinstall the C ring it wouldn't go because the collar was in a bind. I saw something lying on the floor and yes, it was one of the keys, but when I reinstalled it there was no longer a bind and from there on it was fairly easy after having to by a 33.00 set of expansion ring pliers. It is now installed correctly. It would be quite a bit easier with two people, a luxury I don't have. Here are some pictures portraying the install. As it turns out, designing the treadmill motor adaptation was easier then the install of the stock motor on the mill. Thanks for all of the interest, the rest of the adaptation will be coming here shortly. Robert Brown - machiningfoolTreadmill motor adaptation for Bridgeport type mill.-img_2160.jpgTreadmill motor adaptation for Bridgeport type mill.-img_2161.jpgTreadmill motor adaptation for Bridgeport type mill.-img_2162.jpgTreadmill motor adaptation for Bridgeport type mill.-img_2163.jpgTreadmill motor adaptation for Bridgeport type mill.-img_2164.jpgTreadmill motor adaptation for Bridgeport type mill.-img_2166.jpgTreadmill motor adaptation for Bridgeport type mill.-img_2167.jpg

  4. The Following 2 Users Say Thank You to machiningfool For This Useful Post:

    Jon (Aug 1, 2015), kbalch (Aug 3, 2015)

  5. #24
    Supporting Member C-Bag's Avatar
    Join Date
    Aug 2015
    Location
    California, central coast
    Posts
    720
    Thanks
    689
    Thanked 879 Times in 471 Posts

    C-Bag's Tools
    Very interesting. I looked through your u2oob vids and am impressed with you KISS applications. I've been long intrigued by the idea of treadmill motors for small lathe and mill applications. It NEVER would have dawned on me to use the old motor as an adapter like what you are doing on your mill.

    I have several questions about the treadmill motors.

    Are there better brands or are they like so many things these days where the components are all made by one source and the different treadmill manufacturers all buy the same stuff?

    I spent 10yrs as a millwright/mechanic in fruit and vegetable packing making and installing equipment. We used DC motors a lot and they were way more heavy duty looking than the treadmill motors I've seen. So pardon me if I'm a little skeptical. But the stuff we installed also was 5 or 10x's more expensive so I wouldn't be wanting to pay that much unless I could find a deal which I've not been able to find. But there are literally tons of treadmills on Craigslist for cheap and sometimes even free!

    So as it seems you've made several conversions I'd like to ask do they stand up? I've seen it said they are way over rated. I can't wait to see how that little motor does on you Lagun.

    While I can see it's pretty easy to keep the same controller they don't care about making the electronics tidy and compact. Have you ever messed with buying another controller? I ask because usually the free treadmills have a problem and I suspect it's the controller.

  6. #25
    Supporting Member machiningfool's Avatar
    Join Date
    Jul 2015
    Location
    Seffner Florida
    Posts
    266
    Thanks
    0
    Thanked 273 Times in 146 Posts

    machiningfool's Tools
    I have had no problems with the conversions that I have made, not one failure, but realize my operation is not a commercial one. When I buy a treadmill of course I run it, if it doesn't make any funny noises, I buy it. I have never had to buy a controller, if ever one fails I suppose I would just go buy another treadmill. They are so cheap, so I don't see buying anything outside of the treadmill package. Now on this installation, since I think possibly that this mill installation will make the treadmill motor work harder than in the treadmill, I am going to put an ammeter on it to see how the motor is doing. This motor is rated continuously at 12 amps and anything above that requires a fan, so while running it, it doesn't go above 12 amps, I should be OK. As far as brands are concerned, once you get them out of the treadmill, they all look pretty much the same to me, I don't worry about it, because If anything fails, and it hasn't, I will just go buy another. There are some differences in the rated RPM and hp. Some can run at 7000 and some at 4800. HP from 1.5 to 3. I am doing this install for under 2 hundred as compared to 1000 to 1500 for either a re wound motor or a new one, so I am willing to take the chance, we shall see, I should have this thing running tomorrow, hopefully. Robert Brown-machiningfool.
    Last edited by machiningfool; Aug 5, 2015 at 05:32 AM.

  7. The Following User Says Thank You to machiningfool For This Useful Post:

    C-Bag (Aug 2, 2015)

  8. #26
    Supporting Member machiningfool's Avatar
    Join Date
    Jul 2015
    Location
    Seffner Florida
    Posts
    266
    Thanks
    0
    Thanked 273 Times in 146 Posts

    machiningfool's Tools
    Today, I mounted the treadmill motor on the mill and started to organize the controls here are some pictures, thanks to all for your interest in my project. Robert Brown-machiningfoolTreadmill motor adaptation for Bridgeport type mill.-img_2168.jpgTreadmill motor adaptation for Bridgeport type mill.-img_2169.jpgTreadmill motor adaptation for Bridgeport type mill.-img_2170.jpgTreadmill motor adaptation for Bridgeport type mill.-img_2171.jpgTreadmill motor adaptation for Bridgeport type mill.-img_2172.jpg

  9. #27
    Supporting Member C-Bag's Avatar
    Join Date
    Aug 2015
    Location
    California, central coast
    Posts
    720
    Thanks
    689
    Thanked 879 Times in 471 Posts

    C-Bag's Tools
    Thanks for all the info Robert. Especially the >$200, lets me know what to gauge what you have into the project.
    I don't see the emoticon for eating popcorn as in I'll be watching for updates how it goes. I've got a mill drill that is a pain to change speeds on and changing over to this kind of drive would be worthwhile.

  10. #28
    Supporting Member machiningfool's Avatar
    Join Date
    Jul 2015
    Location
    Seffner Florida
    Posts
    266
    Thanks
    0
    Thanked 273 Times in 146 Posts

    machiningfool's Tools
    Well, I won't be eating popcorn for a while. I got it running today, but evidently I chose the wrong pulley ratio. It barely turns, so what I am going to do tomorrow is go back to the original pulley on the treadmill motor. It is about 1 1/2 inches, then go to a 12 inch on the mill motor. The belt on the treadmill is a flat belt, so probably less drag than the V belt I used, so I will also go back to a flat belt also. There is more drag caused by the variable speed pulley system on the mill than I thought. The treadmill motor is a high speed motor, probably about 5 to 7 thousand, so I am going to have to put the original pulley/flywheel back on and try to raise the RPM. Thanks for everyone's interest and I will just keep on keeping on. Robert Brown machiningfool.
    Last edited by machiningfool; Aug 2, 2015 at 06:32 PM.

  11. #29
    Supporting Member machiningfool's Avatar
    Join Date
    Jul 2015
    Location
    Seffner Florida
    Posts
    266
    Thanks
    0
    Thanked 273 Times in 146 Posts

    machiningfool's Tools
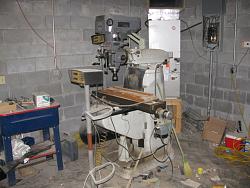
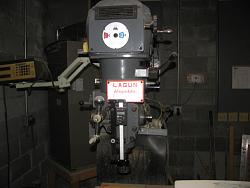
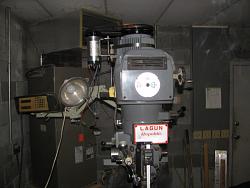
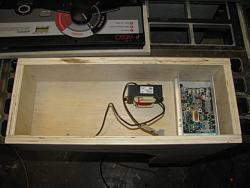
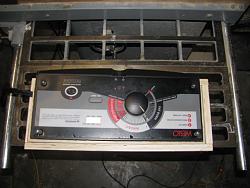
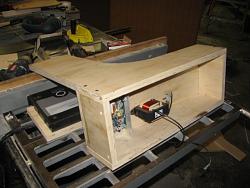
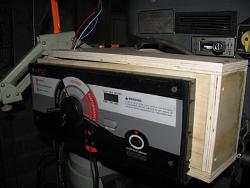
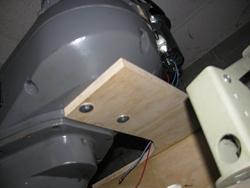
    If you read the previous post, I had trouble getting the treadmill motor rpm up, so I changed the ratio from 2 to 1, to 7 to 1. I cut the original treadmill pulley off of the flywheel and am using the same type of belt that goes on the treadmill, just larger, 38 inches. Since I couldn't find a 9 inch pulley with the same v arrangement of the treadmill pulley, I cut the 5/8 inch V belt and glued it around the 8 inch pulley for the original installation, and will run the micro v belt on the rubber flat surface. It worked on my lathe. I just ordered the belt, will be here tomorrow. The number of the belt is a Gates number==380J8. 38 meaning the length O.D. J, meaning a micro poly-groove V belt and the 8 meaning 8 grooves. Hopefully this arrangement will bring up the rpm on the treadmill motor. I am posting some pictures of how I am arranging the controls. I placed the controls close enough to the motor so that I don't have to cut any wires, they feed right into the top of the box. The long wires, if they will fit, will be coiled up in the box, also not having to be cut, if not I will cut them. I also took a shot of how I mounted the control box on the mill. I used the two bolt holes that was used for the inspection hole cover, worked out well. Now you might notice somewhere that it says Bridgeport, so the base is Bridgeport and the head is Lagun. I bought just the base at one time with no head because it was only 500.00 and later found the Lagun head at a machine shop that was all apart and they gave up on it, so I bought it, rebuilt it and that is what you see on the Bridgeport base. Next post will be the results of the new belt and pulley system, running correctly, I hope. Robert Brown-machiningfoolTreadmill motor adaptation for Bridgeport type mill.-img_2175.jpgTreadmill motor adaptation for Bridgeport type mill.-img_2178.jpgTreadmill motor adaptation for Bridgeport type mill.-img_2180.jpgTreadmill motor adaptation for Bridgeport type mill.-img_2173.jpg

  12. #30
    Supporting Member machiningfool's Avatar
    Join Date
    Jul 2015
    Location
    Seffner Florida
    Posts
    266
    Thanks
    0
    Thanked 273 Times in 146 Posts

    machiningfool's Tools

    Treadmill motor powered Lagun mill a success, finished.

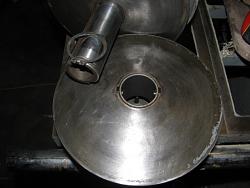
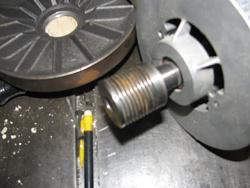
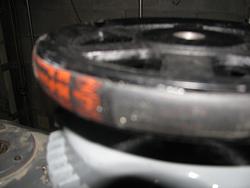
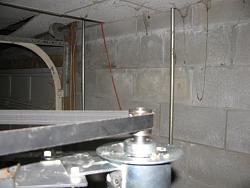
    [url] Well, the original 1 1/4 inch pulley on the treadmill motor did it. With a 1:7 ratio it now has enough power for the mill. I powered it up today as you will see in the video and it runs fine. Spindle speed is 2000, can go higher, but motor is running cool at that speed. That is in high speed gear also runs smooth in low speed. Here are some pictures of the pulleys, I am using the same type belt as the original treadmill only larger 38 inches. I took the 5/8ths inch v belt, cut and wrapped around the large pulley and glued it with CA. The belt runs nicely on it. I am also going to try to upload a video, we shall see. Robert Brown machining fool.Treadmill motor adaptation for Bridgeport type mill.-img_2182.jpgTreadmill motor adaptation for Bridgeport type mill.-img_2183.jpg[video=youtube;jcKwKfgV961]
    Last edited by machiningfool; Aug 4, 2015 at 06:14 PM.

Thread Information

Users Browsing this Thread

There are currently 1 users browsing this thread. (0 members and 1 guests)

Bookmarks

Posting Permissions

  • You may not post new threads
  • You may not post replies
  • You may not post attachments
  • You may not edit your posts
  •