Free 186 More Best Homemade Tools eBook:  
Get 2,500+ tool plans, full site access, and more.

User Tag List

Page 18 of 41 FirstFirst 1 2 3 4 5 6 7 8 9 10 11 12 13 14 15 16 17 18 19 20 21 22 23 24 25 26 27 28 29 30 31 32 33 34 35 36 37 38 39 40 41 LastLast
Results 171 to 180 of 408

Thread: Took the first step towards building my shop

  1. #171
    Supporting Member Frank S's Avatar
    Join Date
    Aug 2015
    Location
    Peacock TX
    Posts
    11,716
    Thanks
    2,228
    Thanked 9,207 Times in 4,399 Posts

    Frank S's Tools
    Quote Originally Posted by metric_taper View Post
    What is the plastic pipe you used for the buried conduit? Looks like 3". I assume you have the wires installed already, unless you have some Greenlee power puller, and a helper to feed the wires.
    Looks like your doing all the details toward the next big task of building walls.
    Its the gray 2" sch 80 electrical conduit plus 2" sch 80 propylene fast line tubing under the floor so no connecting couplings except at the preformed long radius elbows to the riser tubes expensive stuff to buy but for some reason a 100 ft length of it had been left on the property, probably from a previous oilfield test drilling operation. on a neighboring property. yeah I truly am blessed like that.
    Pulling the 3ga wire through the line wasn't all that bad I ran my Greenly fish tape through one direction then pulled a 1/2" braided rope back through attached the 3 conductor wires then pulled tension on the rope walked to the other side fed the wire as far as they would go then tighten up the rope again, it went pretty well would have been easier to have had someone pulling the rope or a capstan tugger but its done now and I have power in my machine-shop van once again.

    186 More Best Homemade Tools eBook
    Never try to tell me it can't be done
    When I have to paint I use KBS products

  2. #172
    Supporting Member Frank S's Avatar
    Join Date
    Aug 2015
    Location
    Peacock TX
    Posts
    11,716
    Thanks
    2,228
    Thanked 9,207 Times in 4,399 Posts

    Frank S's Tools
    This morning I couldn't decide if I was going to build a headache rack for a pickup or get up on the roof of the shop. the shop won out for a while at least.
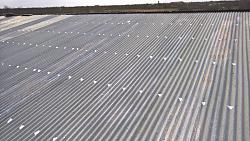
    Anytime one uses reclaimed materials such as sheet metal for the roof there are bound to be a few screw holes which will allow the roof to leak.
    One good way to fill these holes is to use a heavy duty aluminum tape the kind that is used on metal duct work this tape is durable and will last a long time It will last almost forever once I eventually apply paint to the roof
    I used up a roll and a half of the 160 ft long rolls and have one side completed the other side is over 2/3rds complete
    Took the first step towards building my shop-wp_20200329_11_35_38_prorf.jpg
    After doing this this morning I built a headache rack for one of my pickups

    2,500+ Tool Plans
    Last edited by Frank S; Mar 29, 2020 at 10:36 PM.
    Never try to tell me it can't be done
    When I have to paint I use KBS products

  3. #173
    Supporting Member Frank S's Avatar
    Join Date
    Aug 2015
    Location
    Peacock TX
    Posts
    11,716
    Thanks
    2,228
    Thanked 9,207 Times in 4,399 Posts

    Frank S's Tools
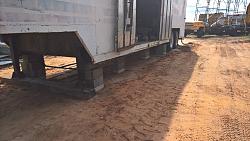
    Finally at long last I made some time for the shop actually I have been moving a little fill clay all along but no real noticeable progress in my mind anyway.
    Oh I blocked and leveled the machine shop trailer hauled maybe 50 to 60 bucket loads of fill things like that. but still no construction other than dirt work
    I decided when I woke up this morning that if a container is going to arrive in a couple of weeks I needed to get back to focusing on the shop instead of rebuilding transmissions building a forge that I have only 2/3rd done rebuilding my wife's mower deck renovating a bathroom and all of the varied other distractions.
    So first I decided that I should finish taping the holes in the roof and get that out of my way so I could remove the last tower of scaffolding.
    that done scaffolding removed I mined up some more fill then hauled about 25 loader buckets full and 10 bobcat buckets full then I moved the buss scaffold to the West end wall of the shop so I can hang some sheet metal
    How it looked in April after blocking and leveling
    Took the first step towards building my shop-wp_20200406_17_31_07_prosp.jpg
    after 50 or 60 bucket loads of fill
    Took the first step towards building my shop-wp_20200411_18_27_20_prosp.jpg
    More fill
    Took the first step towards building my shop-wp_20200411_18_23_13_prosp.jpg
    Todays fill
    Took the first step towards building my shop-wp_20200607_18_29_30_prosp.jpg
    This would make a pretty good deterrent to anyone wanting to take something
    Took the first step towards building my shop-wp_20200607_18_04_27_prosp.jpg
    Took the first step towards building my shop-wp_20200607_18_29_34_prosp.jpg
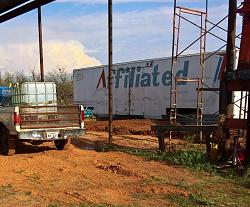
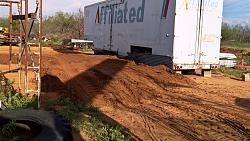
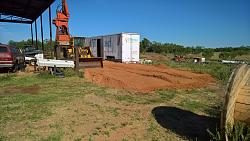
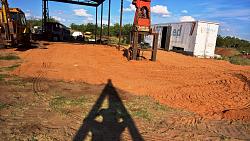
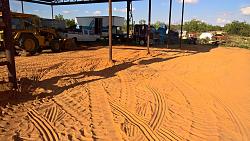
    Eventually all of the grass area you see in the last 2 pictures will have to be excavated and filled I will have to excavate about a foot deep then add back in 18 to 30 inches of fill then someday there will have to be a 30 cubic yard apron poured there
    Never try to tell me it can't be done
    When I have to paint I use KBS products

  4. The Following 2 Users Say Thank You to Frank S For This Useful Post:

    Rikk (Jun 8, 2020), Toolmaker51 (Jun 8, 2020)

  5. #174
    Supporting Member Frank S's Avatar
    Join Date
    Aug 2015
    Location
    Peacock TX
    Posts
    11,716
    Thanks
    2,228
    Thanked 9,207 Times in 4,399 Posts

    Frank S's Tools
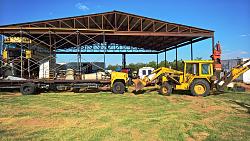
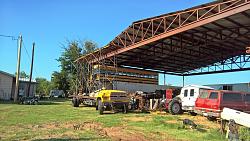
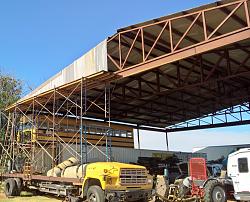
    More fill and some sheet metal on the West end
    Took the first step towards building my shop-wp_20200612_18_12_38_prosp.jpg

    Took the first step towards building my shop-wp_20200612_18_13_09_prosp.jpg
    As long as the shop is nothing more than a roof over head there is not a lot of need for lighting during the day even once the walls and doors are in place if I were to install some sky light panels most of the time artificial lighting would not be required for most things. except on cloudy and rainy days when there will be limited light from the sun.
    However the lack of lighting means daylight hours only and most of the time this is just fine but for those times when something has to go out the next day and it is already sundown.

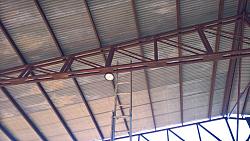
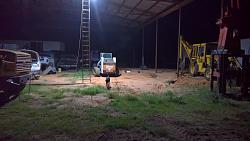
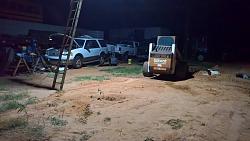
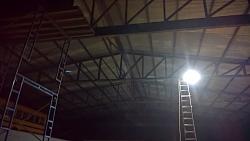
    So I bought a couple of 100 watt ultra thin UFO high bay LED lights to see how much light I can expect to have given that I place 4 or 5 on each of the 3 center trusses about 10 feet apart I could go with fewer larger lights but the fewer the number and the brighter the lights the deeper the shadows are more fixtures affords a better overlap which helps to reduce or eliminate shadowing this is what a single 100watt fixture does
    Took the first step towards building my shop-wp_20200613_17_09_06_prolt.jpg
    No flash taken 50 feet in front of the shop
    Took the first step towards building my shop-wp_20200613_21_57_14_prolt.jpg
    No flash taken from the S.W. corner of the shop
    Took the first step towards building my shop-wp_20200613_21_57_35_prolt.jpg
    no flash looking up at the roof
    Took the first step towards building my shop-wp_20200613_21_58_06_prolt.jpg
    I think I will eventually have 12 to 15 of these in this section of the shop and 6 in the second section
    2100 watts total of lighting in the 6000 square footage of the eventual size of the shop will use less electricity than the lighting I had in my old 6000 sq ft. shop and have twice the illumination I had 15 of the 500 watt halogen and mercury lamps in that shop the energy consumption was around 7.5 KW and only produced around 105,000 lumens of useable light
    These things cost about the same as just the bulbs of the other kind of lights plus put out nearly 1.8 times as much light per unit @ only 100 watts power consumption per disk. Additionally I will probably set them up so I have 3 to 6 zones so will only have the lights on that are needed
    All calculations are approximated
    Last edited by Frank S; Jun 13, 2020 at 11:27 PM.
    Never try to tell me it can't be done
    When I have to paint I use KBS products

  6. #175
    Supporting Member Toolmaker51's Avatar
    Join Date
    Feb 2016
    Location
    Midwest USA
    Posts
    5,338
    Thanks
    7,048
    Thanked 3,020 Times in 1,905 Posts

    Toolmaker51's Tools
    We are on the same page. Few things worse than working with inadequate or detrimental lighting. I have 12' T-8 fluorescent fixtures and a good supply of tubes. Thank you Habitat for Humanity/ Restore! How I arrived at quantity bought? Took an old photography light meter to work, the mall, every shop visited for readings. Those with lighting good OR not enough for machine environments. Then I contacted manufacturer of said lights, they have a PC or CAD program that determines layouts based on room dimensions, intent of work going on, even orientation of the fixtures themselves.
    After ceiling goes in, I'll mount direct to surface, preserving every possible inch of headroom, originally 15'8". Makes bulb replacement easier than when they hang by chain [though tubes are just 4']. Thought is to wire them 3-way in 3 separate banks, controlling them from either door [entry & roll-up].
    Over the years, noticed certain jobs are not done under light other than incandescent, which are now LED. Typically jewelers, precision assemblers, some types of inspection, etc. Where I have that going on will get augmentation, by secondary LED lighting, suspended from above, and controlled there.

    Since I'll live there eventually, [no...not a cot next to the lathe!] and nether wire or electricity will be less expensive than now, all this makes sense.
    Sincerely,
    Toolmaker51
    ...we'll learn more by wandering than searching...

  7. #176
    Supporting Member Frank S's Avatar
    Join Date
    Aug 2015
    Location
    Peacock TX
    Posts
    11,716
    Thanks
    2,228
    Thanked 9,207 Times in 4,399 Posts

    Frank S's Tools
    Quote Originally Posted by Toolmaker51 View Post
    We are on the same page. Few things worse than working with inadequate or detrimental lighting. I have 12' T-8 fluorescent fixtures and a good supply of tubes. Thank you Habitat for Humanity/ Restore! How I arrived at quantity bought? Took an old photography light meter to work, the mall, every shop visited for readings. Those with lighting good OR not enough for machine environments. Then I contacted manufacturer of said lights, they have a PC or CAD program that determines layouts based on room dimensions, intent of work going on, even orientation of the fixtures themselves.
    After ceiling goes in, I'll mount direct to surface, preserving every possible inch of headroom, originally 15'8". Makes bulb replacement easier than when they hang by chain [though tubes are just 4']. Thought is to wire them 3-way in 3 separate banks, controlling them from either door [entry & roll-up].
    Over the years, noticed certain jobs are not done under light other than incandescent, which are now LED. Typically jewelers, precision assemblers, some types of inspection, etc. Where I have that going on will get augmentation, by secondary LED lighting, suspended from above, and controlled there.

    Since I'll live there eventually, [no...not a cot next to the lathe!] and nether wire or electricity will be less expensive than now, all this makes sense.
    The nice thing about those fixtures you have is as time goes on you can eliminate the ballasts and install the 4 ft led tubes your ceiling at 15'8" is borderline between high bay and low bay Places like Walmart and stores of similar ceiling heights who use fluorescent lighting make my eyes bleed (that's what I call it), my eyes will start to have an itchy burning sensation almost from the moment I walk inside until I walk out. If I have to be in one of those places for an extended period of time say more than 15 or 20 minutes my eyes will be watering so bad and burning that I can hardly see.
    And I know what it is they have too many fixtures installed per zone string so they are having a voltage drop in their circuits This is also due to the long distances from the panels to the end of the lighting strings even though they are in compliance to NEC codes I feel if a step up an wiring ga would reduce this effect.
    My shop is no where near as large as many commercial buildings so voltage drop due to line length will be much less of a problem, However that being said for my zones which will be further away from the panel than the shorter ones I will be using a 10 ga feeder wire to the string then run 12 ga from there on and possibly 14 ga for the last fixture on the string but I will rung only 3 to 400 watts worth of fixtures per zone.
    I am also thinking about going with wireless RF controlled switching with motion detectors for areas where persons may not regularly occupy, like in the storage vans and containers. Delayed ON switching for each zone is also a possibility to lower the inrush current load on the LED drivers. Smokestack heat sinks to wick away heat and block radiant heat from above may be an option as well cooler drivers on the LEDs will allow for more lumens and longer life
    http://www.lutron.com/TechnicalDocum...369913_ENG.pdf
    Never try to tell me it can't be done
    When I have to paint I use KBS products

  8. #177
    Supporting Member Toolmaker51's Avatar
    Join Date
    Feb 2016
    Location
    Midwest USA
    Posts
    5,338
    Thanks
    7,048
    Thanked 3,020 Times in 1,905 Posts

    Toolmaker51's Tools
    Yes to all that Frank S about lighting including excess. I'm certain irritation is due resistance of code determined wire size and the flickering it causes. 60-something a second among several hundred fixtures? Sure thing. The lighting didn't bother me till now, because not working in a shop [commercial], where my exposure was constant.
    LED conversion will occur. Each time I've been ready to invest, the tech improves and price drops, so for once delay isn't costly. Once drywall encloses overhead, I'll blow insulation and heat won't be an issue. At 4" in 12", the roof peak is almost 12'.

    and the Lutron link is in my electrical bookmarks!
    Last edited by Toolmaker51; Jun 14, 2020 at 11:31 PM.
    Sincerely,
    Toolmaker51
    ...we'll learn more by wandering than searching...

  9. #178
    Supporting Member jdurand's Avatar
    Join Date
    May 2019
    Location
    Krasnodar Krai, Russian Federation
    Posts
    1,469
    Thanks
    127
    Thanked 769 Times in 427 Posts

    jdurand's Tools
    My wife and I agree on bright lights, her new kitchen is getting three 18W LED ceiling lights. The workshop will get something like two 32 or 48 Watt lights.

  10. #179
    Supporting Member Frank S's Avatar
    Join Date
    Aug 2015
    Location
    Peacock TX
    Posts
    11,716
    Thanks
    2,228
    Thanked 9,207 Times in 4,399 Posts

    Frank S's Tools
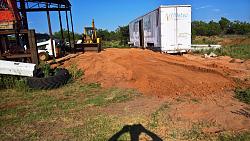
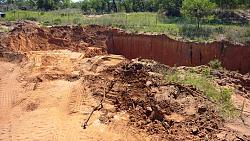
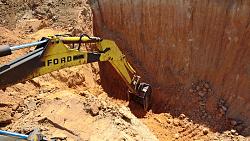
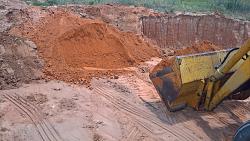
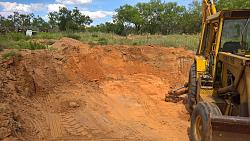
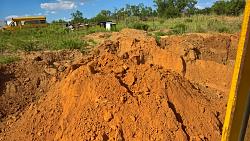
    Today was dig haul spread pack dig haul spread and pack some more
    the process is agonizingly slow but it beats having to do it with a wheel barrow and a shovel
    started out with little to no stockpile excavated then hauled about 35 buckets full
    dug and hauled another 15 or possibly 20
    Took the first step towards building my shop-wp_20200615_10_45_53_propt.jpg
    Took the first step towards building my shop-wp_20200615_11_41_46_propt.jpg
    Took the first step towards building my shop-wp_20200615_13_23_47_propt.jpg
    Took the first step towards building my shop-wp_20200615_16_28_54_propt.jpg
    Took the first step towards building my shop-wp_20200615_17_31_59_propt.jpg
    Took the first step towards building my shop-wp_20200615_18_51_07_propt.jpg
    Took the first step towards building my shop-wp_20200615_18_51_28_propt.jpg
    Never try to tell me it can't be done
    When I have to paint I use KBS products

  11. The Following User Says Thank You to Frank S For This Useful Post:

    Toolmaker51 (Jun 16, 2020)

  12. #180
    Supporting Member Toolmaker51's Avatar
    Join Date
    Feb 2016
    Location
    Midwest USA
    Posts
    5,338
    Thanks
    7,048
    Thanked 3,020 Times in 1,905 Posts

    Toolmaker51's Tools
    I'm no soil engineer, or geologist; or decent gardener, lol.
    Looks same as 'our' red dirt, comparing stockpile angle of repose. Identical to that around my building, elevation 849' [about 75' higher than Missouri River] and completely different than house at 997' [our famous black dirt]. Dense, dry, fine and packs like roadway. You can mold it cleanly enough to use as concrete forms. Astounding somehow, considereing our locales are 650 miles apart.
    And to offshore forum members, that's a 9-1/2 hour flatland drive.
    Sincerely,
    Toolmaker51
    ...we'll learn more by wandering than searching...

Thread Information

Users Browsing this Thread

There are currently 11 users browsing this thread. (0 members and 11 guests)

Bookmarks

Posting Permissions

  • You may not post new threads
  • You may not post replies
  • You may not post attachments
  • You may not edit your posts
  •