Free 186 More Best Homemade Tools eBook:  
Get 2,500+ tool plans, full site access, and more.

User Tag List

Results 1 to 4 of 4

Thread: Sine Bar

  1. #1

    Join Date
    Oct 2012
    Posts
    9
    Thanks
    0
    Thanked 34 Times in 7 Posts

    jgedde's Tools

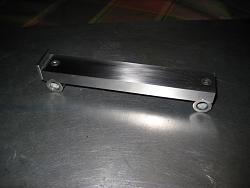
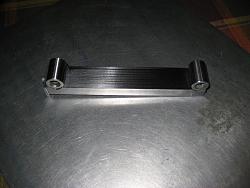
    Sine Bar

    I'd heard that a sine bar is an "exam" for an apprentice toolmaker.

    All in all, it took about 3 hours to make (things wen't way too smoothly).

    Here it is all done. Almost...

    Sine Bar-img_1429.jpgSine Bar-img_1432.jpg

    As you can see I didn't go crazy with the grinding on the bottom. Just enough to be flat. The wheel really needed dressing, and I traversed and fed quickly. For the top, I used a carefully dressed wheel, plenty of Crisco for lube and followed it up with about 2 minutes of lapping on 400 grit.


    John

    186 More Best Homemade Tools eBook
    Last edited by jgedde; Oct 18, 2012 at 04:38 PM. Reason: Fix Pics

  2. The Following 3 Users Say Thank You to jgedde For This Useful Post:

    Jon (Oct 23, 2012), kbalch (Oct 22, 2012), Paul Jones (Oct 31, 2014)

  3. #2

    Join Date
    Mar 2012
    Location
    Winchendon, MA USA
    Posts
    2
    Thanks
    0
    Thanked 0 Times in 0 Posts
    I know how I'd do it but how did you measure the distance of the rounds

    2,500+ Tool Plans

  4. #3

    Join Date
    Oct 2012
    Posts
    9
    Thanks
    0
    Thanked 34 Times in 7 Posts

    jgedde's Tools
    I did it a couple if ways... One was using a height gauge and a DTI to find the high points. This wasn't even close to an accurate method. I came in at 5.003.

    I then measured the exact diameter of the rounds, then measured the distance between them and added half the diameter of each round back in. I measured 5.0008 using that method.

    Our inspection lab at work confirmed that using the CMM. They got 5.000772 (average). The rounds are square to the long axis within 0.0001.

    While I'm content with 5.0008, the imports are twice as good (at a claimed +/- 0.0004)... But, 5.0008 is an error of only 0.016%...

    Here's how the v-grooves were located when final grinding for the rounds, I used a dial indicator (2 inch range) and "leap frogged" the surface grinder to the right location. I guess that's why I'm 0.0008 off!

    One round is about 0.0002 smaller than the other, but the top surface was ground with the rounds installed to compensate.

    How would you have performed the measurment?

    John
    Last edited by jgedde; Oct 20, 2012 at 07:52 PM.

  5. #4
    Jon
    Jon is online now Jon has agreed the Seller's Terms of Service
    Administrator
    Supporting Member
    Jon's Avatar
    Join Date
    Jan 2012
    Location
    Colorado, USA
    Posts
    26,591
    Thanks
    8,152
    Thanked 40,518 Times in 11,840 Posts
    Thanks jgedde! Added this to our Metalworking category, and to your homemade tools page: jgedde's Homemade Tools. Your receipt:


    2,500+ Tool Plans
    New plans added on 01/01/2025: Click here for 2,661 plans for homemade tools.

Thread Information

Users Browsing this Thread

There are currently 1 users browsing this thread. (0 members and 1 guests)

Bookmarks

Posting Permissions

  • You may not post new threads
  • You may not post replies
  • You may not post attachments
  • You may not edit your posts
  •