

 LinkBack URL
 About LinkBacks


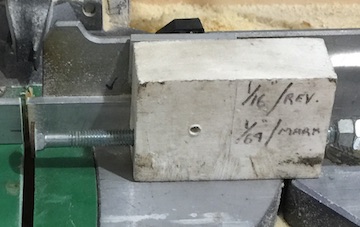
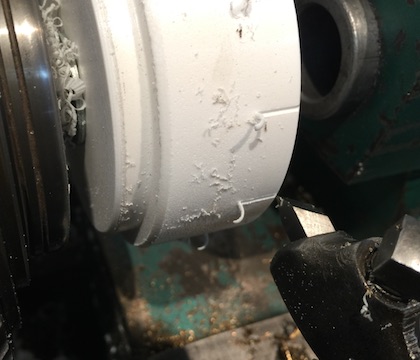
This is an upgrade to a tool I made years ago. Initially I needed some wood shims to install furring strips on the walls of a 100+ year old house. Tapered shims are often used for this but; they often split, so much is wasted, they are not cheap and shims are a easily made from wood too short for anything else. I made an adjustable stop for my old radial arm saw to allow quick, accurate settings. A long 3/8 - 16 carriage bolt was threaded into a piece of HDPE. The head of the bolt was machined flat to provide a surface for the stop. The adjusting knob had 4 graduations, or 1/64 per graduation, 1/16 inch for full turn. The long threaded section in the HDPE block provides just the right friction to hold the stop where you set it. The stop worked well, but measuring small distances, even with a small steel rule, was time consuming and prone to errors. Miters saw were not popular when I first made this. Digital cameras and smart phones had not yet replaced film. This photo is the original stop on my miter saw as I worked on a recent project.
01 original stop
On this recent project, thinking through the process of making 150+ shims there had to be a better way. I decided to use my digital caliper for the measurements. While it is not necessary to work to 0.001 with wood, it takes much less time to measure with a caliper. Then the problem was converting all of those values to fractions. While my calipers can read out in fractions I getting values like 11/128, mentally that is close to 10/128 or 5/64, or it could be 12/128 or 6/64, or 3/16, it just hurts my head. As the metric guys always say, decimals are cleaner to work with. The 16 TPI thread moves 0.0625 per turn. I considered making a new one with 1/4-20 all thread for 0.050 per turn. I also could have used an M10 x 1 thread for 1mm per revolution, but had the stop already made.
To simplify things I just pretend the movement is 0.060 per turn since the 0.0025 is insignificant working with wood.That makes it easy to divide 0.060 by 12, making each graduation 0.005. In reality 0.00521.
02 refurbished stop
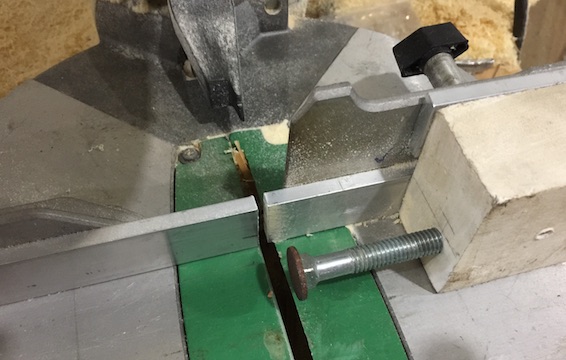
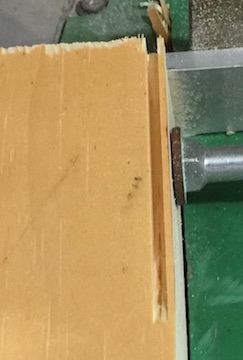
In use the shims can be so thin they slip through between the blade and the fence. This required an auxiliary fence. It could have been wood but I had a strip of aluminum bar stock. The fence is held in place by the stop body on the right and with a small C-clamp on the left. You need some clearance between the blade and the fence. Theres is not much need for shims less than 1/32, so about 0.030 leaves a safe clearance to the blade.
03 aux fence 04 cutting shim

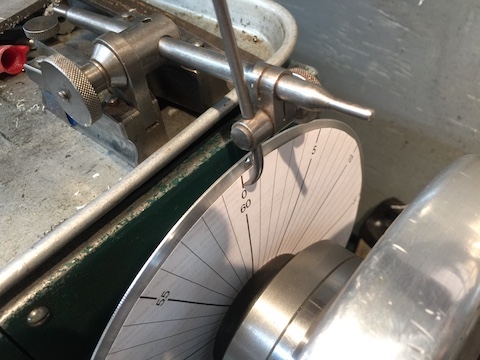
Graduations were cut into the dial using my makeshift dividing head, which is just paper printed with the graduations supported by an aluminum backing plate. These are sandwiched between the back of the lathe chuck and the spindle. Grooves were cut with a threading cutter turned sideways in the tool holder.
05 Dividing head 06 Cutting Graduations
.
How the tool is used.
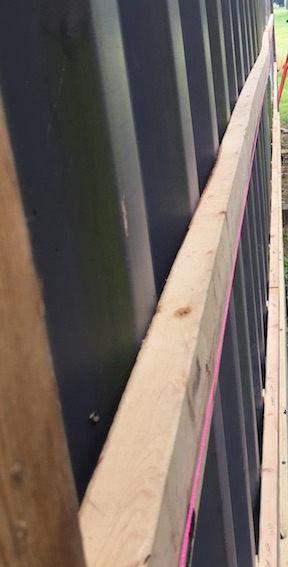
These modifications were inspired as I am putting steel barn siding on 3 shipping containers. I cannot afford to purchase single trip containers. The ones I got have some damage. They get banged around a lot when loading and unloading the contents. The loading damage is typically pushed outward. They get banged around more harshly by handling as they travel around the world. That damage is typically pushed inward. Containers are tough and strong. It is difficult, near impossible, to push the sides back into alignment with the equipment I have access to. If left uncorrected the damage will result in a very unsightly siding installation.
Since it is very difficult to push the side back into alignment, even with a backhoe, the next option is to shim the girts to minimize the waves.
07 Crooked Girt. 08 Shimmed Girt
.
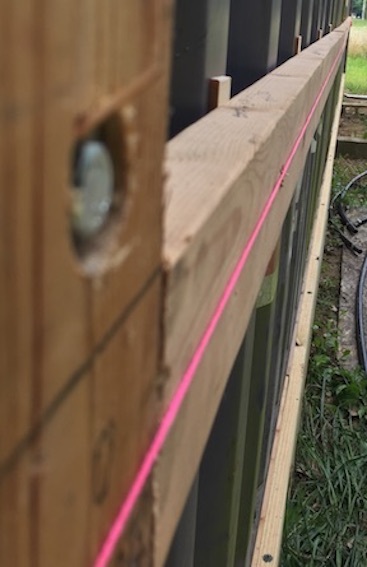
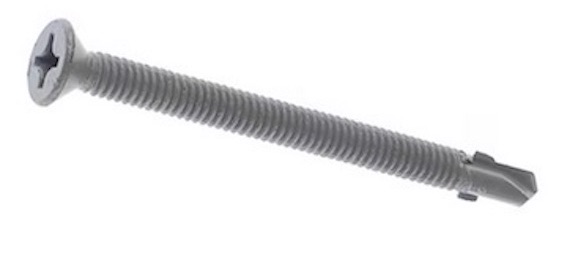
The girts were attached using self drilling, self threading TEK screws.
09 TEK screw
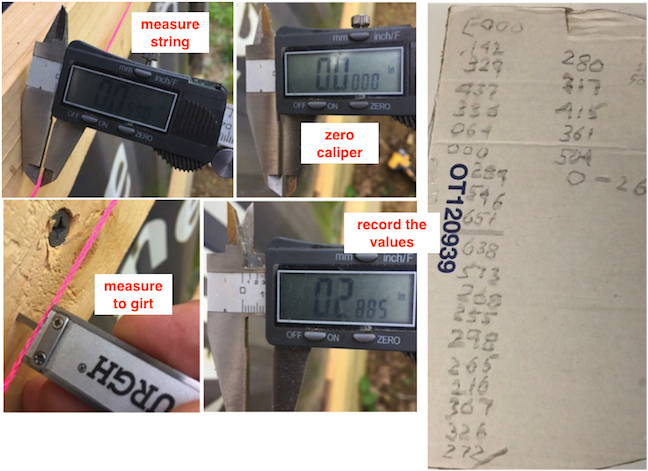
Stretch a TIGHT string from end to end. If it does not play a tune when you tweak the string, it is not tight enough. Using digital calipers, measure the string, zero the caliper, measure from the string to the girt, record the result. If there is a bulge pushing OUT, there is not much you can easily do about that. However shimming the rest of the girt will eliminate the wavy appearance and smooth out the ripples that would be very unsightly. The girt shown show above required 24 shims, ranging from 0.064 to 0.651.
10 take measurements
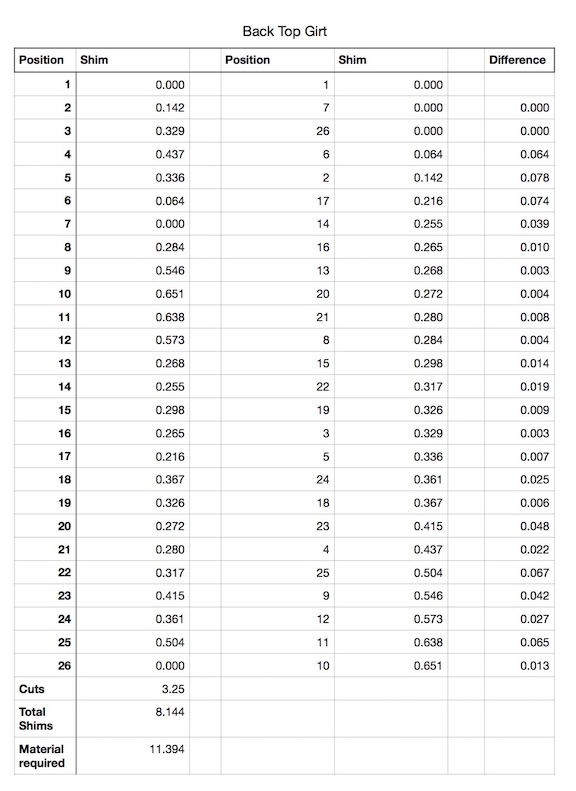
After getting all of the values, I entered them into a spread sheet, recording position the thickness. Then sort the list according to size. Make a column that tells the difference as they get larger. This provides a cut list from small to large and tells how how much material is needed, including waste from the cuts required to make the shims. Working from small to large, allows quick adjustment of the cutting stop.
11 Spreadsheet
In operation, it is important to keep accumulated error to a minimum. Begin with the smallest shim. Set the stop and make a partial cut like above. Measure the cut, then adjust as necessary. For my purposes plus or minus 0.010 is close enough. The spread sheet calculated the differences. Adjust the stop for that difference. I still measure each shim to be sure I set the stop correctly. If the sizes drift too far off the target size, it is easy adjust and move on. There will be some error, but even if one is off 0.020, for this application, that is close enough.
For this job, the difference from largest to smallest shim was 0.587. That amounts to abut 9.4 turns or 0.0235 error due to the calibration of the stop. Checking sizes as you go, you can easily adjust for that error.
After all of the shims are cut, back out the screws, slide in the shim, Tighten the screws back up.


 Reply With Quote


Bookmarks