Free 186 More Best Homemade Tools eBook:  
Get tool plans

User Tag List

Page 1 of 3 1 2 3 LastLast
Results 1 to 10 of 25

Thread: Shop Bult Louver Die

  1. #1
    Supporting Member astroracer's Avatar
    Join Date
    May 2012
    Location
    Byron, Michigan
    Posts
    311
    Thanks
    20
    Thanked 574 Times in 174 Posts

    astroracer's Tools

    Shop Bult Louver Die

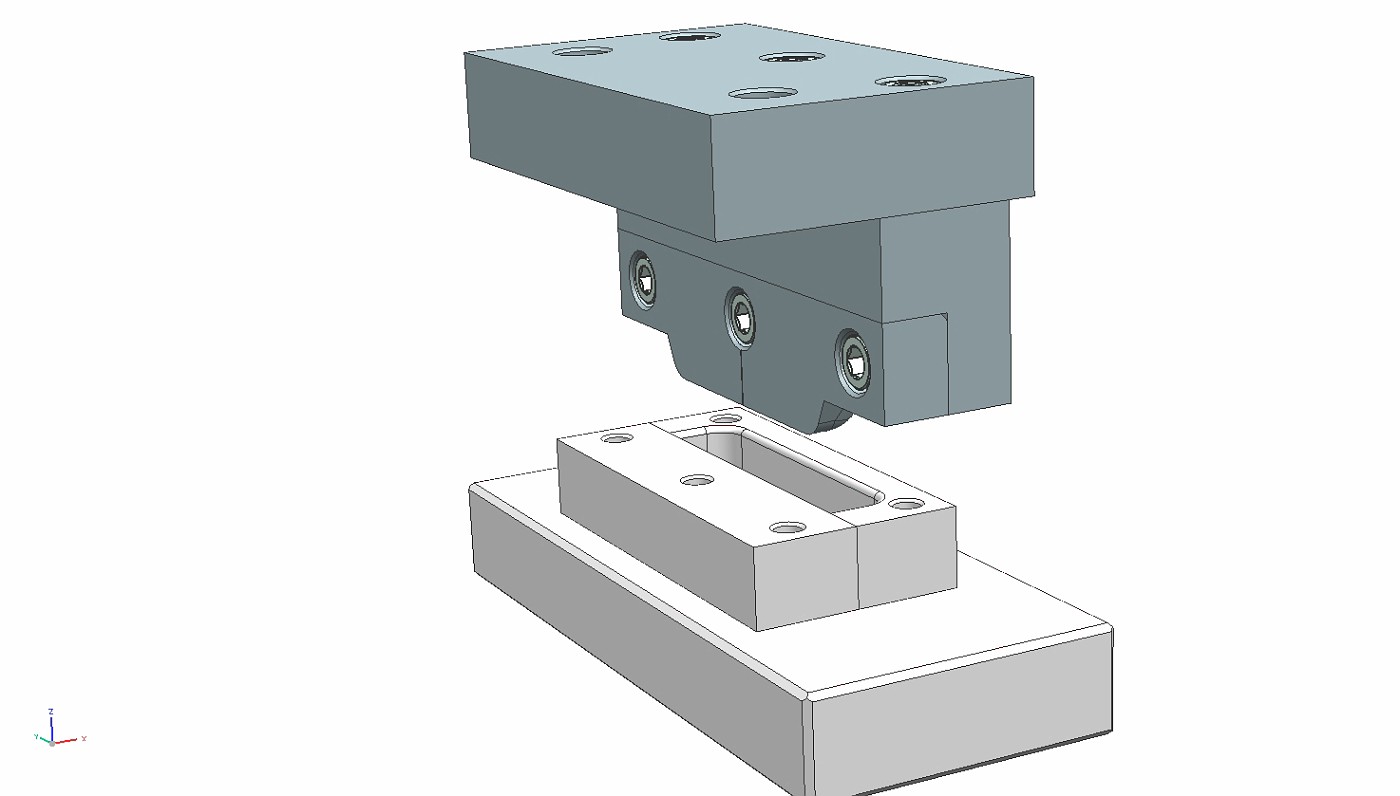
    I have a need to punch some louvers in an upcoming project. These things are pretty spendy. 500 to 800 dollars for a decent one. I did the same thing here as I did with the Tubing Straightener. Designed it in 3DCAD and am building it in the shop.
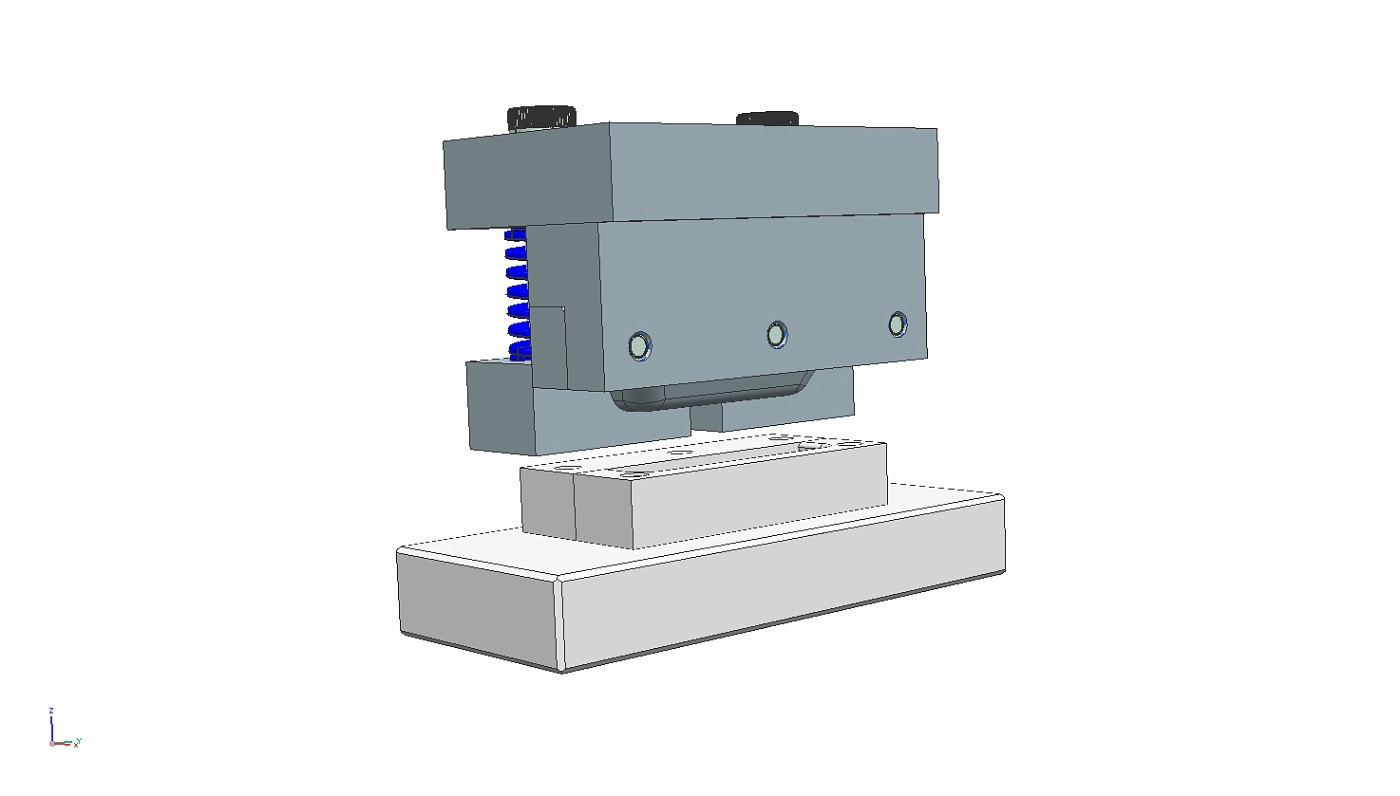
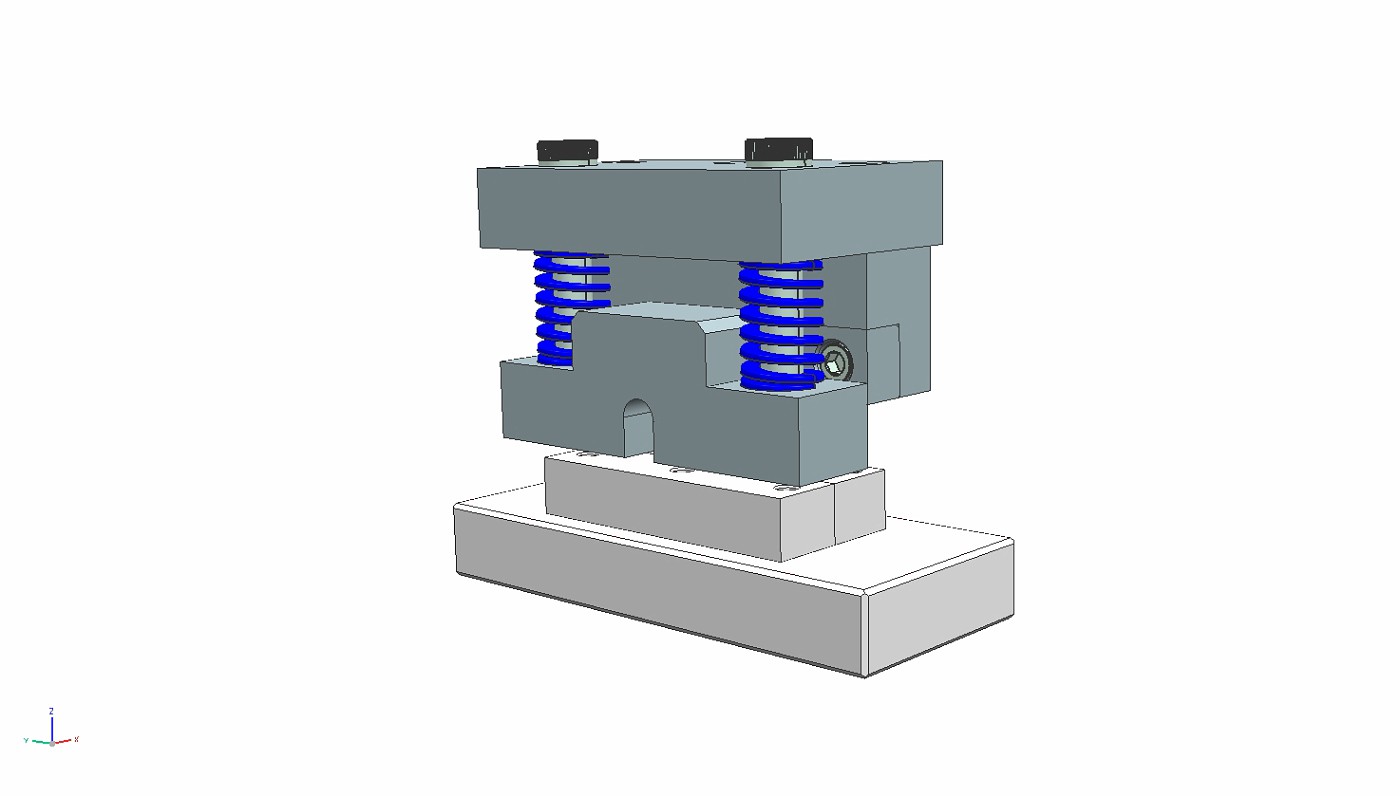
    Here are some snapshots off my computer. The blue pieces are the punch and the white pieces are the die.

    The back. You can see the actual punch in this pic.

    This pic shows the stripper plate in place. This plate contacts the sheet metal before the punch does. The die springs will help hold the sheet in place as the punch starts to work and also keep the metal from distorting to much.

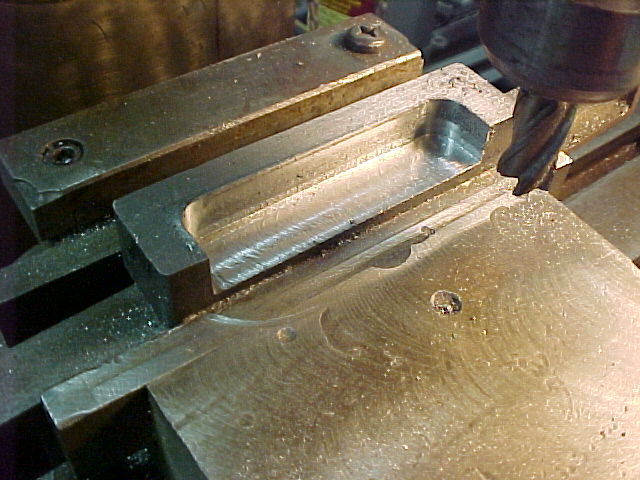
    I have gotten started on the build. The punch die is milled out and has holes laid out for drilling and tapping as well as the lower support plate that carries the punch die and shear plate.
    The punch die.

    Continued in next post.

    186 More Best Homemade Tools eBook
    Last edited by astroracer; Mar 18, 2015 at 04:33 AM.

  2. #2
    Supporting Member astroracer's Avatar
    Join Date
    May 2012
    Location
    Byron, Michigan
    Posts
    311
    Thanks
    20
    Thanked 574 Times in 174 Posts

    astroracer's Tools
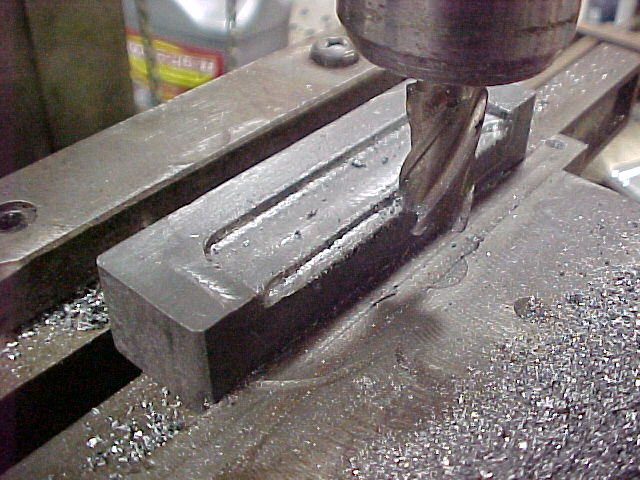
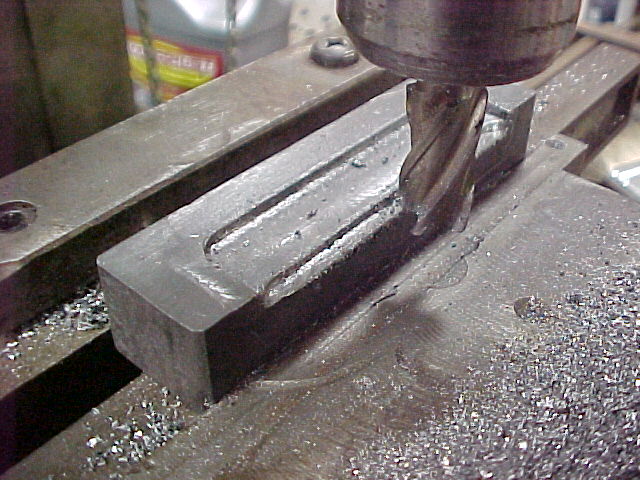
    All milled out and ready for screw holes.

    I have a few pieces cut out but that is where I am at with this project.
    Thanks for looking!
    Mark

    2,000+ Tool Plans

  3. #3
    kbalch's Avatar
    Join Date
    Jun 2012
    Location
    Clermont, FL
    Posts
    5,034
    Thanks
    2,275
    Thanked 532 Times in 384 Posts
    Hi Mark,

    Very cool project. Keep the thread updated and we'll get the project added as soon as it's done. Neat stuff!

    Ken

  4. #4
    Content Editor
    Supporting Member
    DIYer's Avatar
    Join Date
    Aug 2013
    Posts
    3,055
    Thanks
    793
    Thanked 1,888 Times in 1,683 Posts
    Great post, astroracer! Love those drawings.

  5. #5
    Supporting Member astroracer's Avatar
    Join Date
    May 2012
    Location
    Byron, Michigan
    Posts
    311
    Thanks
    20
    Thanked 574 Times in 174 Posts

    astroracer's Tools
    Thanks! I'll try to get more work done this week. "Life" has been getting in the way the last few weeks...
    Mark

  6. #6
    kbalch's Avatar
    Join Date
    Jun 2012
    Location
    Clermont, FL
    Posts
    5,034
    Thanks
    2,275
    Thanked 532 Times in 384 Posts
    I hear ya on the "life" thing. I'm getting tired of seeing car parts all over the house - I need to get busy out in the garage if I want to drive my project while I'm still limber enough to get in and out of it!

    Ken

  7. #7
    Supporting Member astroracer's Avatar
    Join Date
    May 2012
    Location
    Byron, Michigan
    Posts
    311
    Thanks
    20
    Thanked 574 Times in 174 Posts

    astroracer's Tools
    Got out in the shop for few hours today. i got the lower support plate drilled and c'bored and the punch die drilled and tapped. Surprisingly the two pieces bolted together so i must have done something right...
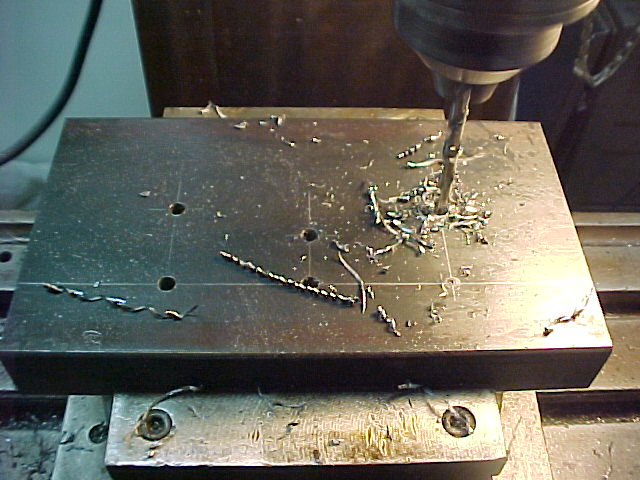
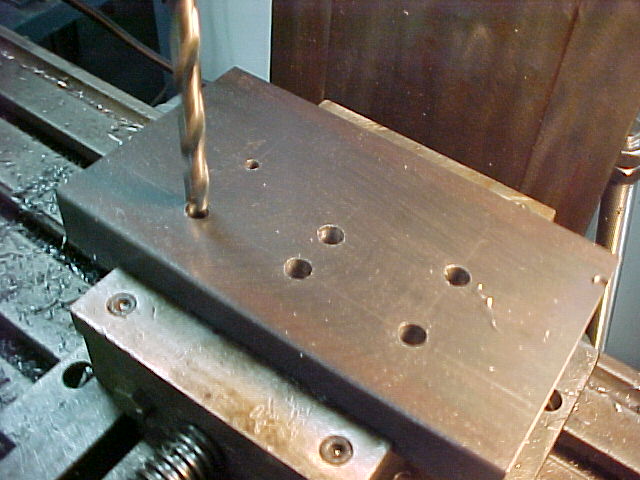
    Drilling the base plate with guide holes. There are six of these that will be drilled out to .343 and then c'bored for a 5/16 SHCS

    One more to drill and it's ready for c'boring.

    C'boring.

    At least all of the screws fit...


    continued in next post.

  8. #8
    Supporting Member astroracer's Avatar
    Join Date
    May 2012
    Location
    Byron, Michigan
    Posts
    311
    Thanks
    20
    Thanked 574 Times in 174 Posts

    astroracer's Tools
    Once the base was ready I worked on the punch die. Set it up in the milling vise and drilled out the holes with 17/64 tap drill.


    Tapping for a 5/16-18.

    Bolted in place.


    Thanks for looking.
    Mark
    Last edited by astroracer; Mar 19, 2015 at 08:13 PM.

  9. The Following 3 Users Say Thank You to astroracer For This Useful Post:

    Doc (Mar 19, 2015), Jon (Mar 19, 2015), kbalch (Mar 19, 2015)

  10. #9
    Doc
    Doc is offline
    Supporting Member Doc's Avatar
    Join Date
    May 2013
    Posts
    78
    Thanks
    140
    Thanked 41 Times in 27 Posts

    Doc's Tools
    Good work there Mark.

    I'm a bit thick though, I think - what will it actually be used for

    Regards

    Doc

  11. #10
    Supporting Member astroracer's Avatar
    Join Date
    May 2012
    Location
    Byron, Michigan
    Posts
    311
    Thanks
    20
    Thanked 574 Times in 174 Posts

    astroracer's Tools
    Thanks Doc,
    The punch will be used to make those "hot rod" style louvers you see on street rods and race cars. Here are some pics off my computer of the "test panel" I made while developing my punch design.


    Mark

  12. The Following User Says Thank You to astroracer For This Useful Post:

    Doc (Mar 19, 2015)

Thread Information

Users Browsing this Thread

There are currently 1 users browsing this thread. (0 members and 1 guests)

Bookmarks

Posting Permissions

  • You may not post new threads
  • You may not post replies
  • You may not post attachments
  • You may not edit your posts
  •