Hands up all those who know what a shear lathe tool bit is. How many of you have ever tried one?
Personally I think these tool bits should better be described as "shaving" tool bits because that more accurately describes the cutting action. The common lathe tool has its cutting edge on the top, the shear tool is very different in that the cutting edge is on the front of the tool as passes along the work piece. The difference is in the way that the bit is sharpened. A normal tool has three angles to be ground, viz: the top rake, the front clearance and the side clearance. On the other hand the shear tool needs only two angles, a clearance angle and the shearing angle. The following illustration shows these angles. Don't forget to click on the images to see them full size.
The upper three drawings show the usual way of sharpening a shear tool. Note that from the side view the shearing edge is at rt. angles to the length of the bit. The lower drawing is a modified way of doing it that I use when turning aluminium alloys. I introduce a small rake angle to the cutting edge.
Here we can see how the cutting edge is related to the work piece, it can be seen how the relative motion produces the shaving action. Note also that when the cutting edge is "vertical" the tool centre height is unimportant, all that happens if the tool is moved up or down is that the cutting portion of the tool is just moved on its edge, no clearance or cutting angles are changed as would be the case with a standard tool. The lower drawing illustrates what happens if the cutting edge is not ground "vertically". For parallel turning this is unimportant, the cutting point on the work piece just moves around the bar a little but clearance and shearing angles are unchanged. However, as with a common tool it is important to have the cutting edge at centre height for turning tapers.
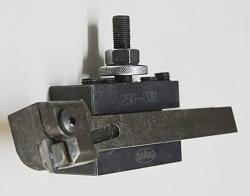
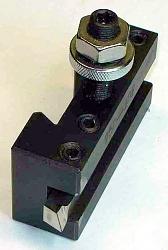
This shows a HSS implementation of a shear tool. When I came to write this note I realised that I didn't have any photos of my own HSS bits and Mr Google found this one. I thank the unknown photographer.
Shear tools are used when you want a very fine finish and are only suitable for taking cuts no deeper than 0.05mm or a couple of thou. The swarf is very fine and wispy, rather like candy-floss. Shear tools can be used for getting good finishes on materials that are often difficult with regular turning tools. For example, soft aluminium can leave you with a stringy finish but not with a shear tool, it is easy to get a mirror finish. Steel grades which are traditionally difficult can be given a finish which some would mistake for ground.
Shear tools are not very tolerant of blunt cutting edges, but because of the insensitivity to centre height, when an edge becomes worn you can just raise or lower it a bit to work with a fresh edge. On that basis you don't have to sharpen these tools all that often.
A traditionally sharpened tool usually has a minimum depth of cut, below that level it will just rub on the work and I am sure that we have all experienced the situation when we just want that extra 0.01mm and before we know it 0.04mm has disappeared. A shear tool allows finer steps in the depth of cut settings and it is easier to achieve accuracy.
With these tools the clearance angle can be very small for two reasons. 1. The face behind the cutting edge is always trailing the cut material. 2. The depth of cut is always small. I never grind the clearance more than 5 deg. and often less. The smaller the clearance angle the longer you will keep a sharp edge.
The cutting or shearing angle is more variable and different people use between 5 and around 45 deg. I use about 20 deg. for Aluminium alloys and 15 deg. for tough steels.
The previous photo shows a HSS bit and these are great for materials like Aluminium because of their sharp edge. For steel though I prefer flat topped carbide inserts of the type which can take a keen edge. I was going to make an insert holding tool but then I remembered that I had a large standard facing one that I hadn't used in years (3 decades actually) because it was too large to fit my current tool post carriers. It occurred to me that with a bit of milling it would fit the bill with the minimum of work.
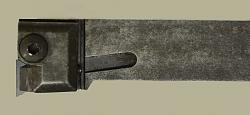
This was the base tool that I started with.
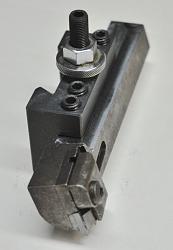
With a little milling it turned into a tool which would fit my tool post carriers and present the insert at a 15 deg shear angle.

Here are a couple more views,
Used to finish 4140 it gives close to a ground finish.
Although I have been talking about turning in this post, shear tools can also be used for facing, but as the work is flat it is necessary to put a curve on the tool shearing edge.
There is a stack of info on the web about shear tools in general for those who wish a second opinion.
Thanks for listening.


 LinkBack URL
 About LinkBacks


 Reply With Quote

 Be colour blind my friend and live life to the full and make every minute count


Bookmarks