Free 186 More Best Homemade Tools eBook:  
Get tool plans

User Tag List

Page 1 of 2 1 2 LastLast
Results 1 to 10 of 11

Thread: Scaffold Crane and Hoist -- For material lifting

  1. #1
    Supporting Member bimmer1980's Avatar
    Join Date
    Jan 2018
    Posts
    70
    Thanks
    96
    Thanked 38 Times in 23 Posts

    bimmer1980's Tools

    Scaffold Crane and Hoist -- For material lifting

    NOTE--I updated the picture links a few post down so they should now be viewable. Thanks for looking!!

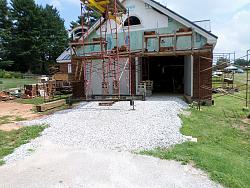
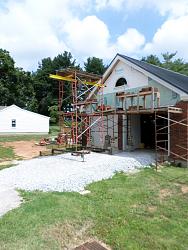
    When I was bricking my garage, I needed a way to lift loads of bricks up to the scaffolding. My skid steer would not lift high enough and I didn't want to rent a telehandler for a long period of time.


    The made my own small pallet lifter -- similar to what you see on the knuckle boom trucks for picking full skids of material. Since I was only using a small Harbor Freight hoist, I sized the pallet lifter to be of a reasonable size.

    I also had to make a special trolley to attach the harbor Freight hoist the to I-beam.

    I used a couple of 3" angle irons to sandwich onto the walk-thru scaffolding. Then the beam attaches with beam clamps. This allows the hoist to easily slide from one side to the center and to the other side if necessary.

    186 More Best Homemade Tools eBook
    Last edited by bimmer1980; Jan 8, 2018 at 09:51 AM. Reason: Updated pictures in a lower post.

  2. The Following 4 Users Say Thank You to bimmer1980 For This Useful Post:

    jeanalvitre (Jan 29, 2018), Jon (Jan 4, 2018), Seedtick (Jan 5, 2018), Toolmaker51 (Jan 6, 2018)

  3. #2
    Supporting Member bimmer1980's Avatar
    Join Date
    Jan 2018
    Posts
    70
    Thanks
    96
    Thanked 38 Times in 23 Posts

    bimmer1980's Tools
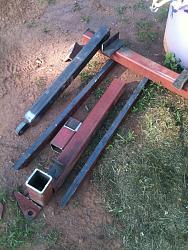
    Here is the process of making the pallet lifter. I first dug thru my assortment of steel I had salvaged and found some suitable pieces. I then used my Stihl Demo saw to cut some of it up. The band saw was used for other cuts.
    Scaffold Crane and Hoist -- For material lifting-photo-60-.jpg

    2,000+ Tool Plans

  4. The Following User Says Thank You to bimmer1980 For This Useful Post:

    jeanalvitre (Jan 29, 2018)

  5. #3
    Supporting Member bimmer1980's Avatar
    Join Date
    Jan 2018
    Posts
    70
    Thanks
    96
    Thanked 38 Times in 23 Posts

    bimmer1980's Tools
    I posted two other threads to specifically show the construction of the pallet lifter and the Harbor Freight hoist.

    I will show how I assembled the scaffold crane and put it into use....

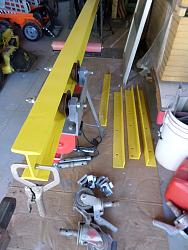
    I was able to procure a couple of small I-beams on craigslist for about $40. Together, they would be long enough for the scaffold crane. I beveled the edges, clamped it straight and then welded to two pieces together with 7018 stick weld. I ground the inside flanges smooth so that the trolley would roll across it, but I left the outside weld bead as laid.

    I also cut some 3" angle to length and then drilled some holes for the mounting hardware.

    Then I Painted everything before assembly.

    Scaffold Crane and Hoist -- For material lifting-sam_0499.jpg

  6. The Following User Says Thank You to bimmer1980 For This Useful Post:

    jeanalvitre (Jan 29, 2018)

  7. #4
    Supporting Member bimmer1980's Avatar
    Join Date
    Jan 2018
    Posts
    70
    Thanks
    96
    Thanked 38 Times in 23 Posts

    bimmer1980's Tools
    For the assembly process, I had a few pieces of equipment at my disposal... a Forklift, Skid steer and a good friend... With that, we proceeded to set up the scaffold crane.

    I had sourced three section of 6'6" walk through scaffolding. I only ended up using two sections of it.

    First we assembled one section of scaffolding with the braces. Then the 3" angles were bolted on to sandwich the scaffold buck frames. Then we manually lifted up the I-beam and used beam clamps to secure it to the angle irons. I ultimately had to put a spacer in between the I-beam and the angle irons as the trolley was interfering on the beam clamps.

    Scaffold Crane and Hoist -- For material lifting-sam_0679.jpg

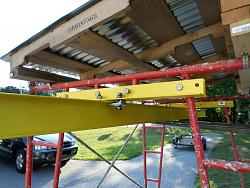
    While we had everything on the ground, we also constructed a roof over the scaffold crane. The roof was simply made of a 4x8 pallet I had with some spacer blocks screwed on one side to give it some slope. Then I cut some corrugated tin to length and we screwed it into place. The roof skid was lifted on top and strapped into place so it would not blow off.

    Scaffold Crane and Hoist -- For material lifting-sam_0683.jpg

    The harbor Freight hoist and trolley was also installed. Notice that there are angle clips on the end of the beam to keep the trolley/hoist from sliding off.

  8. #5
    Supporting Member bimmer1980's Avatar
    Join Date
    Jan 2018
    Posts
    70
    Thanks
    96
    Thanked 38 Times in 23 Posts

    bimmer1980's Tools
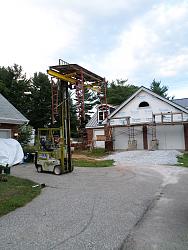
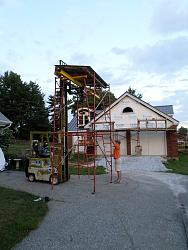
    The next step was to get sufficient height that I could use it. This is where the forklift came in extremely handy!!!

    We simply lifted it up until we could assembly an additional section of scaffolding under the first set!

    Scaffold Crane and Hoist -- For material lifting-sam_0686.jpg

    My friend was a little hard pressed to get the connector pins in... I took care of that after snapping some pictures...

    Scaffold Crane and Hoist -- For material lifting-sam_0689.jpg

    The forklift doesn't do off-road very well, so the next step was figuring out a method to move this beast.....

  9. #6
    Supporting Member bimmer1980's Avatar
    Join Date
    Jan 2018
    Posts
    70
    Thanks
    96
    Thanked 38 Times in 23 Posts

    bimmer1980's Tools
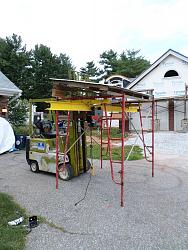
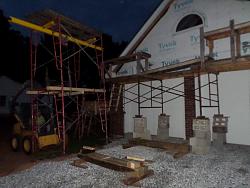
    Enter the skid steer. It doesn't lift more than about 8' at the pallet forks, but that would be sufficient for this purpose.

    I installed some blocking across the lower section of the scaffolding. Then eased the skid steer in and picked it up.

    It was a little hairy moving it to the new location, but the key was to be steady and smooth on the skid steer controls. The picture is a little grainy as it was getting dark and we needed to get it done.....

    Scaffold Crane and Hoist -- For material lifting-sam_0692.jpg

    Notice that the hoist is being used to keep tension on the horizontal blocking as well as keeping the hoist from sliding around during transport.

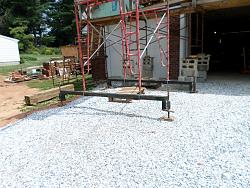
    For the time being, we used some blocks and cribbing to get the scaffold tower crane leveled and plumb. I wasn't totally thrilled with the blocking, but it would work for the moment....

    Scaffold Crane and Hoist -- For material lifting-sam_0793.jpg

  10. #7
    Supporting Member bimmer1980's Avatar
    Join Date
    Jan 2018
    Posts
    70
    Thanks
    96
    Thanked 38 Times in 23 Posts

    bimmer1980's Tools
    After a few cycles of brick were hauled up with the crane, I quickly became aware of the need for a better base. The wood cribbing was just not stable enough. I needed the tower to be a little taller and I wanted a wider base. I would also be moving the tower crane at some point and I wanted an easier method to level it.

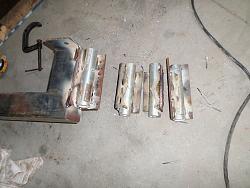
    I had salvaged some 3.5" square tubing that was about 9.5 feet long. I found some heavy wall pipe that my scaffold adjustable feet would slide into.

    To ensure that I got a secure attachment, I first welded the pipe into some angle iron. This way I could get four good welds onto two different edges. The angles were then welding onto the steel tube. The tube already had some 6" long short sections welded on each end from the previous purpose. These "C-Channels" gave a good surface to weld on the adjustable feet brackets.

    Scaffold Crane and Hoist -- For material lifting-sam_0795.jpg

    Once I had the two outriggers complete, I needed a safe way to install them....

    Scaffold Crane and Hoist -- For material lifting-sam_0802.jpg

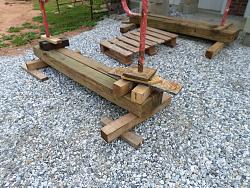
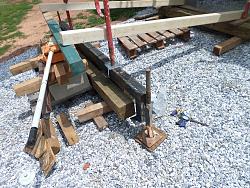
    I used a variety of wood beams and a jack to ease up the end of the scaffold tower and slip the new outrigger into place. Also notice that I bought some scaffold end pads to bolt the scaffold leg onto the outrigger.

    Scaffold Crane and Hoist -- For material lifting-sam_0809.jpg

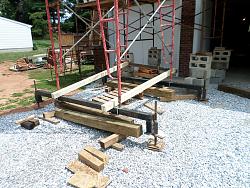
    Then I did the other end and adjusted all the legs so that the scaffold was level and plumb.

    Scaffold Crane and Hoist -- For material lifting-sam_0810.jpg

    Scaffold Crane and Hoist -- For material lifting-sam_0811.jpg

    Much more stable and secure!!

    Scaffold Crane and Hoist -- For material lifting-sam_0812.jpg
    Last edited by bimmer1980; Jan 8, 2018 at 09:49 AM. Reason: Reloaded the picture links so they would work

  11. The Following User Says Thank You to bimmer1980 For This Useful Post:

    Toolmaker51 (Jan 6, 2018)

  12. #8
    Supporting Member Captainleeward's Avatar
    Join Date
    Jul 2014
    Location
    San DIEGO, California
    Posts
    1,097
    Thanks
    496
    Thanked 1,336 Times in 525 Posts

    Captainleeward's Tools
    Wow That's a big Project Bimmer1980, good for you and thanks for sharing add my name to your friend section. Cap....

  13. The Following 2 Users Say Thank You to Captainleeward For This Useful Post:

    bimmer1980 (Jan 6, 2018), Paul Jones (Jan 6, 2018)

  14. #9
    Content Editor
    Supporting Member
    DIYer's Avatar
    Join Date
    Aug 2013
    Posts
    3,055
    Thanks
    793
    Thanked 1,888 Times in 1,683 Posts


    Thanks bimmer1980! We've added your Scaffold Crane to our Cranes category,
    as well as to your builder page: bimmer1980's Homemade Tools. Your receipt:


  15. The Following User Says Thank You to DIYer For This Useful Post:

    bimmer1980 (Jan 6, 2018)

  16. #10
    Supporting Member KustomsbyKent's Avatar
    Join Date
    Dec 2014
    Location
    South Dakota
    Posts
    249
    Thanks
    2,500
    Thanked 185 Times in 110 Posts

    KustomsbyKent's Tools
    Looks good Bro! post some pics of the finished garage... there's a doggone lot of bricks there!

    FYI for the rest of the group, Bimmer1980 is my identical twin brother...

  17. The Following User Says Thank You to KustomsbyKent For This Useful Post:

    bimmer1980 (Jan 6, 2018)

Thread Information

Users Browsing this Thread

There are currently 1 users browsing this thread. (0 members and 1 guests)

Tags for this Thread

Bookmarks

Posting Permissions

  • You may not post new threads
  • You may not post replies
  • You may not post attachments
  • You may not edit your posts
  •