Free 186 More Best Homemade Tools eBook:  
Get tool plans

User Tag List

Page 1 of 2 1 2 LastLast
Results 1 to 10 of 11

Thread: remake of my 7 ft folding break

  1. #1
    Supporting Member Frank S's Avatar
    Join Date
    Aug 2015
    Location
    Peacock TX
    Posts
    11,634
    Thanks
    2,185
    Thanked 9,134 Times in 4,366 Posts

    Frank S's Tools

    remake of my 7 ft folding break

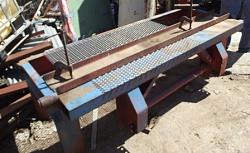
    this is not a new tool but it will hardly resemble the itself.
    I made this about 3 years ago to do 1 little job then after finishing the job it got put on the back burner for completion
    http://www.homemadetools.net/forum/7...0277#post57046
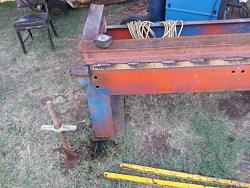
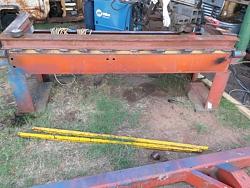
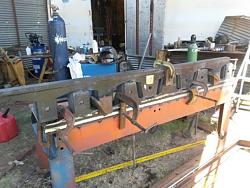
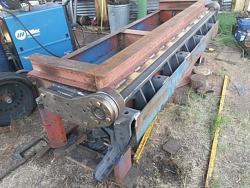
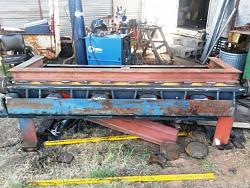
    So for the past month I have been time allowing making tools and parts to finish it up I still might not get it completed as much as I want but at least it is now far enough along to be considered work in progress plus it is right in my way which makes me more inclined to do some work on it .
    remake of my 7 ft folding break-dscf6897c.jpg
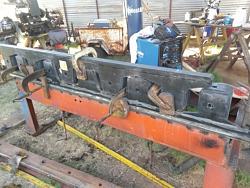
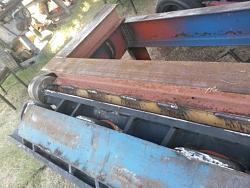
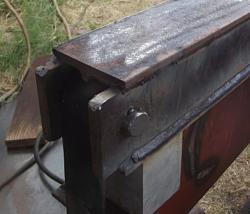
    As you can see it was about as rudimentary of a metal break as possible
    So first things first the gate or swing beam had to go and a top clamp was needed
    remake of my 7 ft folding break-20170813_142219.jpg
    remake of my 7 ft folding break-20170813_142246.jpg
    then a new gate had to be made
    remake of my 7 ft folding break-20170814_131132.jpg
    remake of my 7 ft folding break-20170814_153940.jpg
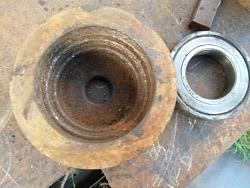
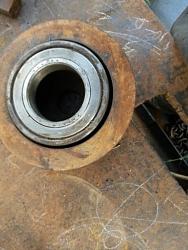
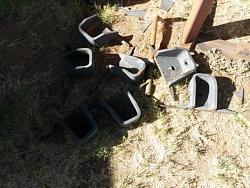
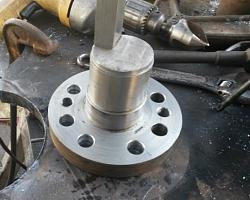
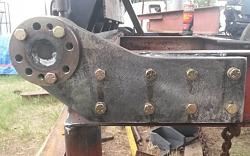
    next the parts for the pivot. I have a large stack of these I think they were once used as casting molds that a guy used to make small train wheels
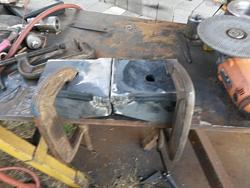
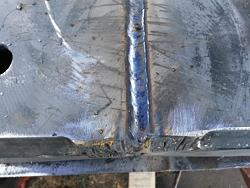
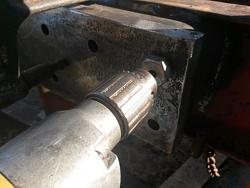
    the bore was too large for my 6212 bearings so I welded them up then machined them out to the depth of 2 bearings
    remake of my 7 ft folding break-20170814_170125.jpg
    remake of my 7 ft folding break-20170814_170137.jpg
    remake of my 7 ft folding break-20170814_170151.jpg
    remake of my 7 ft folding break-20170815_175440.jpg
    Some left over cut offs from the Forklift carriage will become the mount base which the gate pivot mounts will bolt to
    remake of my 7 ft folding break-20170816_123735.jpg
    remake of my 7 ft folding break-20170816_142048.jpg
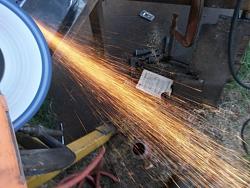
    you can see how tough Caterpillar metal is by the sparks at least 120,000 PSI tensile
    remake of my 7 ft folding break-20170816_142619.jpg

    186 More Best Homemade Tools eBook
    Never try to tell me it can't be done
    When I have to paint I use KBS products

  2. The Following 4 Users Say Thank You to Frank S For This Useful Post:

    baja (May 27, 2020), Paul Jones (Sep 5, 2017), Seedtick (Sep 5, 2017), Toolmaker51 (Jul 11, 2018)

  3. #2
    Supporting Member Frank S's Avatar
    Join Date
    Aug 2015
    Location
    Peacock TX
    Posts
    11,634
    Thanks
    2,185
    Thanked 9,134 Times in 4,366 Posts

    Frank S's Tools
    this build or I should say rebuild so far has required me to make at least half a dozen new tools and parts of the build are shown in 8 or 9 other threads and some tools required other tools to be made before they could be used to make the parts this is at least a partial listing of those threads you may note some of the parts being processed to get the build to this point I am sure more will be required before I can call this a real machine
    http://www.homemadetools.net/forum/s...f-blocks-63258
    http://www.homemadetools.net/forum/2...ch-guide-63215
    http://www.homemadetools.net/forum/t...5-8-11-a-63210
    http://www.homemadetools.net/forum/a...5-x30%B0-63005
    http://www.homemadetools.net/forum/t...s-marker-63049
    http://www.homemadetools.net/forum/set-up-block-63032
    http://www.homemadetools.net/forum/1...ring-bar-62986
    http://www.homemadetools.net/forum/d...ing-head-62925
    http://www.homemadetools.net/forum/b...ving-bar-62901
    http://www.homemadetools.net/forum/n...nly-part-63084
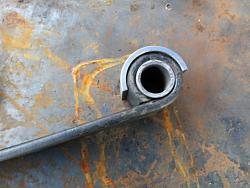
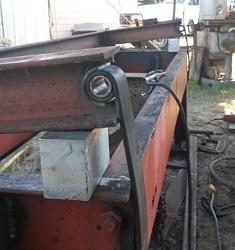
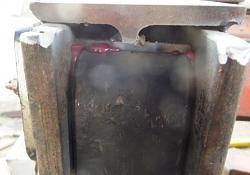
    I will be using the eye end of leaf springs for the top clamp pivot the reasons will be made clear in future posts
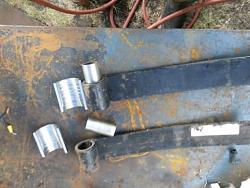
    first off I removed the urethane bushings and replaced them with a pair of hollow piston wrist pins that just happened to be 1/250" OD and 1.000" Id the half round pieces were made from 2 3/8OD oilfield pipe
    remake of my 7 ft folding break-20170813_125813.jpg
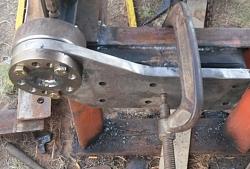
    this is how they will be fitted together on the machine the half round will be welded in the end or the clamp arms then the arms will be plated with 1" holes for a pin to become the pivot.
    remake of my 7 ft folding break-20170813_125943.jpg

    remake of my 7 ft folding break-20170901_155719.jpg

    remake of my 7 ft folding break-20170901_155736.jpg

    remake of my 7 ft folding break-20170901_150929.jpg

    remake of my 7 ft folding break-20170901_181352.jpg

    remake of my 7 ft folding break-20170902_161753.jpg
    first time the gate is opened
    remake of my 7 ft folding break-20170904_152419.jpg

    remake of my 7 ft folding break-20170904_152432.jpg

    remake of my 7 ft folding break-20170904_152447.jpg
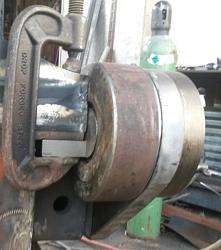
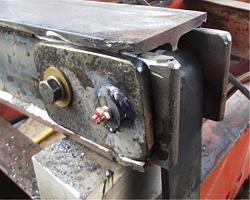
    start of the pivot for the top clamp
    remake of my 7 ft folding break-20170904_164648.jpg

    2,000+ Tool Plans
    Never try to tell me it can't be done
    When I have to paint I use KBS products

  4. The Following 7 Users Say Thank You to Frank S For This Useful Post:

    baja (May 27, 2020), KustomsbyKent (Sep 5, 2017), Paul Jones (Sep 5, 2017), ronny des (Sep 8, 2017), Seedtick (Sep 5, 2017), Toolmaker51 (Jul 11, 2018), Y-geo (Sep 5, 2017)

  5. #3
    Supporting Member Frank S's Avatar
    Join Date
    Aug 2015
    Location
    Peacock TX
    Posts
    11,634
    Thanks
    2,185
    Thanked 9,134 Times in 4,366 Posts

    Frank S's Tools
    With many other things to do I don't get to spend as much time working on this machine as I would like
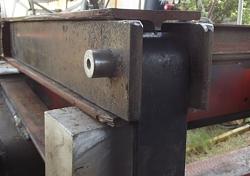
    However today I did manage to spend a little time on it. I now have 1 side of the main hinge for the top clamp complete and the other ready to assemble an dweld.
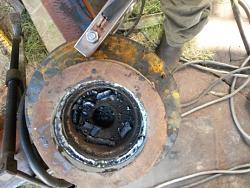
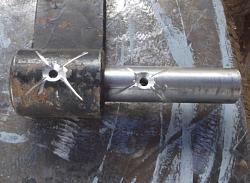
    I drilled and ground grease pathways in both the spring eye and the pivot shaft. since the shaft is fixed to the top clamp this makes the cup holding the spring eye and the pivot shaft rotate around the spring, which meant I needed grease both inside and outside of the spring eye.
    remake of my 7 ft folding break-dscf7505.jpg remake of my 7 ft folding break-dscf7506.jpg remake of my 7 ft folding break-dscf7507.jpg
    Kind of hard to see but grease was forced out both ends of the eye inside and out
    remake of my 7 ft folding break-dscf7509.jpg remake of my 7 ft folding break-dscf7510.jpg
    Never try to tell me it can't be done
    When I have to paint I use KBS products

  6. The Following 3 Users Say Thank You to Frank S For This Useful Post:

    baja (May 27, 2020), MeJasonT (Sep 25, 2017), Seedtick (Sep 23, 2017)

  7. #4
    Supporting Member Frank S's Avatar
    Join Date
    Aug 2015
    Location
    Peacock TX
    Posts
    11,634
    Thanks
    2,185
    Thanked 9,134 Times in 4,366 Posts

    Frank S's Tools
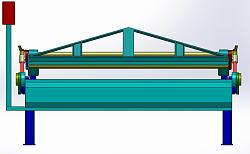
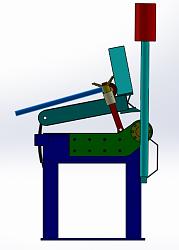
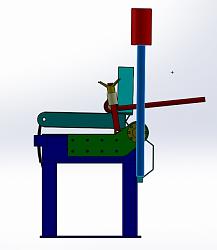
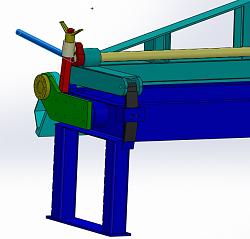
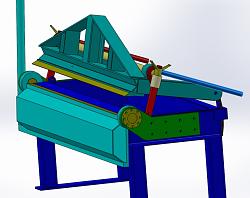
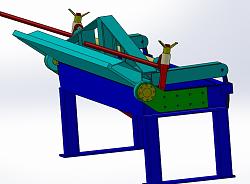
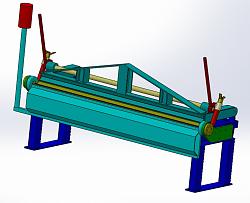
    I have the other side welded up now on to making the cam lock assembly for the top clamp. but I thought I would share some drawing pics of my design This is a close approximation of how it will look when completed
    And later on I may add hydraulics to it
    remake of my 7 ft folding break-7.jpg
    remake of my 7 ft folding break-6.jpg
    remake of my 7 ft folding break-5.jpg
    remake of my 7 ft folding break-4.jpg
    remake of my 7 ft folding break-3.jpg
    remake of my 7 ft folding break-2.jpg
    remake of my 7 ft folding break-1.jpg
    Never try to tell me it can't be done
    When I have to paint I use KBS products

  8. The Following 7 Users Say Thank You to Frank S For This Useful Post:

    baja (May 27, 2020), MeJasonT (Sep 25, 2017), rlm98253 (Sep 23, 2017), Seedtick (Sep 23, 2017), Tonyg (May 27, 2020), Toolmaker51 (Jul 11, 2018), Trainman3810 (Jul 12, 2018)

  9. #5

    Join Date
    Aug 2017
    Posts
    3
    Thanks
    0
    Thanked 1 Time in 1 Post
    Thanks for having excellent info for building nice tool and tooling. Mike

  10. The Following User Says Thank You to customweld For This Useful Post:

    suther51 (Mar 16, 2018)

  11. #6
    Supporting Member suther51's Avatar
    Join Date
    Jul 2016
    Posts
    380
    Thanks
    212
    Thanked 153 Times in 116 Posts
    Looks like it will be a very rugged and useful break. What is the anticipated capacity?

    On another note, the cad drawings makes me ask if any one has had any use for sketch up. I tried but found that w o instructions it was a smoke grinder waste of time.

    Thanks for the post.
    Eric

  12. The Following User Says Thank You to suther51 For This Useful Post:

    Beserkleyboy (May 26, 2020)

  13. #7
    Supporting Member Frank S's Avatar
    Join Date
    Aug 2015
    Location
    Peacock TX
    Posts
    11,634
    Thanks
    2,185
    Thanked 9,134 Times in 4,366 Posts

    Frank S's Tools
    Man I've tried sketch-up Coral draw. solid edge Auto cad designer for me I guess I'm too dense to put the effort into the learning curve Or it maybe because from the very first time I powered up my own PC I have had solidworks on it, and since I can no longer afford the upgrades I'll just stick with my 2013 version
    the target capacity of the machine will be around 10ga for full width but as much as 3/16" for half width or less But I will be happy if I can only form 10ga at 6ft wide sheets.
    It's kind of back burner right now while working on green house and trying get garden in.
    Last edited by Frank S; Mar 16, 2018 at 10:54 PM.
    Never try to tell me it can't be done
    When I have to paint I use KBS products

  14. The Following User Says Thank You to Frank S For This Useful Post:

    suther51 (Mar 17, 2018)

  15. #8
    Supporting Member suther51's Avatar
    Join Date
    Jul 2016
    Posts
    380
    Thanks
    212
    Thanked 153 Times in 116 Posts
    At times I work for my brother in law, he has 9 greenhouses if I count right from memory. He has several different styles, from home built wood Cornell style at 27 by 75 to salvaged 21 by 40 short squat hoop house (a real snow load issue with these, that's wy they are salvaged) he just started crops about 2 weeks ago, still getting in plug orders. Love seeing spring in the houses before it comes outside. The soil where he is is a sand clay mix that holds water terrible. The Cornell houses are having frost heaving problems with the posts, broke a rather, will have to do a drainage project sooner or later. Oh well.
    Eric

  16. #9
    Supporting Member Beserkleyboy's Avatar
    Join Date
    Aug 2014
    Location
    Sunny South Coast NSW, Australia
    Posts
    366
    Thanks
    473
    Thanked 230 Times in 134 Posts

    Beserkleyboy's Tools
    Eric, I've been using SketchUp since 2005 for my cabinetmaking drawings. I use it almost daily. I draw ANYTHING I'm going to manufacture in the workshop, as it allows accurate design to be seen in scale, and shows potential problems before they might be encountered in the workshop. When doing quotes for the generous ladies' wall sized bookcase units, I draw the room to be outfitted with the cabinets in place, allowing them to get a 'real idea' of what it will look like.
    As for ease of use, it is really very intuitive, but will require you to practice. I suggest firstly learning the 'tools' and what they do. Then draw simple 2 dimensional shapes and 'push/pull' them into 3 dimensions. The included tutorials are excellent. I have only ever used the free version, currently called SketchUp 'Make'. It will do 90% of ANYTHING that you would fabricate, be it metal, wood, plastic et al.
    Check out Mathias Wandel's excellent work at 'WoodGears' woodgears.ca . He uses Sketchup for all of his work, and watching some of his drawings can aid in understanding the workings of the program.
    Beware, though, once you get a handle on it, it can be a real time consumer...Cheers
    Jim 33 yr retired timber merchant expat in AUS

  17. #10
    Supporting Member suther51's Avatar
    Join Date
    Jul 2016
    Posts
    380
    Thanks
    212
    Thanked 153 Times in 116 Posts
    Thanks for the reply. At this time I would like to use it but the time for the learning curve is just too valuable elsewhere. Bit of a catch 22. Likely faster once mastered but I dont have the liquid time to get there. Perhaps I will eventually.
    Thanks

Thread Information

Users Browsing this Thread

There are currently 1 users browsing this thread. (0 members and 1 guests)

Bookmarks

Posting Permissions

  • You may not post new threads
  • You may not post replies
  • You may not post attachments
  • You may not edit your posts
  •