Rather than bury this in the back of my original radius cutter I decided make this its own separate post. I hope it ok Jon and DIY'er.
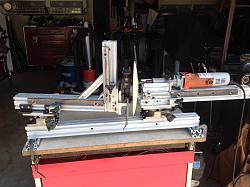
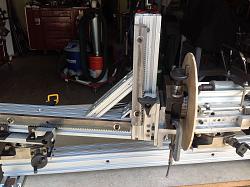
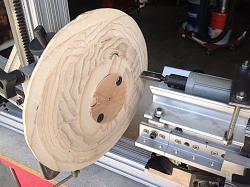
The original was based around the only rotary table I had, my monster 10" that has got to weigh 100# and I'm just getting old to toss around that much steel. One of the many problems with the old setup was it was almost impossible to center quickly and easily and having only one rotary table made it so if I was cutting convex or concave I had to switch the cutter and the work positions. I found on eBay these cute little 3" rotary tables for $35ea(!) and decided it was time to revise the whole idea and give each arm its own table and mount everything on one 80/20 rail. That would make everything much lighter and easier to align. In this process I also realized I needed to be able to make domes. So I got another rotary table to mount the work on. This was a test run so I've still got to work out the mount for work rotating table. It's just clamped right now. The first cut was 24" radius, the max I could cut on this rail with the work arm that is on it right now. That proved to be to big a radius. I repositioned the work arm pivot to 19 1/2" and that was just right for the forming I was doing.
The next improvement would be to make bigger hand wheels for all three r-tables and make a mounting block for the work rotating table so I can offset it to the cutter to do compound radii. Thats something I didn't realize until I finished this experiment. Man I love this 80/20 stuff it's just like erector sets when I was a kid and if I don't like it I can just take it apart and try something else. And like with the arms and main rail I still have a 10' piece I've not cut up yet so I can disassemble and use the parts on longer pieces. Wish I'd had this stuff years ago.


 LinkBack URL
 About LinkBacks


 Reply With Quote


Bookmarks