Free 186 More Best Homemade Tools eBook:  
Get tool plans

User Tag List

Page 4 of 4 FirstFirst 1 2 3 4
Results 31 to 35 of 35

Thread: From Nils to Skills Uber Challenge - Compact Workshop Press

  1. #31
    Supporting Member Canobi's Avatar
    Join Date
    Mar 2016
    Location
    Shrewsbury, Shropshire (UK)
    Posts
    181
    Thanks
    92
    Thanked 364 Times in 98 Posts

    Canobi's Tools
    Hey guys

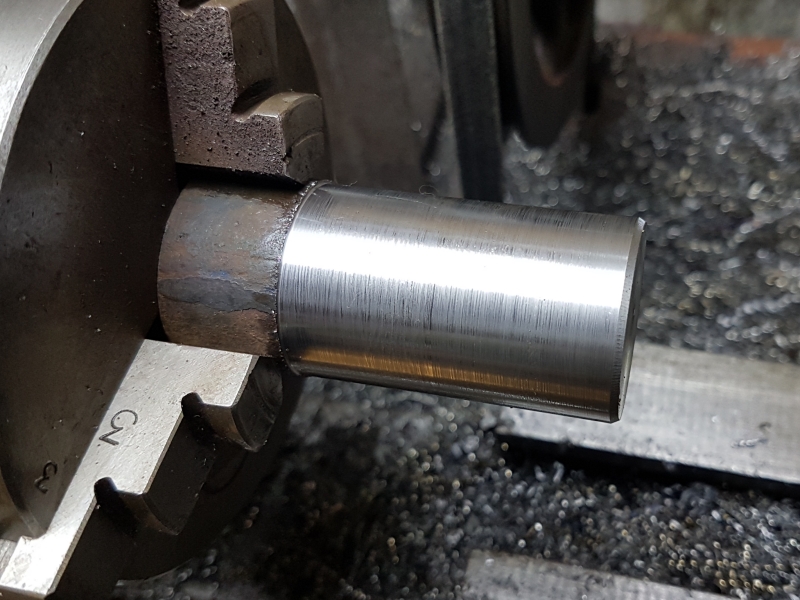
    After dinner, I got onto making the peg. The first thing I did was to face the part and skim off the scale and rust. I just used my three jaw for that as it was nice and quick:


    Once that was done, I swapped to my four jaw, turned the part round, dialled it in and did the same the other end, in this case though, it already had a shallow but somewhat off centre hole drilled in it, unfortunately though, I got quite carried away with precedings and forgot to take pics of a few stages, sorry.

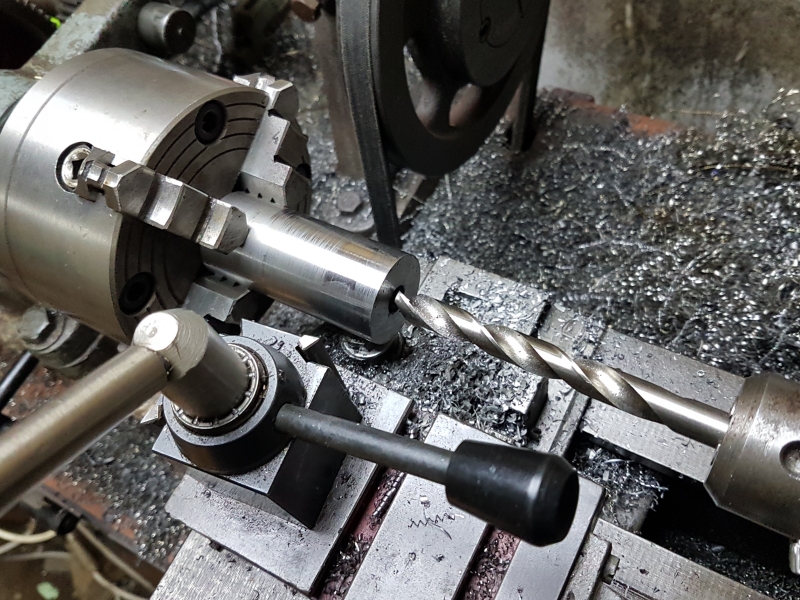
    Anyhoo, despite the off centre hole, I took a 6mm bit and drilled it to just over an inch deep and while I wasn't too keen on the way the bit flexed while I did so, I wasn't concerned about it being off centre as there's a simple way to bring a hole back on centre without having to bore it all the way down.

    The trick is to take a small boring bar and used it to true up the hole just enough to clear the offset while making sure not to overshoot the tap drill diameter.

    The bore need only go to depth of about 10mm or so into the hole and once done, it's then possible to swap back to drilling again as the portion of the hole that has just been bored acts as a drill guide which prevents the larger bits from wandering as it cuts the rest of the hole to depth:


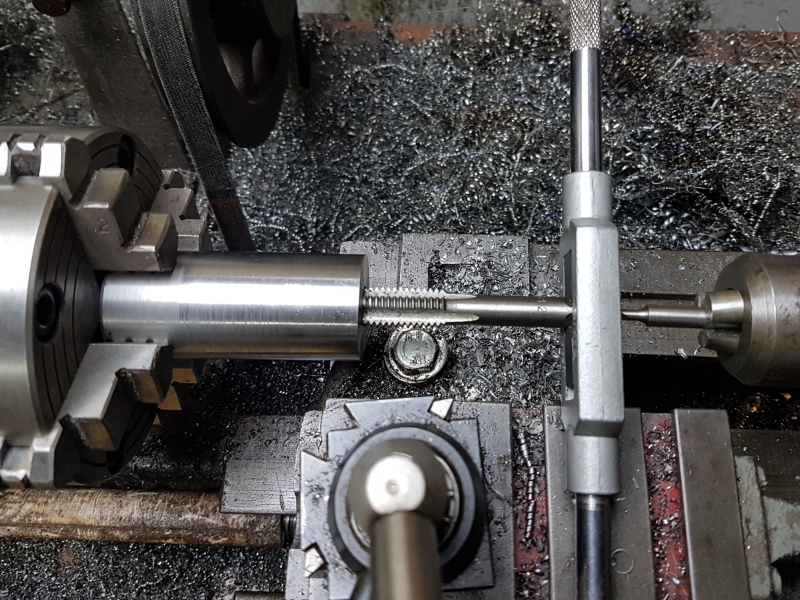
    I then put the lathe in back gear and used it to get the tap started:


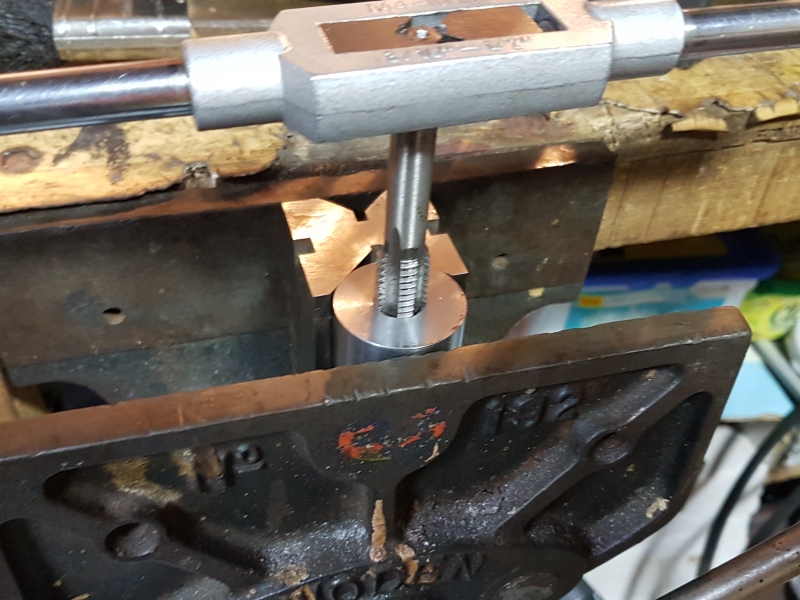
    It did quite a good job and managed quite a few turns and then finished it by hand when it got deep enough:


    With that done, the only thing left to do was test fit it:


    Well that's it for today's progress, I'll catch you all again soon

    186 More Best Homemade Tools eBook
    It's not the destination but the journey you take to get there that matters.

  2. The Following 10 Users Say Thank You to Canobi For This Useful Post:

    Andyt (Nov 3, 2018), G.Paul (Nov 4, 2018), JRock (Nov 2, 2018), kirk332 (Nov 2, 2018), PJs (Nov 2, 2018), Priemsy (Nov 3, 2018), Seedtick (Nov 2, 2018), Shanty (Nov 4, 2018), that_other_guy (Nov 24, 2018), volodar (Nov 5, 2018)

  3. #32
    Supporting Member Canobi's Avatar
    Join Date
    Mar 2016
    Location
    Shrewsbury, Shropshire (UK)
    Posts
    181
    Thanks
    92
    Thanked 364 Times in 98 Posts

    Canobi's Tools
    Hey guys

    I somehow managed to pull my left shoulder muscle a couple weeks ago and had to wait till it was better before I could lug stuff around in order to finish the press.

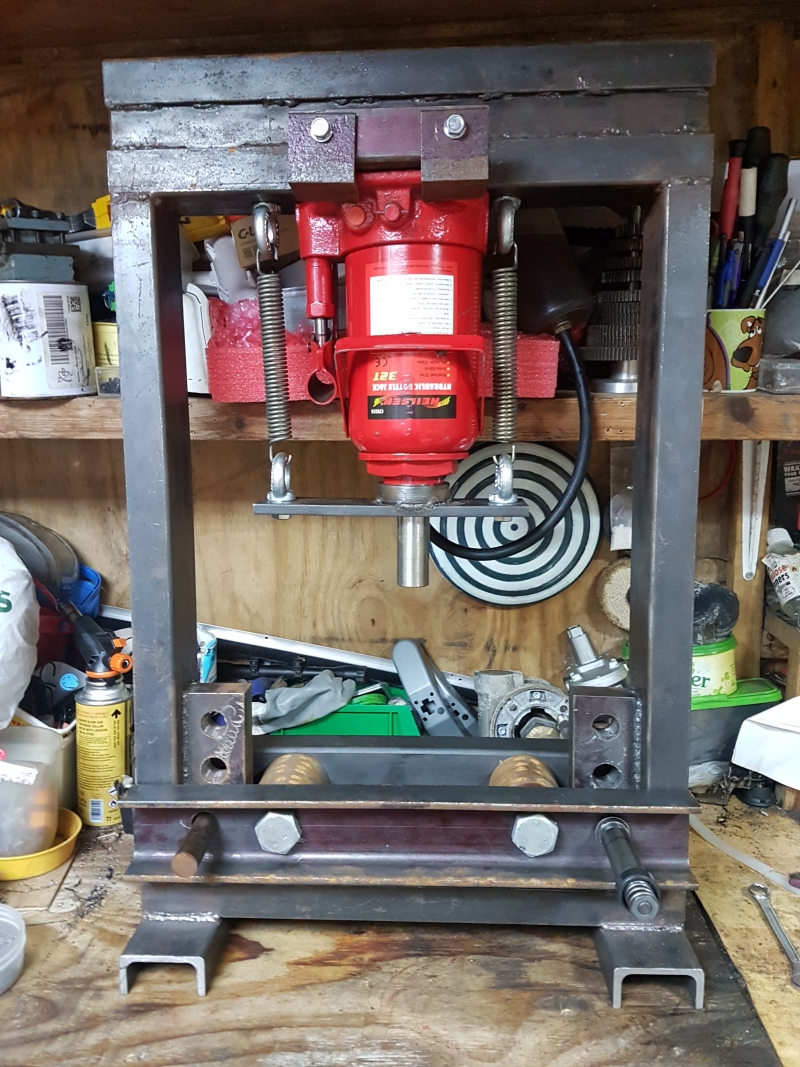
    Thankfully it's all better now and I was able to modify the jack to work upside down this morning.

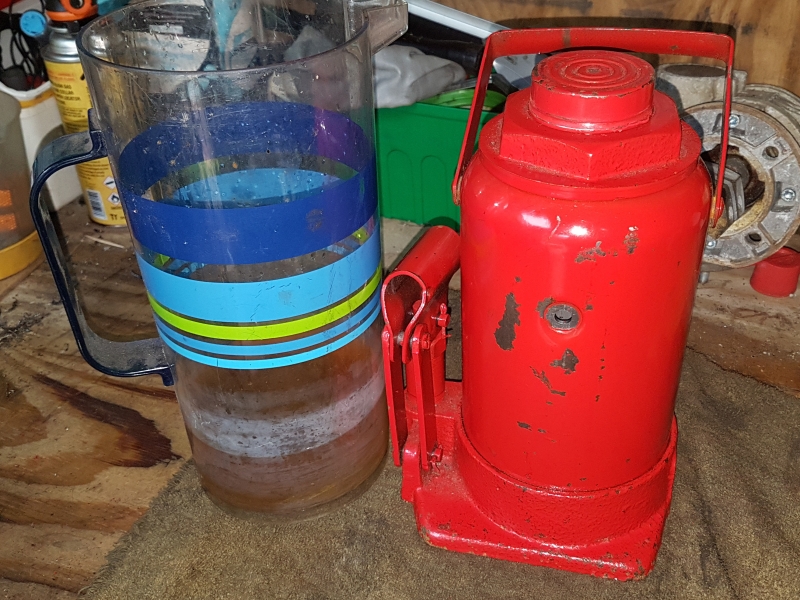
    First job was to drain the oil out of the bottle jack:


    I tried for ages to remove the outer shell but it just wouldn't budge, so I begrudgingly carried on with it fully essembled.

    The hole used to fill the jack with oil measured 8mm, which is nearly the correct size for a 1/8" BSP (@8.8mm). I don't have a 8.8mm drill bit, so I used the next closest one I had which is 8.5mm, which worked just fine.

    I specifically bought a 1/8" BSP machine tap for the hole as I'd had a hunch I wouldn't be able to disassemble the jack due to lack of Abom79 size tools and using a machine tap seemed a good way to prevent chips from dropping inside the jack.

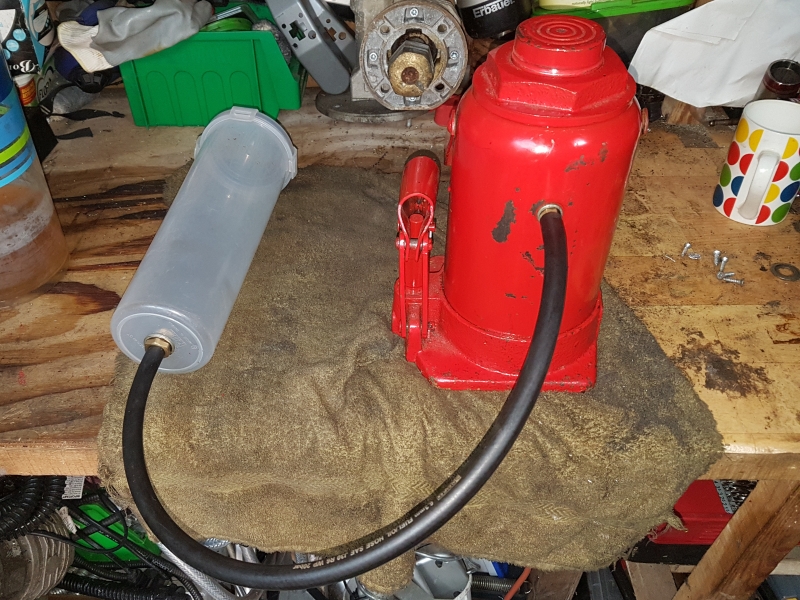
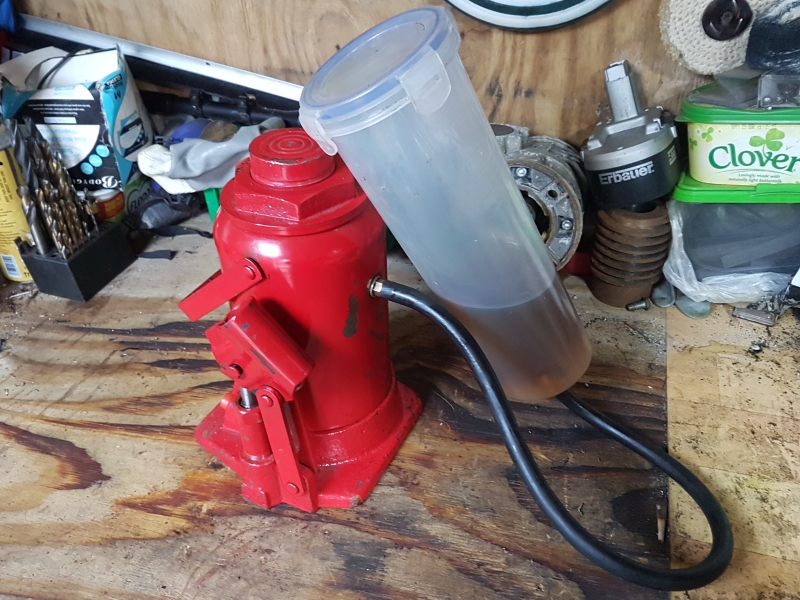
    I then assembled the parts for the reservoir system, made up of a 1/8" and 3/8" male threaded BSP fitting with 6mm hose barbs, 500mm of oil resistant hose with 6mm bore, a clip lock spaggetti tub and a couple of matching dowty washers for the BSP fittings:


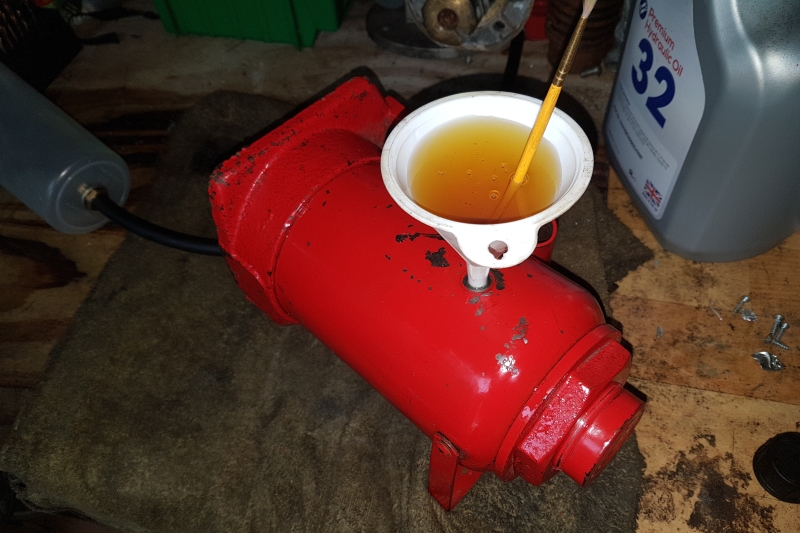
    Once I was happy that the fitting would seal nice and tight on the jack, I removed it, stuck the jack on its side (handily the carry handle made a good impromptu stand for the front) and I proceeded to fill the jack with oil till it was totally full.

    The replacement oil I got was a little more viscous than the oil I drained (not so great in winter but better for pressures exceeding 20 ton) and as my time was limited, I opted to help the bubbles release quicker using a small paintbrush handle, which sped things up considerably:


    With the jack full and with funnel still in place, I started carfully pumping the jack to fill the ram void, making sure not to suck air into the jack as I did so. Once the ram was fully extended, I shoved a handful of paper towels under the jack and removed the funnel to let the excess run off, which wasn't much as I was careful to fill the last portion a little bit at a time to avoid ending up with a full funnel.

    I then screwed the reservoir back on, added a few mills of oil to cover the 3/8" BSP fitting sticking up from the bottom of the tub and returned the ram to it resting position, which purged the use from the tube:


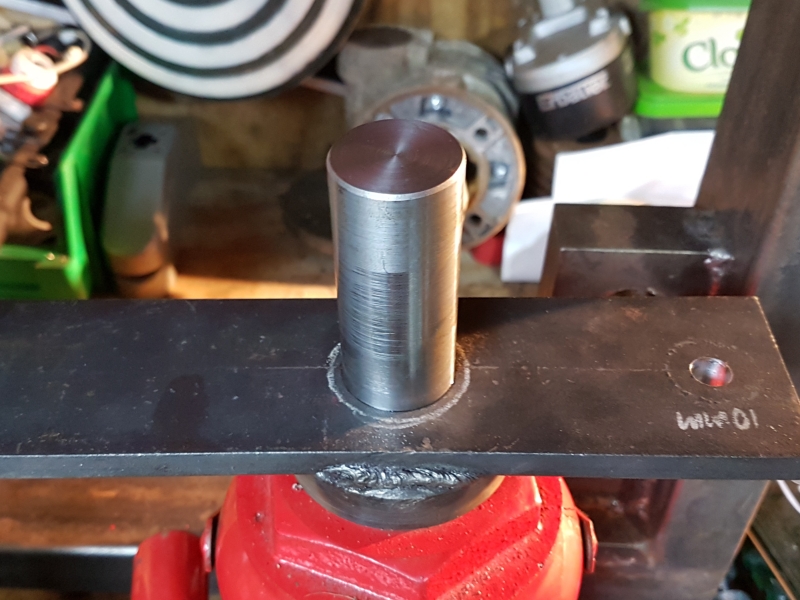
    With that done, the only thing left to do was put the jack in pride of place and test it for soundness and rigidity. For that I stuck a 1/2" plate on the receiver with a short length of 2" bar on it and had at it till I thought the flimsy jack lever was about to fold up on me. To my surprise and delight, the frame didn't make a sound during the test and the ram returned as it should do so I'm very pleased with the results:


    Still needs a little refining as I want to replace the clip lock tub for an aluminium or stainless container of some sort, as well.as.somehwere to fix it ro and I believe the jack can be further modified to work the other way round so the lever is on the right hand side so pumping force is applied downward, not up as it currently stands but that's for another day.

    Right now, I have a milling machine restoration that requires completion, so until next time, stay safe, stay happy and keep those chips flyin'

    2,000+ Tool Plans
    It's not the destination but the journey you take to get there that matters.

  4. The Following 4 Users Say Thank You to Canobi For This Useful Post:

    PJs (Nov 20, 2018), Seedtick (Nov 20, 2018), that_other_guy (Nov 24, 2018), Toolmaker51 (Nov 19, 2018)

  5. #33
    PJs
    PJs is offline
    Supporting Member PJs's Avatar
    Join Date
    Sep 2014
    Location
    Northern CA
    Posts
    1,844
    Thanks
    8,431
    Thanked 1,129 Times in 725 Posts

    PJs's Tools
    Great job Canobi and glad there were no "Sound" issues! Love the reservoir too and being translucent gives a clue of levels, bubbles and condition of the fluid....looks like a spaghetti noodle container I have.

    PJ
    ‘‘Always do right. This will gratify some people and astonish the rest.’’
    Mark Twain

  6. #34
    Supporting Member Canobi's Avatar
    Join Date
    Mar 2016
    Location
    Shrewsbury, Shropshire (UK)
    Posts
    181
    Thanks
    92
    Thanked 364 Times in 98 Posts

    Canobi's Tools
    Quote Originally Posted by PJs View Post
    Great job Canobi and glad there were no "Sound" issues! Love the reservoir too and being translucent gives a clue of levels, bubbles and condition of the fluid....looks like a spaghetti noodle container I have.

    PJ
    Lol, well I suppose I could have used structural integrity instead but "soundness" is as legitimate a way to describe same in my book

    Initially I used the spaggetti tub to help me to find the amount of extra oil that was required. As it was clear, it was also useful for all the reasons you stated above, though I'd prefer an alu or stainless container if I can find one. I've been looking at repurposing either a soap dispenser, gravity feed paint pot or drinking bottle as they would be big enough to hold the extra oil and fairly simple to convert.
    Last edited by Canobi; Nov 20, 2018 at 05:43 PM.
    It's not the destination but the journey you take to get there that matters.

  7. The Following User Says Thank You to Canobi For This Useful Post:

    PJs (Nov 21, 2018)

  8. #35
    Content Editor
    Supporting Member
    DIYer's Avatar
    Join Date
    Aug 2013
    Posts
    3,055
    Thanks
    793
    Thanked 1,892 Times in 1,687 Posts


    Thanks Canobi! We've added your Shop Press to our Brakes and Presses category,
    as well as to your builder page: Canobi's Homemade Tools. Your receipt:


    2,000+ Tool Plans
    New plans added on 12/16/2024: Click here for 2,633 plans for homemade tools.

Thread Information

Users Browsing this Thread

There are currently 1 users browsing this thread. (0 members and 1 guests)

Bookmarks

Posting Permissions

  • You may not post new threads
  • You may not post replies
  • You may not post attachments
  • You may not edit your posts
  •