Free 186 More Best Homemade Tools eBook:  
Get 2,500+ tool plans, full site access, and more.

User Tag List

Page 1 of 3 1 2 3 LastLast
Results 1 to 10 of 25

Thread: My Rifle Brass Annealer

  1. #1
    Supporting Member Crusty's Avatar
    Join Date
    May 2019
    Location
    Dry Gulch, Tx
    Posts
    749
    Thanks
    220
    Thanked 854 Times in 325 Posts

    Crusty's Tools

    My Rifle Brass Annealer

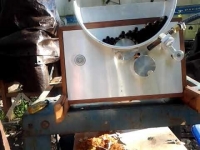
    Here's my rifle brass annealer in operation as the first step in reloading precision long range rifle ammunition. I don't think I even wrote anything down as I built it much less any sort of documentation. I used a rotisserie motor for drive, a 10mm XL timing belt (5mm pitch) and sprockets (40:26 ratio to achieve 6 sec rotor revs from the 10 sec motor revs), half inch shaft stock, cheap bearings I bought at the local hardware store, various aluminum pieces from my materials bin and a cake pan. The frame is 1/4" mdf with an aluminum sheet overlay on the front and a mahogany perimeter frame. You can't see them in the video but there's finishing nail pins that guide the cases from the input slot into the heating position.

    The big discovery for me was that if the cases landed on a downward moving surface they tended to stop rotating and skidded in place, but when I offset the top rotor so that they landed on an upward moving surface then rotation became reliably 100%. A rotor diameter of around 2" gives enough rotations for uniform heating.

    The angular relationship between the two slots is adjusted to achieve the desired heating time (best determined empirically with Tempilaq) and in the video it's set for 5-5½ seconds, which puts my cases in the 700-750º range. Each rotor is fastened to its driving shaft with two grub screws so it's simple and easy to adjust the relationship between the two. A small flame with the tip of the inner cone directed at the neck/shoulder junction (barely visible in the video) is adequate to reach the target temp range.


    186 More Best Homemade Tools eBook

  2. The Following 28 Users Say Thank You to Crusty For This Useful Post:

    12L14 (Jul 31, 2019), Altair (Jun 1, 2019), Andyt (Jun 4, 2019), athomp (Jun 9, 2019), baja (Jun 3, 2019), Bobinwa (Jun 4, 2019), GKK (Jun 3, 2019), hemmjo (Mar 22, 2024), high-side (Jun 9, 2019), HobieDave (Mar 3, 2020), johncg (Aug 13, 2023), Jon (Jun 1, 2019), mklotz (Jun 1, 2019), mr mikey (Jan 10, 2023), nova_robotics (Jul 22, 2021), PJs (Mar 22, 2024), RetiredFAE (Jul 22, 2021), rlm98253 (Jun 3, 2019), rogue1949 (Mar 22, 2024), SA MAKER (Jun 10, 2019), Seedtick (Jun 3, 2019), that_other_guy (Mar 23, 2024), threesixesinarow (Jun 1, 2019), Tonyg (Jun 3, 2019), Toolmaker51 (Jun 3, 2019), volodar (Jun 6, 2019), Whiteboardwarriors2 (Jun 7, 2019), will52100 (Jun 3, 2019)

  3. #2
    Supporting Member mklotz's Avatar
    Join Date
    Aug 2015
    Location
    LA, CA, USA
    Posts
    3,548
    Thanks
    363
    Thanked 6,580 Times in 2,165 Posts

    mklotz's Tools
    Very clever implementation of the feed mechanism. I will endeavor to remember that.

    2,500+ Tool Plans
    ---
    Regards, Marv

    Failure is just success in progress
    That looks about right - Mediocrates

  4. #3
    Supporting Member Crusty's Avatar
    Join Date
    May 2019
    Location
    Dry Gulch, Tx
    Posts
    749
    Thanks
    220
    Thanked 854 Times in 325 Posts

    Crusty's Tools
    It sure beats spinning cases in a deep socket on my screw gun while counting seconds.

  5. #4
    Supporting Member Altair's Avatar
    Join Date
    Aug 2013
    Posts
    12,020
    Thanks
    1,365
    Thanked 30,361 Times in 9,999 Posts


    Thanks Crusty! We've added your Rifle Brass Annealer to our Firearm and Weaponry category,
    as well as to your builder page: Crusty's Homemade Tools. Your receipt:


    New plans added on 01/03/2025: Click here for 2,682 plans for homemade tools.

  6. #5
    Supporting Member Toolmaker51's Avatar
    Join Date
    Feb 2016
    Location
    Midwest USA
    Posts
    5,338
    Thanks
    7,048
    Thanked 3,020 Times in 1,905 Posts

    Toolmaker51's Tools
    Hereabouts, likely one of the best endorsements of a project comes from Marv K. "Very clever implementation of the feed mechanism. I will endeavor to remember that." Figure you just scored a 1000 yard X ring. . .
    I agree, the cartridge timing and positioning mechanics are ideal. I really like the style Geneva gear action.
    I have 1500+ .308 Winchester [M1A] and just as many .30-06 Springfield [M1] begging I duplicate your project.
    Poor guys, totally unaware getting 6500 sq/ft of drywall in comes first.
    Sincerely,
    Toolmaker51
    ...we'll learn more by wandering than searching...

  7. #6
    Supporting Member McDesign's Avatar
    Join Date
    Sep 2016
    Posts
    259
    Thanks
    5
    Thanked 126 Times in 65 Posts

    McDesign's Tools
    That is really, really nice!

  8. #7
    Supporting Member Crusty's Avatar
    Join Date
    May 2019
    Location
    Dry Gulch, Tx
    Posts
    749
    Thanks
    220
    Thanked 854 Times in 325 Posts

    Crusty's Tools
    I'll tell you what, I shoot the longest range with a caliber that's not supposed to be able to do it and sometimes it turns out not too shabby and I'm a believer in annealing before every reload so that I get consistent bullet seating depth and consistent bullet release from every round, plus the icing on that cake is the extended brass life: the brass used in the video for testing was some OK but nothing special Hornady brass that I got 19 reloads out of before I retired it because I was getting 10% split necks. And the annealer's beau coups faster than annealing by hand.

    I'd never thought about it but it does look like a Geneva mechanism however it's really just one slot to deliver the brass into the heating position at the right time and then another to remove it at the right time integrated into the brass roller. The rotors are kept synchronized by the unseen timing belt and sprockets driving them. Be sure to run some tests with Tempilaq to determine your timing - most of the videos of home built annealers way overheat the brass and that's a bad thing to do.
    If you can't make it precise make it adjustable.

  9. #8
    Supporting Member Toolmaker51's Avatar
    Join Date
    Feb 2016
    Location
    Midwest USA
    Posts
    5,338
    Thanks
    7,048
    Thanked 3,020 Times in 1,905 Posts

    Toolmaker51's Tools
    I load a bunch of calibers; .17 Remington to .375 H&H and .45-70, plus common handgun calibers. It's so rewarding; analyze brass and targets, making a load perform where it didn't [or shouldn't, lol] before.
    Using a timing belt, means you could have different case spools. . .better than varying torch placement for good temperature control. And once a combination is set, easily recorded and duplicated.
    Sincerely,
    Toolmaker51
    ...we'll learn more by wandering than searching...

  10. #9

    Join Date
    Jan 2017
    Posts
    18
    Thanks
    0
    Thanked 11 Times in 5 Posts
    I've seen other videos of this type of design. None show build details. I'd love to build one but need some sort of materials list and idea of dimensions.
    How 'bout it? Would be cool to make one myself.

    Thanks and good job!

    Jim

  11. #10
    Supporting Member Crusty's Avatar
    Join Date
    May 2019
    Location
    Dry Gulch, Tx
    Posts
    749
    Thanks
    220
    Thanked 854 Times in 325 Posts

    Crusty's Tools
    The major limitation is actually case length - the feed hopper has a notch cutout in it for the case neck to pass through on it's way to the heating position and it needs to be just long enough for the case to go through. I actually used the cutaway aluminum from the notch to make a ramp tab that pushes the case back towards the wall so that it will fall into correct position where the flame is aimed. The slot width in the rotor is pretty forgiving - as long as a case will fall into it below the rotor surface that's good enough. If you've got a small lathe it's relatively easy to make more rotors for really different case sizes and they go onto their driving shafts with a couple of set screws in the bottom of the troughs so they're easy to change. There's little torque required so the set screws don't need to be really cranked tight, which would mar an unhardened shaft.

    I've already stated the unique factors to be taken into consideration. A rotor revolution time of 6 seconds is likely adequate for most calibers because the flame can always be adjusted greater. Around two inch rotor diameters provide adequate rotation for uniform heating. Configure it so that the input rotor delivers the case onto an upward moving surface. I chose ½" Thompson QS shafting and it was a good choice. The bearings were just cheap generics from my hardware store that fit. I bought the burner at Home Depot, sawed it in two and spliced a fuel hose between the burner and the tank. The specifics for different case dimensions, a different driving motor or mechanical drive components and different materials selection are design elements to be thought through in each unique instance.
    Last edited by Crusty; Jun 3, 2019 at 10:20 PM.
    If you can't make it precise make it adjustable.

  12. The Following 2 Users Say Thank You to Crusty For This Useful Post:

    jcorpx (Jun 10, 2019), rebuilder1954 (Jul 22, 2021)

Thread Information

Users Browsing this Thread

There are currently 1 users browsing this thread. (0 members and 1 guests)

Bookmarks

Posting Permissions

  • You may not post new threads
  • You may not post replies
  • You may not post attachments
  • You may not edit your posts
  •