Free 186 More Best Homemade Tools eBook:  
Get 2,500+ tool plans, full site access, and more.

User Tag List

Results 1 to 7 of 7

Thread: Mini Mill Lighting (also for drill press)

  1. #1

    Join Date
    Nov 2018
    Posts
    12
    Thanks
    1
    Thanked 28 Times in 8 Posts

    H0$$'s Tools

    Mini Mill Lighting (also for drill press)

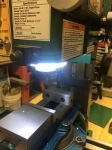
    Here is my attempt at a first time posting. Being a newbie to HMT I will try not to embarrass myself too much. This is my version of a lighting modification which I installed onto my Grizzly G8689 Mini mill. I chose to purchase Everbright 1-pair white 70mm angel eyes halo ring lamps by YM E-Bright from Amazon. At the time the cost was $11.49 with Prime shipping available for those that qualify. I have also installed a similar version onto my drill press. As a personal preference I do not like having goose neck lighting, or any other sort of attachable light source around, near, or on my machinery. However I do demand proper lighting of the work area. Now that technology in led lighting has improved, and the cost to consumer is acceptable, good lighting is finally achievable, even to the hobbyist. I started by purchasing a set of Angel Eyes led light rings from Amazon(see pic for listing). I chose this model because of it's size, clarity, and small footprint. Once I received the lights I opened the front switch compartment and drilled a small hole at the rear, and at an angle for the wires to enter into the compartment (see pic). Next I glued the light ring into position around the spindle ( these lights come with a double sided tape that is used to attach them). I then tested with a 12v power supply before proceeding. checked ok. Since I will be adding a set of 12v DRO's to this mill I decided to install a power source in the electrical junction box of the mill. This will provide a separate power source with clean power to the lights as well as the future DRO's. For mine I simply found an old 120vAC/12vDC power supply which I cut open and robbed the transformer and power board from (see pics). After cutting open the case I removed the transformer and board and then cut off the spades which plug into the wall receptacle and replaced them with some short lengths of wire. I found a location in the control panel where the new transformer would fit and yet still leave access to other important connections. The transformer and board were then attached to the inner wall with some 3M double sided tape. This will hold it in place while adding a bit of dampening for any vibration (Electronic Hum). Do not cover over any of the ventilation holes when mounting the transformer, these holes are important for ventilation and cooling of the electronic parts inside. I then pulled in a pair of wires for the light ring and also a pair of wires for the switch which I wanted mounted in the front of the mill. Next I checked for proper clearances and drilled a hole for the toggle switch ( before drilling the label cut it with an exacto razor or some other type of small blade, if not the drill bit will grab and rip the label leaving an ugly "apprentice mark" ). install the switch and connect the wires. I then connected the new 120v lead on the transformer to the 120 leads coming into the mills power cord. By tapping into this location the lighting and DRO's will be switchable independently of the mills normal operation. The light ring provides good lighting around the bit without the shadows caused by other light sources. I preferred to have the switch in the front of the mill, on a separate power source, and free of tangled wires, extra wiring, batteries, and additional power supplies. I feel this adds a clean install and modification to this mill. This basic process can be added to drill presses as well, (with some slight modifications of course). As stated above, the transformer I installed will be plenty strong enough to power the light ring as well as when I later add a small female connector or hard wire in the 12v Dro's. I hope that this mod build will help someone or inspire you to modify it for your own needs. If any further clarification is needed, if I have left anything out, just send me a message. Thanks H0$$
    Attached Thumbnails Attached Thumbnails Mini Mill Lighting (also for drill press)-img_1499.jpg   Mini Mill Lighting (also for drill press)-img_1500.jpg   Mini Mill Lighting (also for drill press)-img_1503.jpg   Mini Mill Lighting (also for drill press)-img_1504.jpg   Mini Mill Lighting (also for drill press)-img_1502.jpg  

    Mini Mill Lighting (also for drill press)-img_1501.jpg   Mini Mill Lighting (also for drill press)-img_1505.jpg   Mini Mill Lighting (also for drill press)-img_1506.jpg  

    186 More Best Homemade Tools eBook

  2. The Following 16 Users Say Thank You to H0$$ For This Useful Post:

    benkeller3 (Mar 11, 2021), Frankd68 (Apr 8, 2019), high-side (Feb 11, 2019), Home-PC (Nov 29, 2023), olderdan (Feb 11, 2019), Paul Jones (Feb 14, 2019), PJs (Feb 13, 2019), rarmintrout (Mar 12, 2021), RetiredFAE (Mar 11, 2021), rlm98253 (Jul 1, 2024), Saltfever (Apr 4, 2019), sossol (Feb 11, 2019), suther51 (Feb 11, 2019), Toolmaker51 (Feb 11, 2019), Tule (Feb 12, 2019), Whiteboardwarriors2 (Apr 3, 2019)

  3. #2
    Supporting Member olderdan's Avatar
    Join Date
    Jun 2016
    Posts
    795
    Thanks
    1,464
    Thanked 1,594 Times in 472 Posts

    olderdan's Tools
    Great first post and a nice idea, very neatly done.

    2,500+ Tool Plans

  4. The Following 2 Users Say Thank You to olderdan For This Useful Post:

    benkeller3 (Mar 11, 2021), PJs (Feb 13, 2019)

  5. #3
    Supporting Member Toolmaker51's Avatar
    Join Date
    Feb 2016
    Location
    Midwest USA
    Posts
    5,338
    Thanks
    7,048
    Thanked 3,020 Times in 1,905 Posts

    Toolmaker51's Tools
    Yes! There's no shortage of reasons that gooseneck lighting blows. LED bulbs in them is not a cure; but a cooler lamp that ignores vibration is a plus.
    But it's never in the right place, while blinding operators as they manipulate, each time it falls And a lot of them aren't really machine lamps; chips work into switch cavity for your own 4th of July show, no matter what day it is.
    Sincerely,
    Toolmaker51
    ...we'll learn more by wandering than searching...

  6. #4

    Join Date
    Nov 2018
    Posts
    12
    Thanks
    1
    Thanked 28 Times in 8 Posts

    H0$$'s Tools
    Thanks for the positive replies

  7. #5
    Content Editor
    Supporting Member
    DIYer's Avatar
    Join Date
    Aug 2013
    Posts
    3,055
    Thanks
    795
    Thanked 1,895 Times in 1,690 Posts


    Thanks H0$$! We've added your Mill Light to our Lighting category,
    as well as to your builder page: H0$$'s Homemade Tools. Your receipt:


    New plans added on 01/03/2025: Click here for 2,682 plans for homemade tools.

  8. #6
    Supporting Member ranald's Avatar
    Join Date
    Jan 2018
    Location
    Black Mountain Queensland
    Posts
    1,326
    Thanks
    992
    Thanked 367 Times in 256 Posts

    ranald's Tools
    Great work. As an alternative, I found that rechargeable magnetic flat back LEDs solved my issues and I use them in the house, camping, in the paddock etcas well. They work great on drill press, bandsaw, & even RAS :being flat they can be twisted around & also attach to round objects like pipe. I also use an old bedlamp(weightedbase) stand to gain other access neat router table & lathe. I found two are all i need . Fine Woodworking published my tip last year.

  9. #7
    Supporting Member rlm98253's Avatar
    Join Date
    Feb 2016
    Posts
    68
    Thanks
    3,688
    Thanked 45 Times in 29 Posts
    Well done, sir. Welcome aboard.


    2,500+ Tool Plans

Thread Information

Users Browsing this Thread

There are currently 1 users browsing this thread. (0 members and 1 guests)

Bookmarks

Posting Permissions

  • You may not post new threads
  • You may not post replies
  • You may not post attachments
  • You may not edit your posts
  •