Free 186 More Best Homemade Tools eBook:  
Get tool plans

User Tag List

Page 6 of 9 FirstFirst 1 2 3 4 5 6 7 8 9 LastLast
Results 51 to 60 of 87

Thread: Milling machine - video

  1. #51
    Supporting Member SteelCraft's Avatar
    Join Date
    Sep 2021
    Location
    Poland
    Posts
    66
    Thanks
    25
    Thanked 114 Times in 54 Posts

    SteelCraft's Tools
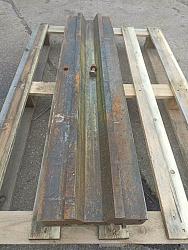
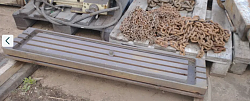
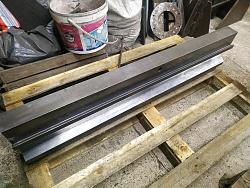
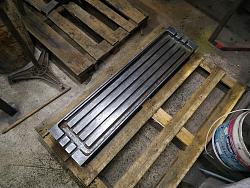
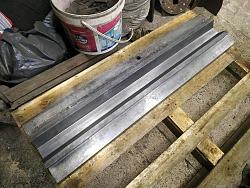
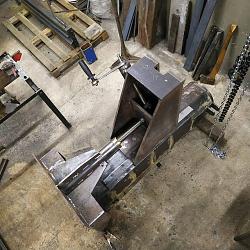
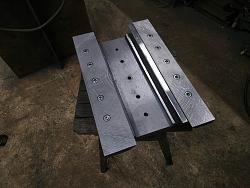
    I bought a t-slot table for my milling machine. Table is from Polish Jarocin FWC25 milling machine. Dimension of the table are very simmilar to my drawings (20mm longer and 10mm wider)

    Some photos before and after cleaning:

    Milling machine - video-395900600_2051595415196998_5128739900395679387_n-2-.jpgMilling machine - video-st.png
    Milling machine - video-371529679_1072045670471477_3632451062305099339_n.jpg
    Milling machine - video-398028019_2008992349472610_2775695430247407850_n.jpg
    Milling machine - video-397084841_661975765916580_8575266079490222775_n.jpg

    I also managed to finish Z axis guide. Cause of problem was last bolt on the bottom. Bolt was twisting end of the right dove tail. This is why it seemed to be wider. I drilled bigger hole and now everything is fine.
    Download plans for milling tools.
    Last edited by SteelCraft; Nov 2, 2023 at 05:46 PM.

  2. The Following User Says Thank You to SteelCraft For This Useful Post:

    mwmkravchenko (Nov 3, 2023)

  3. #52
    Supporting Member mwmkravchenko's Avatar
    Join Date
    Nov 2017
    Location
    Perth Ontario Canada
    Posts
    1,042
    Thanks
    5,238
    Thanked 394 Times in 280 Posts
    Quote Originally Posted by SteelCraft View Post
    I bought a t-slot table for my milling machine. Table is from Polish Jarocin FWC25 milling machine. Dimension of the table are very simmilar to my drawings (20mm longer and 10mm wider)

    Some photos before and after cleaning:

    Click image for larger version. 

Name:	395900600_2051595415196998_5128739900395679387_n (2).jpg 
Views:	88 
Size:	286.9 KB 
ID:	46447Click image for larger version. 

Name:	st.png 
Views:	80 
Size:	726.1 KB 
ID:	46448
    Click image for larger version. 

Name:	371529679_1072045670471477_3632451062305099339_n.jpg 
Views:	81 
Size:	482.8 KB 
ID:	46450
    Click image for larger version. 

Name:	398028019_2008992349472610_2775695430247407850_n.jpg 
Views:	81 
Size:	470.9 KB 
ID:	46449
    Click image for larger version. 

Name:	397084841_661975765916580_8575266079490222775_n.jpg 
Views:	81 
Size:	486.0 KB 
ID:	46451

    I also managed to finish Z axis guide. Cause of problem was last bolt on the bottom. Bolt was twisting end of the right dove tail. This is why it seemed to be wider. I drilled bigger hole and now everything is fine.
    You saved so much work with buying that table. And good that you found the cause of your problems on the Z axis. Soon Milling!

    Mark
    Download plans for milling tools.

  4. #53
    Supporting Member SteelCraft's Avatar
    Join Date
    Sep 2021
    Location
    Poland
    Posts
    66
    Thanks
    25
    Thanked 114 Times in 54 Posts

    SteelCraft's Tools
    Quote Originally Posted by mwmkravchenko View Post
    You saved so much work with buying that table
    More than month for sure

    Also whole build plan has changed. Instead of making ram guides and lifting whole machine to vertical position I will make table carriage first. Then I will temporary weld it to main body then milling head will be attached to the knee and bang I have 3 axis milling machine to make other parts of final milling machine

    Now I'm waiting for Christmas to implement this plan.

    Chain hoist will be necessary...

  5. The Following User Says Thank You to SteelCraft For This Useful Post:

    mwmkravchenko (Nov 4, 2023)

  6. #54
    Supporting Member SteelCraft's Avatar
    Join Date
    Sep 2021
    Location
    Poland
    Posts
    66
    Thanks
    25
    Thanked 114 Times in 54 Posts

    SteelCraft's Tools
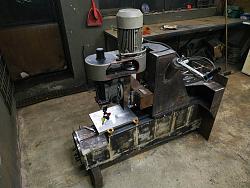
    As I said in previous post I managed to weld knee to the carriage and then attach milling head.

    Milling machine - video-frezarka-1.jpg

    This is how current setup looks like:

    Milling machine - video-412626523_267860672709844_214918891836757724_n.jpg

    Spindle was squared to Z axis guides. Ready for table guides milling operation.

  7. The Following User Says Thank You to SteelCraft For This Useful Post:

    mwmkravchenko (Jan 3, 2024)

  8. #55
    Supporting Member mwmkravchenko's Avatar
    Join Date
    Nov 2017
    Location
    Perth Ontario Canada
    Posts
    1,042
    Thanks
    5,238
    Thanked 394 Times in 280 Posts
    Soon you will be making parts on your milling machine! It is looking better and better. So many things you have learned to get this far!

  9. #56
    Supporting Member SteelCraft's Avatar
    Join Date
    Sep 2021
    Location
    Poland
    Posts
    66
    Thanks
    25
    Thanked 114 Times in 54 Posts

    SteelCraft's Tools
    Saddle of my mill is almost ready.

    Top surface of the guides is milled parallel to the bottom surface of base plate. Ability of milling is huge improvement in comparison to grinding with angle grinder and scraping. I used rotary table as third axis of movement for the set up from my previous post.

    Milling machine - video-428241635_816716093623227_5644552423666031819_n.jpg

    I still have to make plates for mounting lead screw nuts and cut oil grooves etc.

    Bearing brackets for table. One is bigger because I wanted extra space for installing an electric power feed unit.
    Milling machine - video-427887843_848656873701707_2806854464548814249_n.jpg

  10. The Following User Says Thank You to SteelCraft For This Useful Post:

    mwmkravchenko (Feb 20, 2024)

  11. #57
    Supporting Member SteelCraft's Avatar
    Join Date
    Sep 2021
    Location
    Poland
    Posts
    66
    Thanks
    25
    Thanked 114 Times in 54 Posts

    SteelCraft's Tools
    Part 12 is out!


  12. The Following 3 Users Say Thank You to SteelCraft For This Useful Post:

    mwmkravchenko (Feb 25, 2024), nova_robotics (Feb 27, 2024), Ralphxyz (Mar 2, 2024)

  13. #58
    Supporting Member SteelCraft's Avatar
    Join Date
    Sep 2021
    Location
    Poland
    Posts
    66
    Thanks
    25
    Thanked 114 Times in 54 Posts

    SteelCraft's Tools
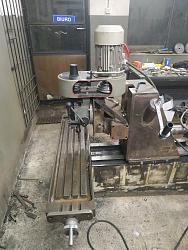
    Madness of temporary setups continues. This time this is fully operational 3 axis milling machine which will make rest of parts needed to it's final form
    Milling machine - video-1.jpg

    Only downside is distance between center of spindle and the knee. It's extended very far and bends 0.15 [mm] under weight of my body. This is why 50 [mm] diameter face mill doesn't work well at this moment.

  14. The Following User Says Thank You to SteelCraft For This Useful Post:

    mwmkravchenko (Feb 29, 2024)

  15. #59
    Supporting Member SteelCraft's Avatar
    Join Date
    Sep 2021
    Location
    Poland
    Posts
    66
    Thanks
    25
    Thanked 114 Times in 54 Posts

    SteelCraft's Tools
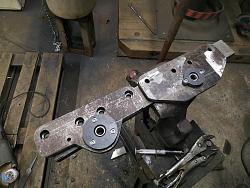
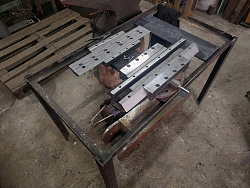
    Ram and Y axis guides are almost ready. I wish I had machine like that in the beginning of the project

    What left to do?
    I have to scrape them and machine bottom surface of the Ram to flatness. After final assembly basically this will be the end of "mechanical" part of the whole project. Then the "electrical" part will start.
    Milling machine - video-1g.png

  16. #60
    Supporting Member mwmkravchenko's Avatar
    Join Date
    Nov 2017
    Location
    Perth Ontario Canada
    Posts
    1,042
    Thanks
    5,238
    Thanked 394 Times in 280 Posts
    Quote Originally Posted by SteelCraft View Post
    Ram and Y axis guides are almost ready. I wish I had machine like that in the beginning of the project

    What left to do?
    I have to scrape them and machine bottom surface of the Ram to flatness. After final assembly basically this will be the end of "mechanical" part of the whole project. Then the "electrical" part will start.
    Click image for larger version. 

Name:	1g.png 
Views:	62 
Size:	2.87 MB 
ID:	47321
    This looks simple. But, there is a large amount of work in this picture. Seeing your video will be very nice!

    Mark

  17. The Following User Says Thank You to mwmkravchenko For This Useful Post:

    SteelCraft (Apr 5, 2024)

Thread Information

Users Browsing this Thread

There are currently 8 users browsing this thread. (0 members and 8 guests)

Bookmarks

Posting Permissions

  • You may not post new threads
  • You may not post replies
  • You may not post attachments
  • You may not edit your posts
  •