Free 186 More Best Homemade Tools eBook:  
Get tool plans

User Tag List

Results 1 to 9 of 9

Thread: Measuring the depth in a hole…

  1. #1
    Supporting Member Okapi's Avatar
    Join Date
    Mar 2013
    Location
    Switzerland
    Posts
    222
    Thanks
    346
    Thanked 132 Times in 76 Posts

    Okapi's Tools

    Measuring the depth in a hole…

    It is always a problem when you have no surface and no place for a common tool like a kaliper or a depth caliper.

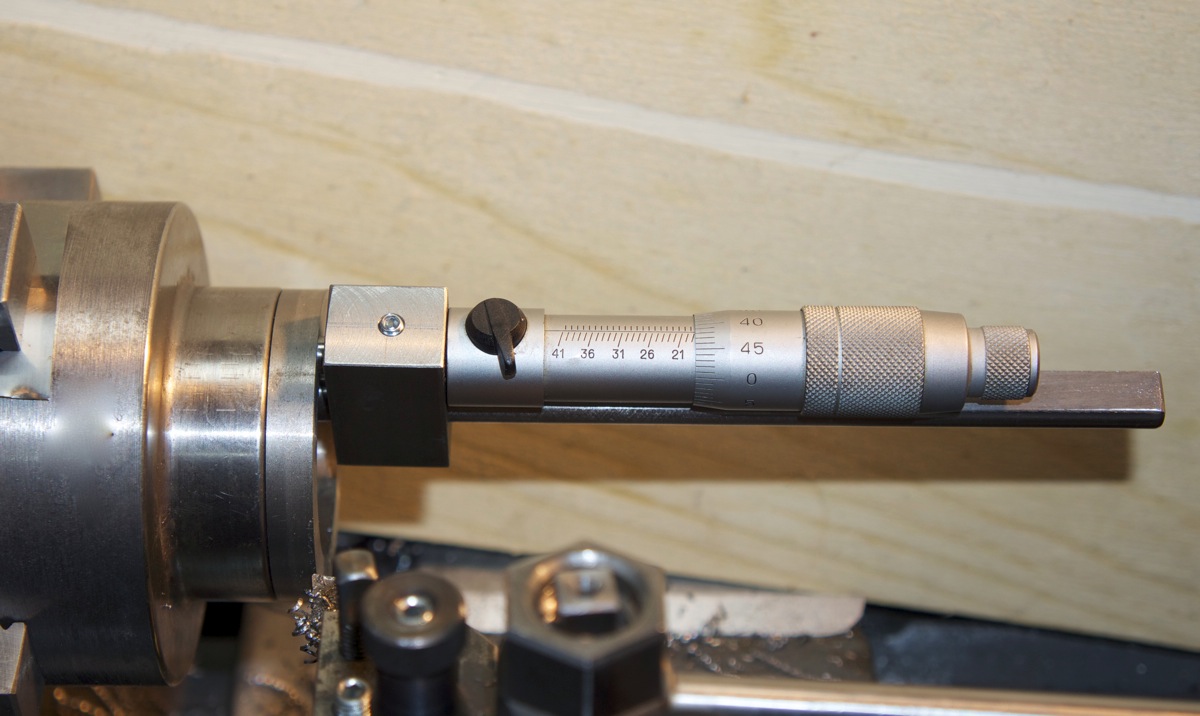
    Then last week when I have three particular pieces to modify, changing the Schaublin 38mm. thread by a M40X3 with an insert, and a result which does be in less than a tenth millimeter error, I find the solution with that tool, it's easy to understand how it works, you can use it with a micrometer or just with the moving piece.

    You take the measurement in the tool with a classical caliper, and use the micrometer next to make the finish, or you can adjust the micrometer on somethig like a bearing and use it like a normal micrometer.
    I hope my explanations are not too hard to understand and will be happy if that can solve a problem for you.

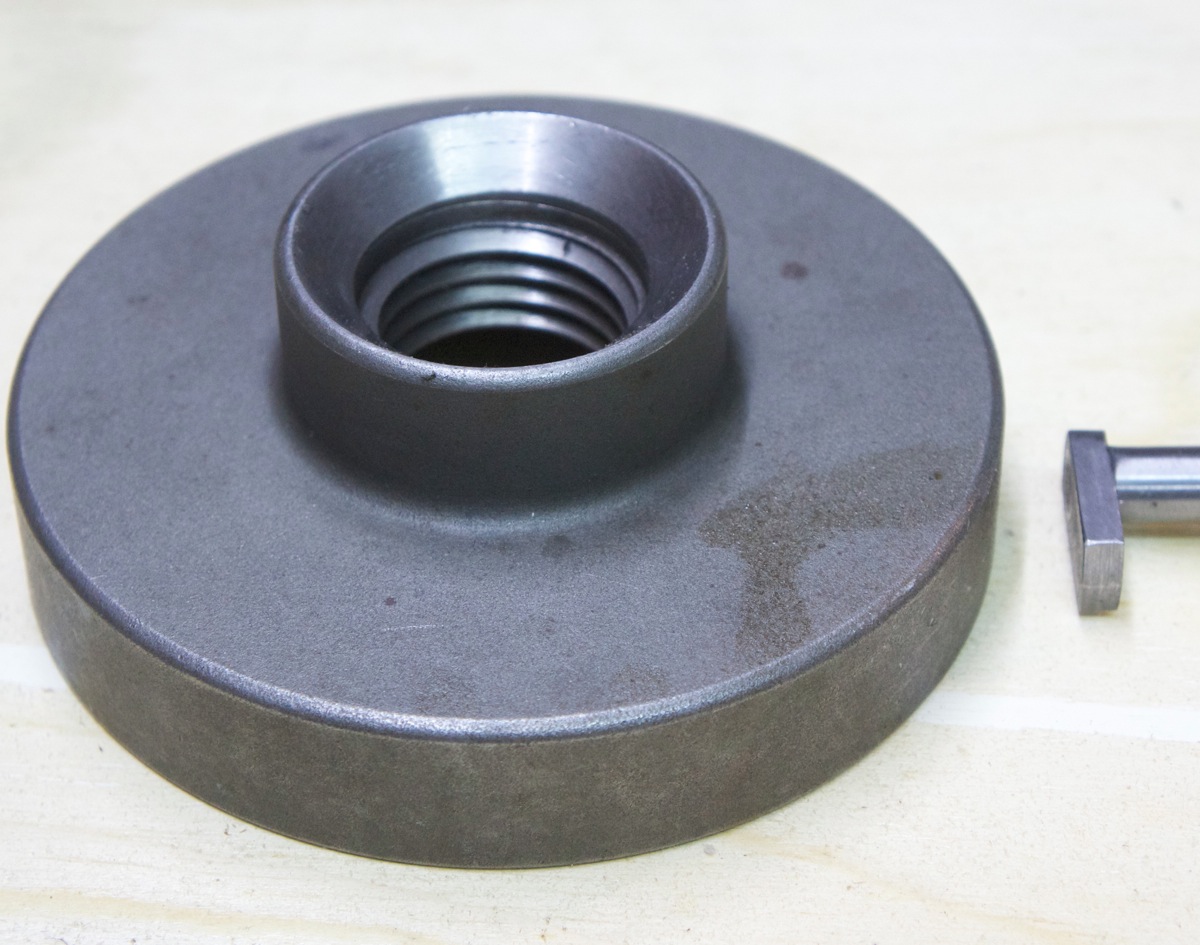
    One of the pieces i modify.


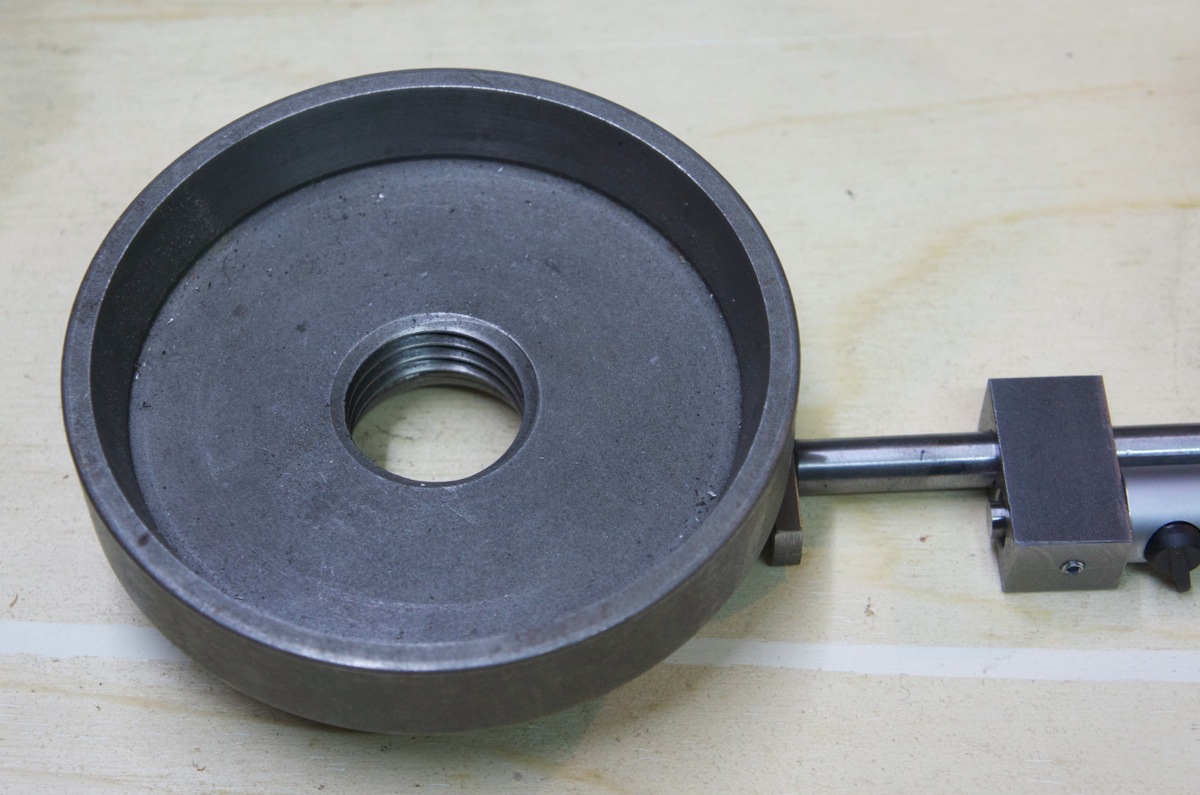
    The inside view.


    And the new tool.


    On the lathe.
    Download plans for height and depth gauges.

  2. The Following 6 Users Say Thank You to Okapi For This Useful Post:

    12L14 (Jul 31, 2019), kbalch (May 9, 2014), olderdan (Jun 24, 2019), Paul Jones (Aug 13, 2014), Scotsman Hosie (Jun 22, 2019), Toolmaker51 (Jun 23, 2019)

  3. #2
    kbalch's Avatar
    Join Date
    Jun 2012
    Location
    Clermont, FL
    Posts
    5,034
    Thanks
    2,275
    Thanked 532 Times in 384 Posts
    Thanks Okapi! I've added your Depth Gauge to our Measuring and Marking and Machining categories, as well as to your builder page: Okapi's Homemade Tools. Your receipt:

    Download plans for height and depth gauges.

  4. #3
    Supporting Member Paul Jones's Avatar
    Join Date
    May 2014
    Location
    Del Mar, California
    Posts
    1,231
    Thanks
    5,810
    Thanked 1,459 Times in 657 Posts

    Paul Jones's Tools

    Great idea with your design

    I like the design and have considered making something similar but for limited use. I think I may start out with something simpler that won't have the micrometer head attached but will have a pin of the same diameter as the micrometer shank and have the measuring end reduced in diameter. I will substitute gage blocks to measure the gap distance between the moving end and the fixed pin.

  5. #4
    Supporting Member Okapi's Avatar
    Join Date
    Mar 2013
    Location
    Switzerland
    Posts
    222
    Thanks
    346
    Thanked 132 Times in 76 Posts

    Okapi's Tools
    The micrometer head is really not expensive, they come from control department which are going to electronical measurment system.

  6. #5
    Supporting Member schor's Avatar
    Join Date
    Jul 2014
    Location
    Ajax
    Posts
    35
    Thanks
    6
    Thanked 39 Times in 15 Posts

    schor's Tools
    Nice job Okapi. I really like the design.

    Is the foot (not sure what you call it) removable so you can interchange it with different sizes as may be required?
    Steve
    Check out MyShopNotes on YouTube.

  7. #6
    Supporting Member Okapi's Avatar
    Join Date
    Mar 2013
    Location
    Switzerland
    Posts
    222
    Thanks
    346
    Thanked 132 Times in 76 Posts

    Okapi's Tools
    Thanks Schor,
    The foot is totally independent then you can use any form you want, this one is fixed but another bar is made in minutes if needed(I have three others made for special applications).
    As you need a the beginnig a calibration when it's not just a comparative use, the form is not important, all you want, it's just a basis for the measurment, not a fuctional piece.

  8. #7
    kbalch's Avatar
    Join Date
    Jun 2012
    Location
    Clermont, FL
    Posts
    5,034
    Thanks
    2,275
    Thanked 532 Times in 384 Posts
    This thread has been moved to the Must Read subforum. Congrats (and thanks) to Okapi for making such a valuable contribution!

  9. #8
    Supporting Member Toolmaker51's Avatar
    Join Date
    Feb 2016
    Location
    Midwest USA
    Posts
    5,334
    Thanks
    7,044
    Thanked 3,011 Times in 1,900 Posts

    Toolmaker51's Tools
    I like it too. Once a common micrometer measurement is made and a cut taken, that measurement becomes somewhat irrelevant. Your tool addresses that perfectly being a comparator, and either re-zeroing to monitor change [reduction]; or calibrate to Jo-blocks validate approach to finished size.
    Very good!
    Sincerely,
    Toolmaker51
    ...we'll learn more by wandering than searching...

  10. #9
    Supporting Member Okapi's Avatar
    Join Date
    Mar 2013
    Location
    Switzerland
    Posts
    222
    Thanks
    346
    Thanked 132 Times in 76 Posts

    Okapi's Tools
    Thanks Toolmaker, I've made a lot of specific supports for special measurements and it always function perfectly with a precision in one hundred for a small price, just a little work for the most appropriate way.
    I use too the inverted measure micrometer in the same manner for other parts when measuring a inner space in a hole.


    Download plans for height and depth gauges.

  11. The Following User Says Thank You to Okapi For This Useful Post:

    Toolmaker51 (Jun 24, 2019)

Thread Information

Users Browsing this Thread

There are currently 1 users browsing this thread. (0 members and 1 guests)

Bookmarks

Posting Permissions

  • You may not post new threads
  • You may not post replies
  • You may not post attachments
  • You may not edit your posts
  •