Free 186 More Best Homemade Tools eBook:  
Get 2,500+ tool plans, full site access, and more.

User Tag List

Results 1 to 9 of 9

Thread: Making a skip bolt some call it a shoulder bolt

  1. #1
    Supporting Member Frank S's Avatar
    Join Date
    Aug 2015
    Location
    Peacock TX
    Posts
    11,715
    Thanks
    2,228
    Thanked 9,207 Times in 4,399 Posts

    Frank S's Tools

    Making a skip bolt some call it a shoulder bolt

    There are times when the exact size skip bolt or shoulder bolts simply do no exist off the shelf or if they do they are special order.
    For a project I am working on I don't need precision ground and hardened bolts but I do need a shoulder.
    There are a few ways to accomplish this 1 would be to start from scratch with a piece of hex stock then machine out the bolt as required.
    Another way would be to slide a length of tubing over the bolt which in my case would have worked just fine, but I opted for a third way
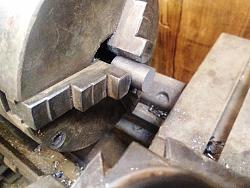
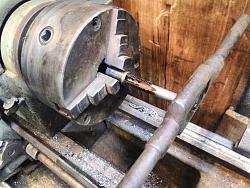
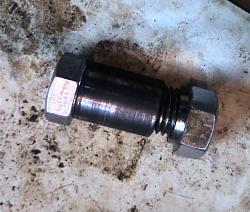
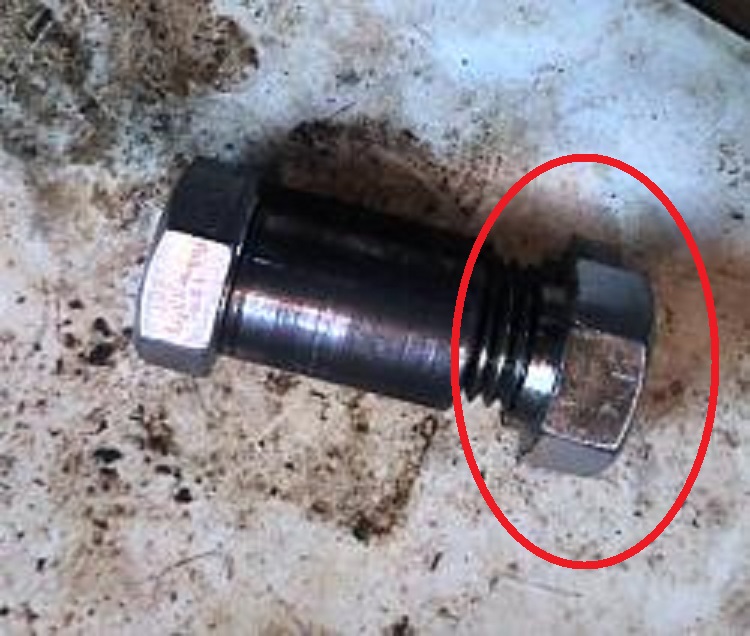
    By drill and taping a piece of round stock turning to desired length then screwing it onto the bolt.
    Making a skip bolt some call it a shoulder bolt-img_20211015_182410bh.jpg
    Making a skip bolt some call it a shoulder bolt-img_20211015_200459bh.jpg
    I purposefully drilled 1 size over size to make the taping easier
    Making a skip bolt some call it a shoulder bolt-img_20211015_200827bh.jpg
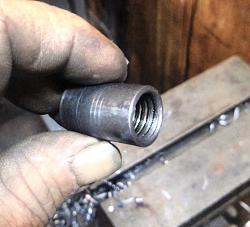
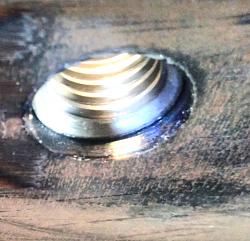
    I also turned a step on the nut for locating it in the hole
    Making a skip bolt some call it a shoulder bolt-img_20211015_201256bh.jpg
    Making a skip bolt some call it a shoulder bolt-img_20211015_181702bh.jpg
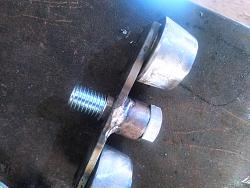
    The shoulder on the bolt protrudes beyond the wheel mounting plate to lock against the nut welded into the member
    Making a skip bolt some call it a shoulder bolt-img_20211015_181652bh.jpg
    the trolley truck is free to rotate about the shoulder
    while the shoulder being tightened against the nut and centered to the hole side ways stresses and movement is all but eliminated
    Making a skip bolt some call it a shoulder bolt-img_20211015_182015bh.jpg

    186 More Best Homemade Tools eBook
    Last edited by Frank S; Oct 16, 2021 at 01:07 PM.
    Never try to tell me it can't be done
    When I have to paint I use KBS products

  2. The Following 10 Users Say Thank You to Frank S For This Useful Post:

    baja (Oct 19, 2021), chevy3755 (Oct 17, 2021), Jon (Oct 21, 2021), KustomsbyKent (Oct 18, 2021), metric_taper (Oct 18, 2021), mr mikey (Jan 24, 2024), mwmkravchenko (Oct 18, 2021), ranald (Oct 29, 2021), rebuilder1954 (Oct 19, 2021), Saltfever (Nov 2, 2021)

  3. #2
    Content Editor
    Supporting Member
    DIYer's Avatar
    Join Date
    Aug 2013
    Posts
    3,055
    Thanks
    796
    Thanked 1,895 Times in 1,690 Posts


    Thanks Frank S! We've added your Shoulder Bolt to our Fastening category,
    as well as to your builder page: Frank S's Homemade Tools. Your receipt:


    2,500+ Tool Plans
    New plans added on 01/03/2025: Click here for 2,682 plans for homemade tools.

  4. #3
    Supporting Member metric_taper's Avatar
    Join Date
    Mar 2017
    Location
    Marion, Iowa
    Posts
    628
    Thanks
    242
    Thanked 270 Times in 164 Posts

    metric_taper's Tools
    I guess I'm confused by your shoulder bolt, it seems your more making a sturdy threaded extension of the trolley truck pivot so that the hole does not elongate or rotate from the perpendicular mounting you want. I guess in my narrow view a shoulder bolt is used as a pivot axis for some other part in a machine.

    I've made shoulder bolts via a fourth way (sorta your first method starting with raw hex stock), start with the next bolt size larger, machine the threads off, and any shank of unthreaded down to the hex head of the shoulder diameter you want, then machine the length of the OD for thread pitch you need, leaving the desired shoulder length, single point it or use a thread die.

    I typically will support the bolt with the tail stock and a center drilled into the end of the bolt.

    It should be interesting to see what your making with all these jigs and fixture posts of late.

  5. #4
    Supporting Member Frank S's Avatar
    Join Date
    Aug 2015
    Location
    Peacock TX
    Posts
    11,715
    Thanks
    2,228
    Thanked 9,207 Times in 4,399 Posts

    Frank S's Tools
    Quote Originally Posted by metric_taper View Post
    I guess I'm confused by your shoulder bolt, it seems your more making a sturdy threaded extension of the trolley truck pivot so that the hole does not elongate or rotate from the perpendicular mounting you want. I guess in my narrow view a shoulder bolt is used as a pivot axis for some other part in a machine.

    I've made shoulder bolts via a fourth way (sorta your first method starting with raw hex stock), start with the next bolt size larger, machine the threads off, and any shank of unthreaded down to the hex head of the shoulder diameter you want, then machine the length of the OD for thread pitch you need, leaving the desired shoulder length, single point it or use a thread die.

    I typically will support the bolt with the tail stock and a center drilled into the end of the bolt.

    It should be interesting to see what your making with all these jigs and fixture posts of late.
    The trolley truck allowed to pivot on the shoulder of the bolt, since after the bolt is tightened into the locating hole the truck still has a few thou. clearance.
    The reason for the step nut being welded in place it to provide a land or a stop if you will to provide a positive locking location for the bolt this pilots the shoulder as well placing the threads of the bolt in tension and not shear. There is no possible way for movement other than rocking pivoting motion on behalf of the trolley truck
    Never try to tell me it can't be done
    When I have to paint I use KBS products

  6. The Following User Says Thank You to Frank S For This Useful Post:

    Toolmaker51 (Oct 24, 2021)

  7. #5
    Supporting Member Frank S's Avatar
    Join Date
    Aug 2015
    Location
    Peacock TX
    Posts
    11,715
    Thanks
    2,228
    Thanked 9,207 Times in 4,399 Posts

    Frank S's Tools
    Quote Originally Posted by metric_taper View Post
    It should be interesting to see what your making with all these jigs and fixture posts of late.
    You possibly could get an early viewing of it at SEMA in Vegas this year if I can burn enough late night oil to get it done in time
    Never try to tell me it can't be done
    When I have to paint I use KBS products

  8. #6
    Supporting Member Saltfever's Avatar
    Join Date
    Apr 2012
    Location
    NorCal
    Posts
    410
    Thanks
    406
    Thanked 146 Times in 104 Posts

    Saltfever's Tools
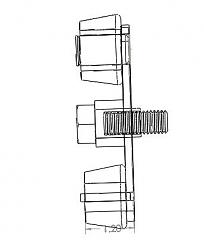
    Frank, it looks interesting and quite useful but could you please sketch a cross-section of the assembly?

  9. #7
    Supporting Member Frank S's Avatar
    Join Date
    Aug 2015
    Location
    Peacock TX
    Posts
    11,715
    Thanks
    2,228
    Thanked 9,207 Times in 4,399 Posts

    Frank S's Tools
    Quote Originally Posted by Saltfever View Post
    Frank, it looks interesting and quite useful but could you please sketch a cross-section of the assembly?
    here you are
    Making a skip bolt some call it a shoulder bolt-tapered-roller-assemblty32.jpg
    Never try to tell me it can't be done
    When I have to paint I use KBS products

  10. #8
    Supporting Member Saltfever's Avatar
    Join Date
    Apr 2012
    Location
    NorCal
    Posts
    410
    Thanks
    406
    Thanked 146 Times in 104 Posts

    Saltfever's Tools
    Hi Frank: Thanks for your fast reply and my apologies for my slow response. Its been a rough past few days!

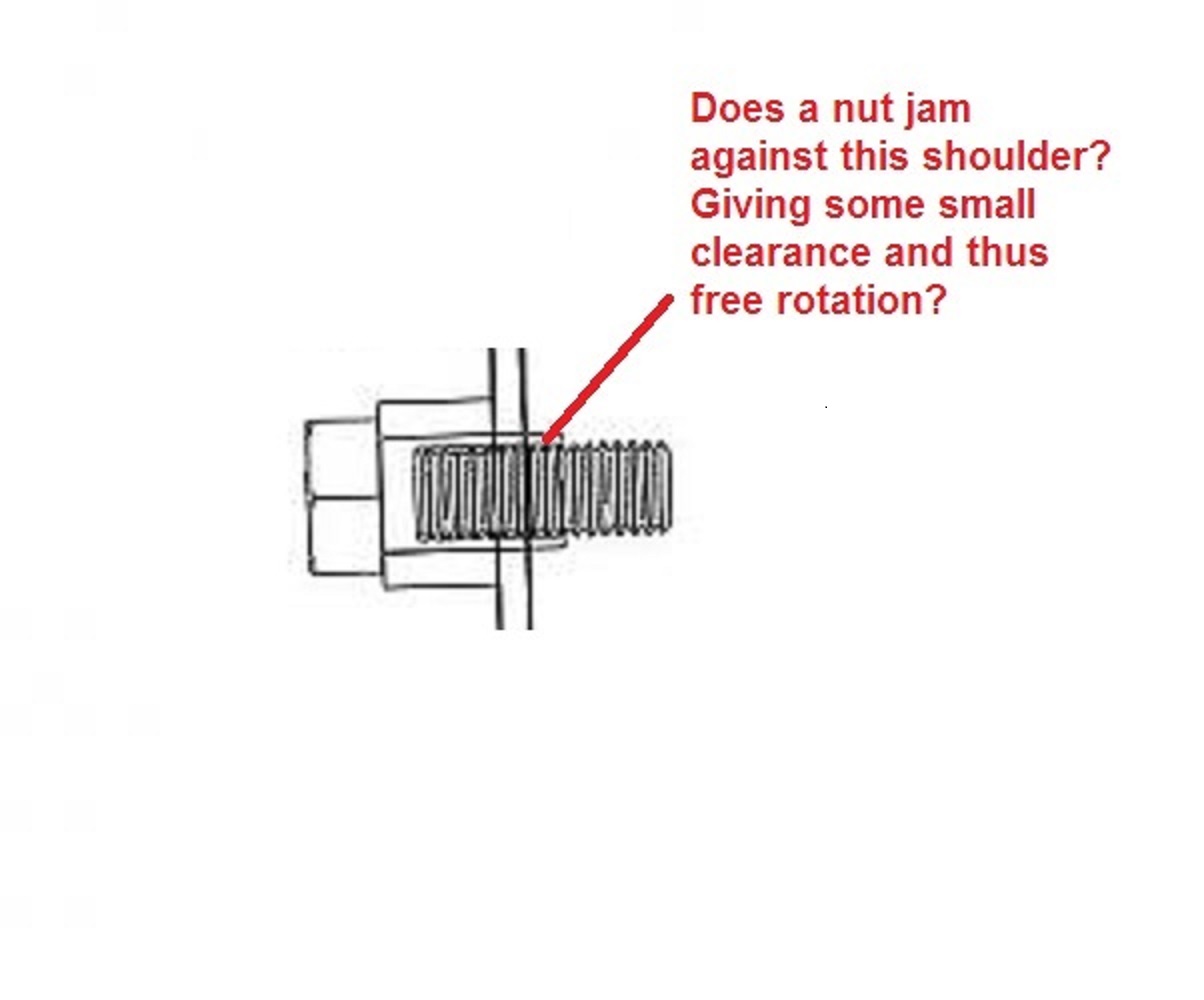
    Sorry for the persistent questions. I'm still trying to find the nut with a shoulder and how it locks in place and still give freedom of rotation.

    Click image for larger version. 

Name:	nut.jpg 
Views:	707 
Size:	132.7 KB 
ID:	40982


    It appears to have more flexibility in design compared to a shoulder bolt. Is the sleeve free to turn or is it locked in place?

    Click image for larger version. 

Name:	roller assembly.JPG 
Views:	701 
Size:	76.9 KB 
ID:	40983

  11. #9
    Supporting Member Frank S's Avatar
    Join Date
    Aug 2015
    Location
    Peacock TX
    Posts
    11,715
    Thanks
    2,228
    Thanked 9,207 Times in 4,399 Posts

    Frank S's Tools
    Quote Originally Posted by Saltfever View Post
    Hi Frank: Thanks for your fast reply and my apologies for my slow response. Its been a rough past few days!

    Sorry for the persistent questions. I'm still trying to find the nut with a shoulder and how it locks in place and still give freedom of rotation.

    Click image for larger version. 

Name:	nut.jpg 
Views:	707 
Size:	132.7 KB 
ID:	40982


    It appears to have more flexibility in design compared to a shoulder bolt. Is the sleeve free to turn or is it locked in place?

    Click image for larger version. 

Name:	roller assembly.JPG 
Views:	701 
Size:	76.9 KB 
ID:	40983
    the nut has a short shoulder to pilot into the hole then it is welded to the structural member, the shoulder of the bolt pilots into the hole as well this insures any side loading is carried by the shoulder of the bolt.
    I could have just slid a sleeve over a bolt just as well but I wanted the assembly to be dead ridged and centered to another truck assembly.
    the truck assembly is free to rotate on the shoulder in the space between the head of the bolt and the structural member
    Actually rotate is a misnomer it would be more like oscillate since there will be almost zero movement having the bolt as the pivot in the truck assembly just assures that the rollers will be equally loaded with no single point loading of any 1 bearing possible


    2,500+ Tool Plans
    Last edited by Frank S; Nov 7, 2021 at 06:45 PM.
    Never try to tell me it can't be done
    When I have to paint I use KBS products

Thread Information

Users Browsing this Thread

There are currently 1 users browsing this thread. (0 members and 1 guests)

Bookmarks

Posting Permissions

  • You may not post new threads
  • You may not post replies
  • You may not post attachments
  • You may not edit your posts
  •