My latest fabrication venture is this "key cutter/duplicator" attachment I made for my mini-lathe. The idea just popped into my head a few weeks ago so I had to run with it. Only took about 3 days. First job was to see if any others were out there for inspiration. A search on the net turned up 0 home made key cutters! I was surprised by that! Maybe there are a few out there somewhere but I couldn't find any...
You can buy small machines starting around $100 up to thousands of dollars to cut keys but that's no fun! I was looking for a new project anyway so I set out and researched all I could find on how they work. Some of these machines actually reminded me of very small metal lathe in design so I knew this would be easy. (and it really was)
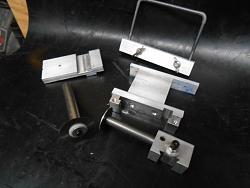
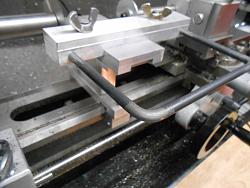
While my design changed a few times during the process, shown below is what I ended up with. It's made all from aluminum with a steel handle I formed from 1/4 hot rolled (might need to upgrade some of the sliding areas to brass later if it see's enough use or gets any wear)
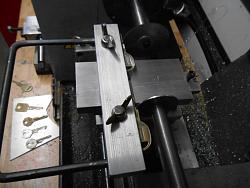
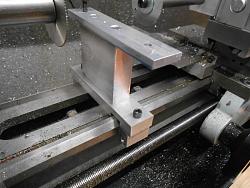
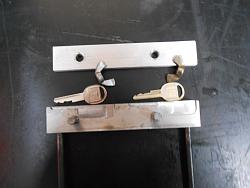
I opted to build the main stand so it mounted to the lathe bed ways. Initially I was going to have it all attached to the cross slide but there wasn't enough height room on mine to allow the dual cross slide table. The main support goes onto the bed very quickly with 2 cap screws to clamp it on. Then a small table slides on for the in/out movement with a set screw so I can never run the key clamp fixture into the cutter. The "key clamp" piece that the keys are clamped into simply slides left and right in a groove. A spritz of WD40 prior to each use makes all work nicely.
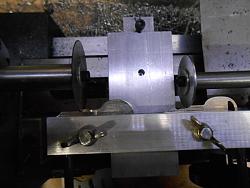
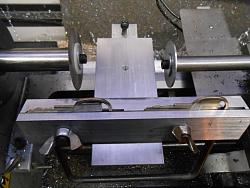
The cutter is just something I had in my drawer and never used for anything. It's a 2 inch 100 tooth cutter from Harbor Freight part #42805, pack of 3 for $9.99 It is designed to cut plastic and soft materials up to brass so it works well. (most keys are made of plated brass)
I built an arbor shaft for the blade and it mounts in a 3/4 inch collet so it runs nice and true. The "follower" is made from a thin washer (I have since thinned it down more than shown for more accurate cuts) It's mounted on a metal rod that goes into a home made tool holder for easy on/off. With this part on the cross slide, it makes it a breeze to line up the follower to the cutter position on the keys. In fact, the whole set up takes hardly no time to install and actually use.
While it may look a bit dangerous, it's really not bad, I've even added the handle so mine is safer! The blade has fine teeth so it's not too aggressive. It won't pull you in and fling you against the wall or anything.It even has that "key cutting machine" sound! It is a safe as a commercial built model. It runs at a slow RPM (a few hundred to guess) and you just work from the high areas down into the valleys. The key your cutting can never go any further into the blade than the follower allows. The deepest cut on these GM keys is .100 thousandths anyway so your not hogging out material by any means.
The very first key I cut was a success! It worked in the lock perfectly. (I did run a wire brush in a drill over the cuts to take any sharp spot off like they do when you get a key made at a store)
Part B:
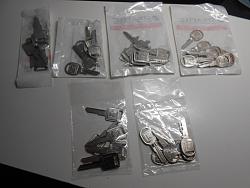
All of the above is fine for "duplicating" a key but you can't duplicate a worn out key. With proper depth and spacing keys (I bought a set for these older 6 cut GM keys) and a key code book, I can take the 4 digit code from any GM lock and use those to produce a brand new key! I'm only focused on the 1935-94 GM keys as I have a lot of antique cars & trucks. I've purchased a nice assortment of GM key blanks and will be making nice sharp keys for each of my vehicles. (the last time I had a Chevy dealer make them, they charged me $15 for 2 keys and I provided the blanks!)


 LinkBack URL
 About LinkBacks



 Reply With Quote


Bookmarks