Free 186 More Best Homemade Tools eBook:  
Get tool plans

User Tag List

Page 1 of 2 1 2 LastLast
Results 1 to 10 of 18

Thread: Home made ring roller, ongoing.

  1. #1
    Supporting Member
    Join Date
    Feb 2016
    Location
    England, UK.
    Posts
    27
    Thanks
    2
    Thanked 35 Times in 12 Posts

    AdrianH's Tools

    Home made ring roller, ongoing.

    I made a garden fence at home just using bought in basic twists, cages etc, it would have been nice to add a few more items such as rings with inlays, make my own shapes et al. So I looked at a ring roller, now there are several out there one can buy, typically with everything in a frame where you pull the middle roller out to remove the completed ring, or another style with the rollers on the outside of the frame. This is the style I went for as I thought it could be more versatile.

    So I looked around on the Internet and looked at various designs, all generally based on Pyramid rolls, I checked what unused materials I had around in the garage and settles on a design using 100 x 100 x 4 mm wall box section.

    Without any drawings I just cut up the metal as shown below.


    Cut at an angle of 28 degrees, basically because that angle still allowed me to get the box in the vice and cut on the band-saw. Then welded to make the two sections and then the bases milled flat so it should sit flat and level.

    I had some CDS tube left over from the kit car build this has an internal diameter hole very slightly over 25mm, so as accurately as I could used the milling machine and 24 operations later had holes through the sides to fit the CDS tubes snugly into.


    I had to spend money now and buy some EN8 25mm bar from a online metal shop, £14 for 1 metre. I was also looking at bearings for the rollers. I originally looked at some needle roller bearings, 25mm internal with internal sleeves and 32mm external diameter, but with prices it would cost quite a bit to get four of them I thought I would need, so I settled on budget rollers and picked up 10 bearings 25mm internal, 47mm external diameters for £10.


    I visited an Engineering shop in Leyland and managed to get a length of 90 mm diameter EN3 bar for £10, and after some time on the lathe had my two idle rollers, they are 56mm wide.

    186 More Best Homemade Tools eBook
    Last edited by AdrianH; Aug 2, 2017 at 12:58 AM. Reason: Images have moved

  2. The Following 2 Users Say Thank You to AdrianH For This Useful Post:

    kbalch (Feb 23, 2016), Vyacheslav.Nevolya (Feb 26, 2016)

  3. #2
    Supporting Member
    Join Date
    Feb 2016
    Location
    England, UK.
    Posts
    27
    Thanks
    2
    Thanked 35 Times in 12 Posts

    AdrianH's Tools


    Next was to make the middle section and roller. This is again a piece of box section but with 4 lengths of 80 by 6mm thick bar front and back.

    Used some cardboard off a cornflake box to give me a little bit of play so the unit will slide up and down, 3 bits in there so probably around 15 thou padding put in when compressed!


    There are 16 x M8 countersunk screws with Ny-locks keeping it in place front and back.
    I also had to figure a way of locking the middle roller to the bar, this could well end up with holes drilled and grub screws and I have no easy way to make a key-way.
    In the end I went back to the engineering shop I picked up the steel from and had a key-way cut in the roller using their broaching set. small cost but worth it. I milled a key-way slot in the shaft.

    2,000+ Tool Plans
    Last edited by AdrianH; Aug 2, 2017 at 12:58 AM. Reason: images have moved

  4. #3
    Supporting Member
    Join Date
    Feb 2016
    Location
    England, UK.
    Posts
    27
    Thanks
    2
    Thanked 35 Times in 12 Posts

    AdrianH's Tools
    The downside to this whole thing is there are no bearings in the middle section, I am going to rely on grease, or slide way oil, in the tube and see how it performs.

    I have milled a few flats in the end of the shaft/rod tonight to accept a 21mm socket. The idea eventually to weld a ring to the socket or large spider to the socket to act as a handle.


    M20 threaded bar is pressing down on to a thrust bearing on to a piece of angle, the angle because of the vertical section should not bend. I small bolt goes through to the underside and has a large washer, this should mean I can pull up the middle section with the M20. A cut down M20 nut sits on to of the thrust washer and the nut is tack welded into place.

    On top of the frame is a 8 mm thick bar with a hole in it to pass the threaded bar and a nut fully welded on to this. This should allow me to wind down and up to change the pinch on any bar I am rolling.
    Sorry no pictures showing how it went together.
    Last edited by AdrianH; May 25, 2017 at 02:07 PM.

  5. #4
    Supporting Member
    Join Date
    Feb 2016
    Location
    England, UK.
    Posts
    27
    Thanks
    2
    Thanked 35 Times in 12 Posts

    AdrianH's Tools
    I had a small length of 30 x 8 mm bar to try it on so here goes.


    And the final picture, with the ends cut off, and welded up.


    The inside diameter is approx 10 & 1/2 inches or 266 mm'ish and definitely is the smallest I could do as the unit stands now. It was quite difficult to move the ends out of the way when rolling, or they get caught on the roller when they come around. there is approx 3 inches, 75mm of waste at each end of the ring that needs to be trimmed.

    Sorry that the pictures are a bit fuzzy, that is what I get using the smart phone!

    Up to this point I am using a 1/2 inch drive ratchet to turn the middle roller, and it is time to have a more aesthetic solution, and a nice round ring handle is what I am going for. To do this I need to be able to roll round tube, so more lathe work and make another middle roller. The tube I have is 19 mm diameter, 2 mm wall. So I need to machine a groove in this. So here is my version of the popular internal radius cutter.


    The body was made using a piece of 3/4 inch plate I had, milled down to a rough size for the lathe tool holder. An old 1/2 inch bolt, hole drilled through it for a 6mm piece of HSS and clamped in place with a M6 cap head drilled and tapped from the top.

    Then to make it easy to turn a drilled out M10 tacked on the top. It will probably get a tidy up as some point but it works for now.

    Then with my new roller in the lathe I turned the groove.


    Above is the new middle roller on the ring roller, I have space there to add a 1 inch groove. I had to cut my own key-way in this so a small tool was made to fit my boring bar head and used in the lathe capstan like a shaper.
    Last edited by AdrianH; May 25, 2017 at 02:40 PM.

  6. The Following 2 Users Say Thank You to AdrianH For This Useful Post:

    KARLITOS (Nov 21, 2016), rlm98253 (Nov 26, 2017)

  7. #5
    Supporting Member
    Join Date
    Feb 2016
    Location
    England, UK.
    Posts
    27
    Thanks
    2
    Thanked 35 Times in 12 Posts

    AdrianH's Tools
    So back to making the ring handle, approx 1.8 metres of tube and I end up with a 56 cm diameter ring after wastage of the end pieces.


    Took a bit to keep it straight and a bit of manual effort and then welding it up and then standing on various sections and it is not that bad.

    I need to add spokes and weld on to the 21 mm socket. Drill a hole in the end of the bar and thread it for a small bolt to hold the handle in place.

    More updates as I continue with this

    Adrian
    Last edited by AdrianH; May 25, 2017 at 02:31 PM.

  8. The Following User Says Thank You to AdrianH For This Useful Post:

    rlm98253 (Nov 26, 2017)

  9. #6
    Supporting Member
    Join Date
    Feb 2016
    Location
    England, UK.
    Posts
    27
    Thanks
    2
    Thanked 35 Times in 12 Posts

    AdrianH's Tools
    Update
    This is the handle welded up and bolted to the bar to stop it falling off in use. The spokes are 12 mm solid bar, left over from a fence.

    Over time I will make different rollers to try and match what ever I need to roll, but for now a completed project.


    Hope it helps some body.

    Adrian
    Last edited by AdrianH; May 25, 2017 at 02:54 PM.

  10. The Following 6 Users Say Thank You to AdrianH For This Useful Post:

    Christophe Mineau (Feb 26, 2016), Jon (Feb 24, 2016), kbalch (Feb 24, 2016), rlm98253 (Nov 26, 2017), Scrapper (Mar 3, 2016), Vyacheslav.Nevolya (Feb 26, 2016)

  11. #7
    kbalch's Avatar
    Join Date
    Jun 2012
    Location
    Clermont, FL
    Posts
    5,034
    Thanks
    2,275
    Thanked 532 Times in 384 Posts
    Very nice work, indeed!

    We'll get it added to the database directly.

    Ken

  12. #8
    Supporting Member
    Join Date
    Feb 2016
    Location
    England, UK.
    Posts
    27
    Thanks
    2
    Thanked 35 Times in 12 Posts

    AdrianH's Tools
    Thanks to all for the views to the thread and I hope, as a posted above it gives a bit of encouragement to build your own, or at least another idea to use.

    If I get chance to visit the steel stockists this weekend I will pick up some flat bar and do a simple video of the unit in use, depends on what plans have already been decided for me by the better half.

    Adrian

  13. The Following 2 Users Say Thank You to AdrianH For This Useful Post:

    rlm98253 (Nov 26, 2017), Scrapper (Mar 3, 2016)

  14. #9
    kbalch's Avatar
    Join Date
    Jun 2012
    Location
    Clermont, FL
    Posts
    5,034
    Thanks
    2,275
    Thanked 532 Times in 384 Posts
    Thanks Adrian! I've added your Ring Roller to our Ring Rollers category, as well as to your builder page: AdrianH's Homemade Tools. Your receipt:


  15. #10
    kbalch's Avatar
    Join Date
    Jun 2012
    Location
    Clermont, FL
    Posts
    5,034
    Thanks
    2,275
    Thanked 532 Times in 384 Posts
    Hi Adrian,

    A superb example of its type! Your Ring Roller is the 'Tool of the Week'!

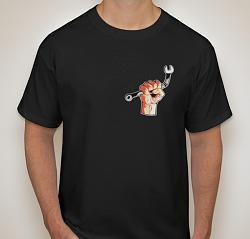
    You'll be receiving one of our official HomemadeTools.net T-shirts:

    Home made ring roller, ongoing.-black-shirt-front-actual-design.jpg Home made ring roller, ongoing.-black-shirt-rear-actual-design.jpg
    Home made ring roller, ongoing.-white-shirt-front-actual-design.jpg Home made ring roller, ongoing.-white-shirt-rear-actual-design.jpg

    Just let me have your details (size, color choice, and mailing address) via PM and we'll get things processed directly.

    Congrats!

    Ken

  16. The Following User Says Thank You to kbalch For This Useful Post:

    skypilot (Aug 7, 2019)

Thread Information

Users Browsing this Thread

There are currently 1 users browsing this thread. (0 members and 1 guests)

Bookmarks

Posting Permissions

  • You may not post new threads
  • You may not post replies
  • You may not post attachments
  • You may not edit your posts
  •