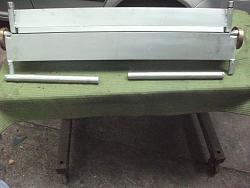
Pic #1 of the newly re-painted tool:-
I recently cosmetically refurbished (a fancy term for re-painting !) my 15 year old home made sheet metal folder and I thought this a good opportunity to do a post here, and also on YouTube, on it's construction, details and assembly. There are undoubtedly quite a lot of folder posts already on the Homemade Tools Forum but another one should not go amiss and it might inspire a reader to make one along these lines themselves. I've supplied only a few basic dimensions but I can add more on request.
The tool capacity is 800mm long x 1.25mm thickness in steel but will of course fold heavier gauges in aluminium or shorter lengths of 1.5mm steel sheet.
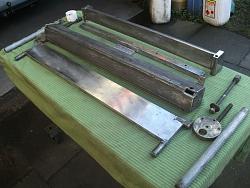
Pic#2:-
The main body was made from 80 x 80 x 6mm wall square section with one corner built up by welding a 5mm rod all the way along and then machining to give a square corner. End plates were welded on the ends to facilitate bolting and dowelling the bronze pivot bushes. Adjustable back stops were added to allow adjustment for different bend radii, and the hold down bolt holes slotted to accommodate the small movement.
The alloy plate you see is bolted to the back to provide a means of holding in the bench vice as I do not have floor space for the luxury of a dedicated floor stand.
Pic #3:-
The bushes were made from waste 5/8 inch thick part-offs of 3 1/2 inch aluminium bronze bar with 1 inch holes bored to suit the pivot stubs, (plus attachment and dowel holes).
The 'swinging anvil' (don't know what this piece is officially called !) was made from 4 inch x 1/2 inch bright mild steel, with the aforementioned 1 inch pivot (and handle attachment) stubs welded on.
PIC #4:-
The 'Clamping anvil' (again, don't know the proper name for this), was made up from 80 x 20mm hot rolled mild steel with the 1 inch x 1 1/2 inch 20 degree bevelled b.m.s. section attached with five 3/8 inch cap screws. (20 degrees is to allow for the worst case 'springback' scenario).
The long bolts were ex-car cylinder head 12mm diameter by 210mm long.
Pic #5:-
The quite heavy return springs fit into the blind holes shown and the detachable 'bayonet fitting' handles are just pieces of steam piping.
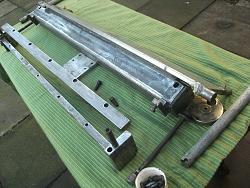
Pic #6
This shows the folder after re-painting and partially assembled. (Left the bushes unpainted because the tool is stored on it's end and they will get scraped on the ground, and anyway I think they look quite good just as they are !)
I have posted a video of this on YouTube as part of my series of videos on the theme of 'Handy Home Made Garage/Workshop Items & Tools' in which you can see the final assembly and a short demo. There might be a few other details that I've forgotten to mention here.
I hope this has been of interest - thanks.
The link is :-


 LinkBack URL
 About LinkBacks


 Reply With Quote


Bookmarks