Free 186 More Best Homemade Tools eBook:  
Get tool plans

User Tag List

Page 1 of 2 1 2 LastLast
Results 1 to 10 of 20

Thread: Getting the most from your Dremel

  1. #1
    Supporting Member mklotz's Avatar
    Join Date
    Aug 2015
    Location
    LA, CA, USA
    Posts
    3,527
    Thanks
    362
    Thanked 6,559 Times in 2,161 Posts

    mklotz's Tools

    Getting the most from your Dremel

    The Dremel is a wonderful, versatile tool in the hobbyist's workshop. While it's meant to be a hand-held tool, I often find it far more comfortable to bring the work to the tool rather than vice-versa.

    To that end, I built this jig to hold the tool.


    The plastic grip that clamps the Dremel was removed from a Dremel router attachment*. Without modification, it was attached to a baseplate - thus it can be returned to the router jig when needed. The baseplate has a 1/2" square aluminum 'backbone' which can be conveniently gripped in the bench vise when the tool is used.

    Attached to the end of backbone is a small adjustable table. In addition to sliding along the backbone, it can be adjusted in height and tilted to various angles. The table has a slot milled into it into which various sliding accessories can fit.

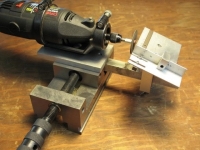
    This (staged) shot shows how the jig mounts in a vise (small vise used for clarity - my bench vise was too messy for photography) and how the accessory table tilts. Also, one of the sliding accessories is shown positioned on the tilting table.


    Here are some of the accessories. Bottom left is a cutoff guide. For cutting small rod, tubing or screws, the workpiece is held against the aluminum fence and the adjustable depth stop with the bit to be cut off projecting to the left. The whole assembly is then slid along the table guide groove into a cutoff disk mounted in the Dremel. Makes very nice neat, well-contolled cuts.

    Lower right is a sliding protractor table. The protractor arm is settable to a variety of angles and locks in place with a small brass pin. Angled cutoffs are possible with this although its primary use is, in concert with the table tilting, to produce compound angles on the 1/8" HSS specialty tool bits I grind for making obscure parts.


    The jig shown at the top is a sanding table. It attaches to the backbone as shown in the photo below,


    and a sanding drum projects up through the hole. When this is used, the backbone is held vertically in the vise and the plate through which the drum projects acts as a small table. By using very small sanding drums, this arrangement can do a lot of the work one might more conventionally use a filing machine to achieve.
    Shown in front is a bushing which reduces the diameter of the hole when smaller sanding drums are used. (Too much clearance around the drum can cause tiny parts to go walk-about.)

    -----------------
    * Since I built this, Dremel has marketed an accessory that consists of a tool holder that fits into a universal ball joint base (similar to a Panavise base).
    It may be easier to adapt this tool holder to the jig described above than use the holder from the router jig that I employed. Incidentally, this new accessory is quite useful in its own right, especially so for freehand activities like deburring.

    Get tool plans
    Last edited by mklotz; Jul 9, 2017 at 10:20 AM.
    ---
    Regards, Marv

    Failure is just success in progress
    That looks about right - Mediocrates

  2. The Following 29 Users Say Thank You to mklotz For This Useful Post:

    allenz (Dec 4, 2019), baja (Dec 4, 2019), benkeller3 (Oct 8, 2017), billster (Oct 9, 2017), blkadder (Oct 9, 2017), butlerandrew (Jan 28, 2023), Christophe Mineau (Sep 2, 2015), emu roo (Jun 13, 2024), FEM2008 (Dec 3, 2019), G.Paul (Oct 22, 2016), Guy Gadois (Oct 8, 2017), HobieDave (Jul 29, 2021), jjr2001 (Oct 10, 2017), Jon (Aug 31, 2015), kbalch (Aug 31, 2015), kngtek (Oct 8, 2017), matt_albitz (Dec 3, 2019), Moby Duck (Oct 22, 2016), mr mikey (Jan 22, 2024), oldcaptainrusty (Oct 8, 2017), Paul Jones (Sep 14, 2015), PJs (Sep 2, 2015), Seedtick (Oct 8, 2017), TEXACCA (Sep 3, 2015), Toolmaker51 (Oct 9, 2017), Tule (Oct 9, 2017), vit61 (Apr 2, 2017), winmac (May 26, 2024), wolle (Dec 5, 2019)

  3. #2
    kbalch's Avatar
    Join Date
    Jun 2012
    Location
    Clermont, FL
    Posts
    5,034
    Thanks
    2,275
    Thanked 532 Times in 384 Posts
    Thanks mklotz! I've added your Dremel Jig to our Rotary Tools category, as well as to your builder page: mklotz's Homemade Tools. Your receipt:


    2,000+ Tool Plans

  4. #3
    Mark Fogleman's Avatar
    Join Date
    Feb 2015
    Posts
    11
    Thanks
    33
    Thanked 21 Times in 5 Posts
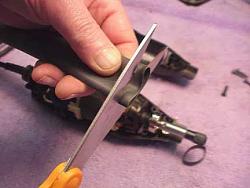
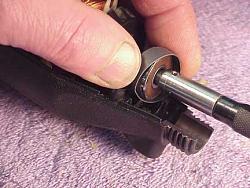
    Some readers probably think of the Dremel as a tool with too much slop in the frontend. You can fix that problem with some shrink tubing around the bearing race to make a tight fit as Frank Ford shows here: FRETS.COM

    Getting the most from your Dremel-drembear1.jpg
    Getting the most from your Dremel-drembear2.jpg

  5. The Following 9 Users Say Thank You to Mark Fogleman For This Useful Post:

    baja (Dec 4, 2019), DuayneI (Oct 9, 2017), kbalch (Sep 2, 2015), Metallurg33 (Mar 24, 2018), oldcaptainrusty (Oct 8, 2017), Paul Jones (Sep 5, 2015), PJs (Sep 2, 2015), TEXACCA (Sep 3, 2015), Tule (Oct 9, 2017)

  6. #4
    Supporting Member Christophe Mineau's Avatar
    Join Date
    Jul 2014
    Location
    France, Brittany !
    Posts
    913
    Thanks
    832
    Thanked 1,705 Times in 481 Posts

    Christophe Mineau's Tools
    Very nice jig set, well thought !

    I myself often use it on the lathe, using a jig to hold it on the tool post.
    The workpiece is hold in the lathe chuck (not spinning), and use the cross slides to approach precisely the piece.
    It covers most of my needs, but your jig is much more complete.

    Also did the same kind of mod as reported by Mark above, but I used a piece of inner tube wrapped around the bearing.

    Christophe
    Cheers !
    Christophe
    ________________________________________________________________
    Visit my Website : http://www.labellenote.fr/
    Facebook : La Belle Note
    All my personal works, unless explicitly specified, are released under
    Creative Commons BY-NC-SA license.

  7. The Following 4 Users Say Thank You to Christophe Mineau For This Useful Post:

    Moby Duck (Oct 22, 2016), Paul Jones (Sep 5, 2015), PJs (Sep 2, 2015), Tule (Oct 9, 2017)

  8. #5
    PJs
    PJs is offline
    Supporting Member PJs's Avatar
    Join Date
    Sep 2014
    Location
    Northern CA
    Posts
    1,844
    Thanks
    8,427
    Thanked 1,129 Times in 725 Posts

    PJs's Tools
    Really well thought out Marv! It's versatile, simple and easily adaptable to all sorts of tasks. Thanks for the Pan-Vice tip, will definitely take a look at that. One of the thing I seem to do a lot is cut of screws as I seem to never have the right length, no matter how many types and sizes I buy. This would be perfect for trimming to length!! The tilt table is a Gem. Thanks for sharing this clever setup!! ~PJ
    ‘‘Always do right. This will gratify some people and astonish the rest.’’
    Mark Twain

  9. The Following User Says Thank You to PJs For This Useful Post:

    Paul Jones (Aug 18, 2016)

  10. #6
    Supporting Member Paul Jones's Avatar
    Join Date
    May 2014
    Location
    Del Mar, California
    Posts
    1,231
    Thanks
    5,810
    Thanked 1,461 Times in 657 Posts

    Paul Jones's Tools
    Marv,
    I wish I had seen this design years ago because it is very useful for small part fabrications. Started with your design, I think it can be modified and expanded into many other capabilities using the affordable Dremel tool.

    I am thinking about using your sliding protractor table design on my diamond wheel tool grinder (with a 20% discount and free shipping offer I bought an inexpensive Enco version of the Baldor 6" model 522). The only difference with your protractor would be to add some more pin locations for the typical lathe tool relief angles. The Enco tool grinder has adjustable side tables with 12 x 4 mm slots that would be perfect for the sliding protractor to grind compound angles in the lathe carbide tools.

    Thank you for another one of your well thought out designs.

    Regards, Paul

  11. The Following 2 Users Say Thank You to Paul Jones For This Useful Post:

    Moby Duck (Oct 22, 2016), PJs (Apr 2, 2016)

  12. #7
    Supporting Member mklotz's Avatar
    Join Date
    Aug 2015
    Location
    LA, CA, USA
    Posts
    3,527
    Thanks
    362
    Thanked 6,559 Times in 2,161 Posts

    mklotz's Tools
    Yes, there are many ways to extend this design. There are plenty of opportunities to improve the existing design as well.

    For cutting screws to size, I've always meant to build a small lantern chuck to hold the screws and fit it with a bar to ride in the table slot. Still haven't found a round tuit but someday...

    Another thing to add is a rod that attaches to the backbone of the jig and is turned to fit into a Pana-Vise base if you have one of those very useful tools. Alternatively, you can hold the jig in the Pana-Vise but the rod arrangement makes for a more compact and stiff arrangement.

    The little protractor table is very handy indeed. I have its big brother on my bench grinder. That one has holes every five degrees. I coordinate drilled all the holes (no use of a rotary table) and, when I put it together, was very pleased to have the pin fall into each and every hole smoothly.

    I replaced the inadequate tool rests on the grinder with one long rest that spans the front of the grinder. The protractor table has a piece of angle screwed to its bottom that rides along this long rest. This keeps the table a fixed distance from the wheels yet allows easy side-to-side motion. The table is made of aluminum so that it serves as a giant heat sink for the object being ground.

    Don't tell the safety Nazis but the long rest extends out far enough on both sides that I can grind (very lightly) on the sides of the wheels when I need a flat surface. I don't do this often and only with very small parts that don't cause a lot of wheel wear. Larger flat surfaces are done on a disk/belt sander.
    ---
    Regards, Marv

    Failure is just success in progress
    That looks about right - Mediocrates

  13. The Following 3 Users Say Thank You to mklotz For This Useful Post:

    Moby Duck (Oct 22, 2016), Paul Jones (Apr 2, 2016), PJs (Apr 2, 2016)

  14. #8
    Wiljoy's Avatar
    Join Date
    Nov 2013
    Location
    Adelaide South Australia
    Posts
    1
    Thanks
    0
    Thanked 3 Times in 1 Post
    As a retired joiner-cabinet maker I recently bought a dremel rotary drill to enable me to do small jobs in my little workshop, i have found it extremely useful and it has made me wonder why I never acquired one during my working days. I am now going to experiment and find different things I can make jigs for.


    NEVER apprentice with anyone that doesn't have all 8 fingers & 2 thumbs.

  15. The Following 3 Users Say Thank You to Wiljoy For This Useful Post:

    Paul Jones (Aug 18, 2016), PJs (Aug 17, 2016), rgsparber (Oct 22, 2016)

  16. #9
    Supporting Member rgsparber's Avatar
    Join Date
    Nov 2012
    Location
    Phoenix, AZ
    Posts
    1,321
    Thanks
    778
    Thanked 2,840 Times in 670 Posts

    rgsparber's Tools
    Nicely done!

    Rick
    Rick

  17. #10
    Supporting Member
    Join Date
    Feb 2016
    Posts
    125
    Thanks
    22
    Thanked 21 Times in 19 Posts
    I have a 395 Dremel. I replaced countless switches the little circuit board always seams to fail. Is there a fix for that ?

Thread Information

Users Browsing this Thread

There are currently 1 users browsing this thread. (0 members and 1 guests)

Bookmarks

Posting Permissions

  • You may not post new threads
  • You may not post replies
  • You may not post attachments
  • You may not edit your posts
  •