Free 186 More Best Homemade Tools eBook:  
Get 2,500+ tool plans, full site access, and more.

User Tag List

Page 1 of 3 1 2 3 LastLast
Results 1 to 10 of 23

Thread: Fly cutter - first try

  1. #1
    Supporting Member Canobi's Avatar
    Join Date
    Mar 2016
    Location
    Shrewsbury, Shropshire (UK)
    Posts
    181
    Thanks
    92
    Thanked 364 Times in 98 Posts

    Canobi's Tools

    Fly cutter - first try

    Hi folks


    I've got a toolpost grinder project waiting for me to get a vice for my mill. I also need some specific tooling to perform some of the operations and felt inspired enough to have a go at making one or two of them.

    The main body of the grinder will need squaring up but I don't have a fly cutter in my shop yet, so I chose to make the fly cutter first.

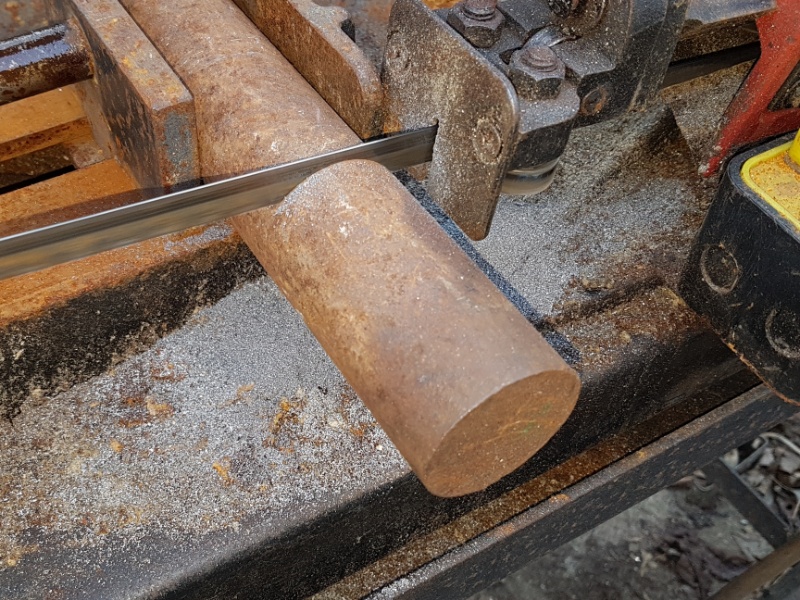
    I wanted a relatively chunky fly cutter so I grabbed some 1.3/4" mystery alloy steel bar I have (that's as much as I know about it, chips turn a very pretty blue which is my only clue to it being an alloy) and cut a piece off about 82mm in length:


    I then chucked it up in the lathe and faced the end, then measured a 30mm section on the faced end for the shaft and turned it down till it was just a shade over my target size of 17mm. I then flipped the part round, gave it skim cut to clean off the rust and faced it.

    At this stage I figured I would make it a round head fly cutter as it's my first attempt and there being less milling operations involved.

    I then worked out at what angle I wanted the cutting bit to be positioned and cut a taper on the end of part to match my chosen angle.

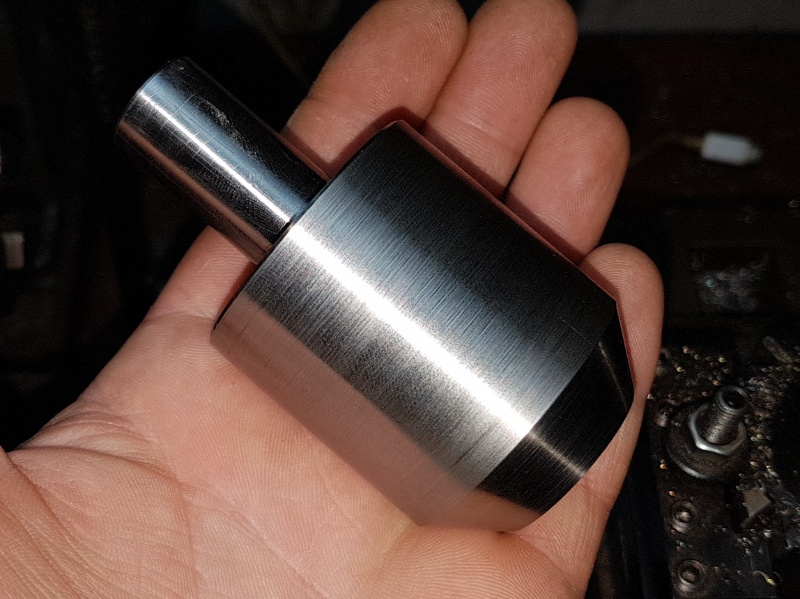
    After the taper was cut, I flipped it round to give the shank it's finishing cut, which I then polished with some oiled 250 grit wet n dry and finally buffed with some fine scotch bright:


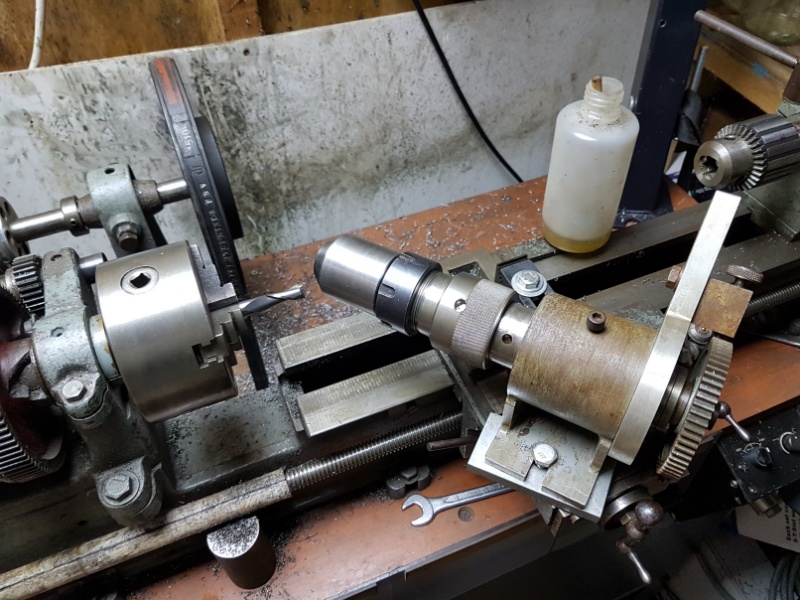
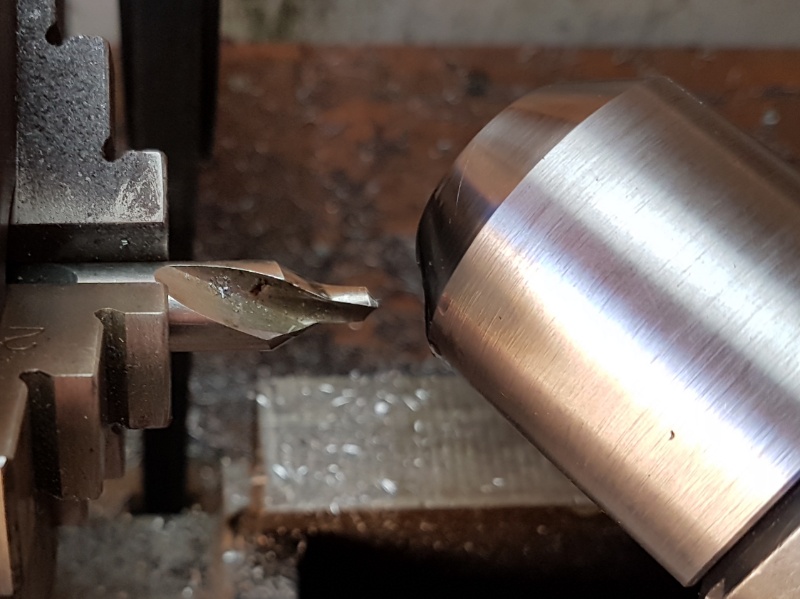
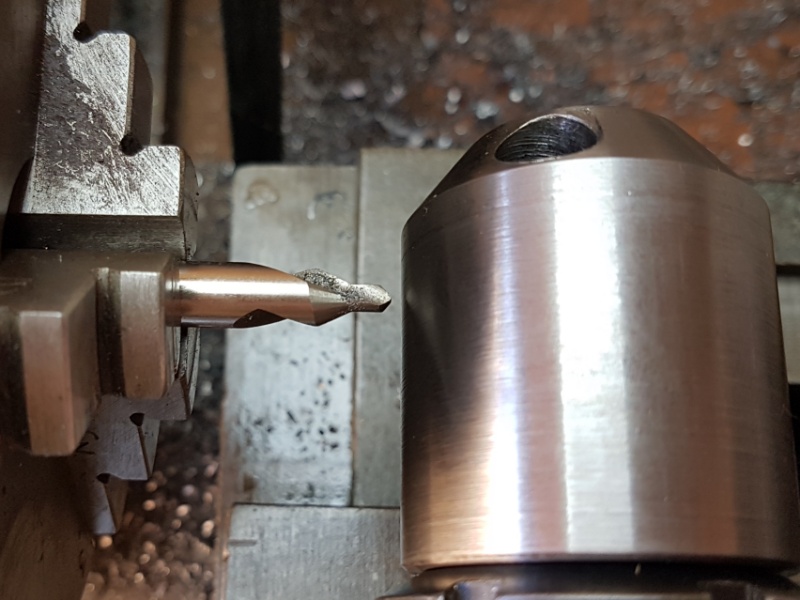
    My next move was to make the hole for the cutting bit. This I did on the lathe due to lack of a milling vice but had to get creative with the setup to achive the required angle and offset:


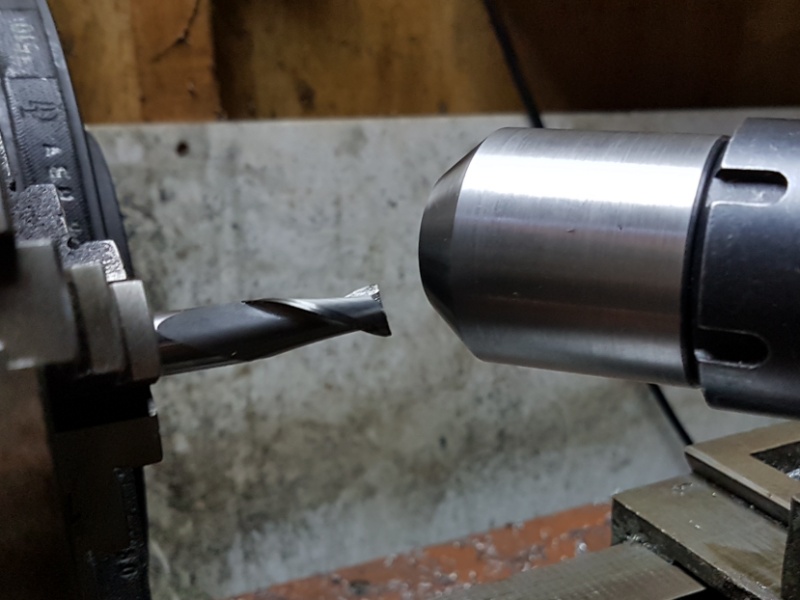
    Once it was set up and ready, if not a bit sketchy, I chucked up a 10mm carbide slot mill to make a flat for the spot drill:


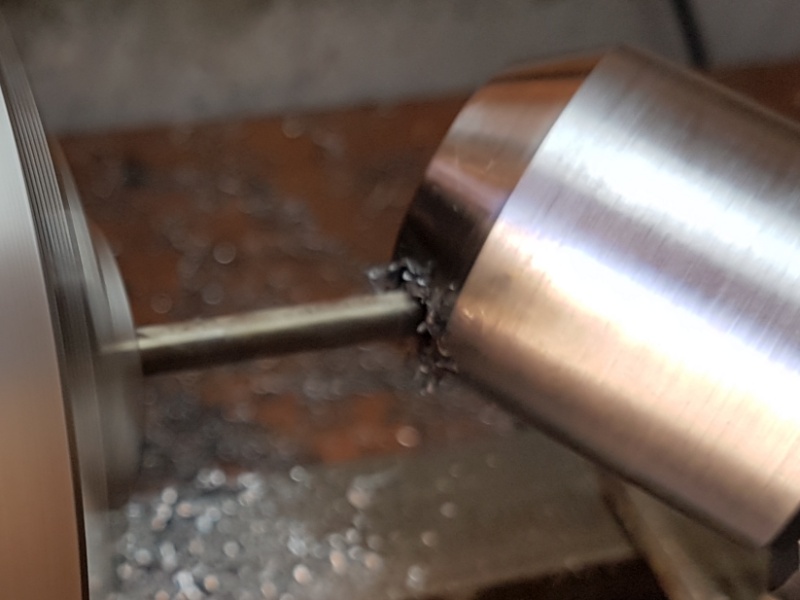
    I then used a smaller drill bit, the size of which was chosen at random, to make a pilot hole and then switched to a freshly ground 10mm drill bit to bring the hole to it's final size:


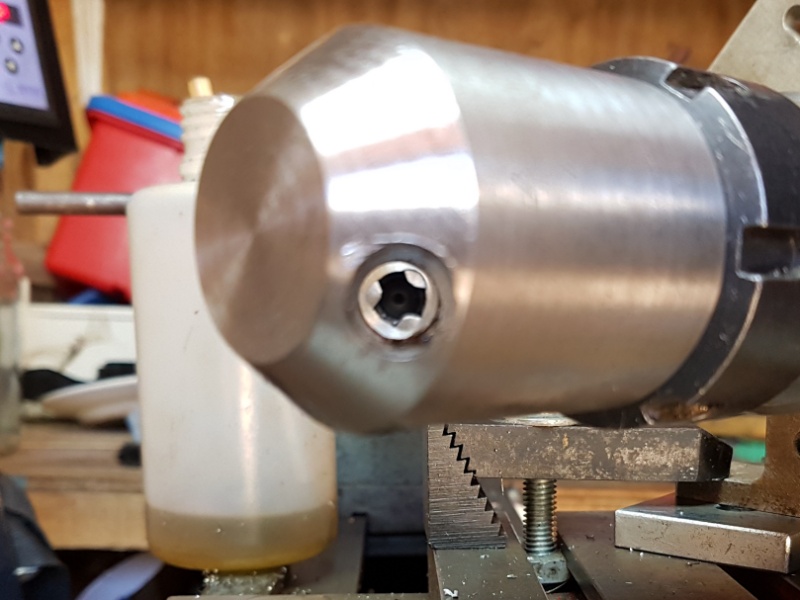
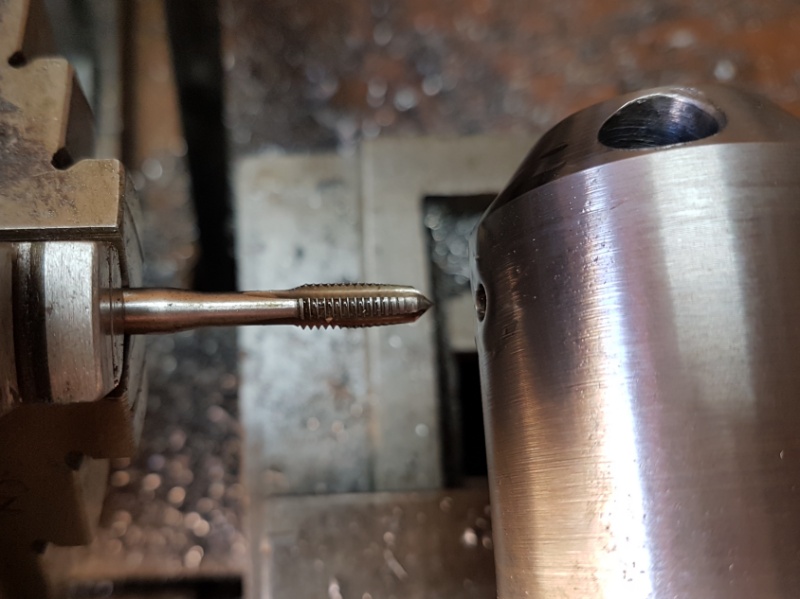
    With that job done, I indexed the head 45° and repositioned the setup to 90° in order to drill and tap an M5 hole in the side for a grub screw that will lock the cutter in position. Since the hole was on centre this time, a flat for the spot drill wasn't needed:


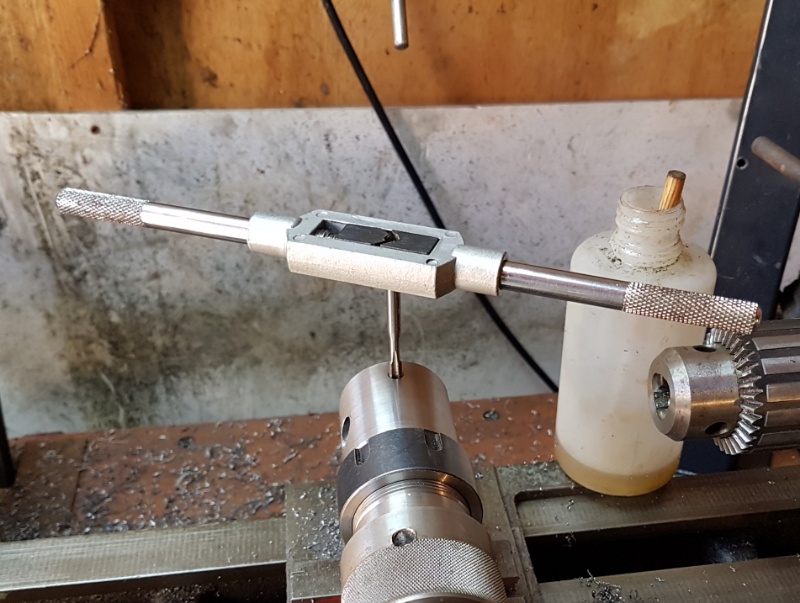
    I then chucked up an M5 tap and put my lathe in backgear for a bit of power tapping. To get a proper feel of things I feed the carriage by hand and utilise the VFDs forward and reverse function to break the chips as I go.


    Once the tap started slipping in the chuck (which they always seem to do), I released it from the jaws, backed the carriage away with the tap still in the work, then indexed the part another 45° so I could finish tapping by hand:


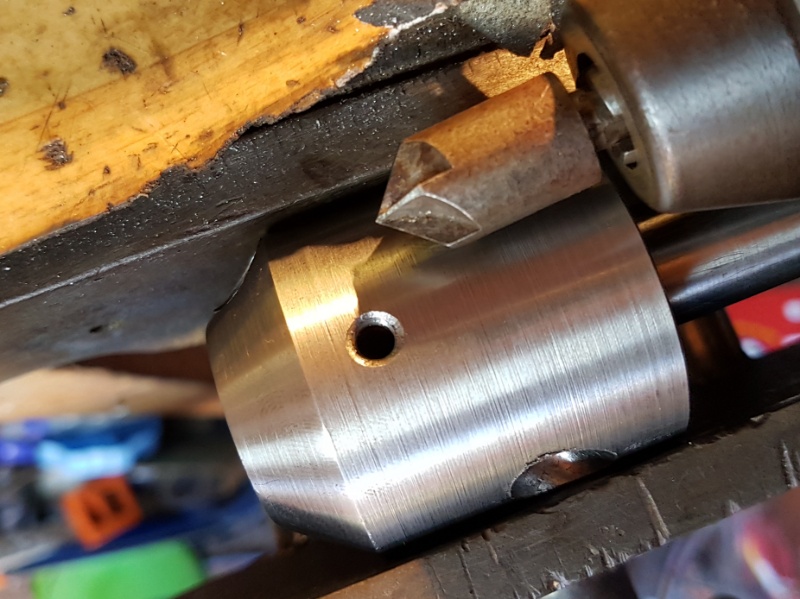
    After the hole was tapped, I removed tge piece from the ER chuck and used my cordless and a countersink bit to chamfer the edge and neaten it a little while it was clamped in my bench vice:


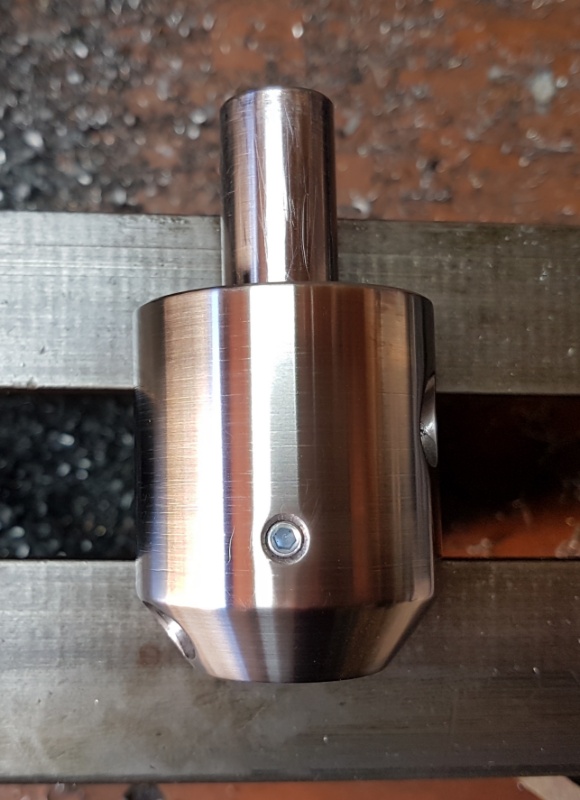
    After that was done, I put it back in the ER chuck which I put on the lathe spindle to give the rest of it the same polish and shine treatment I did on the shank:


    I still need to get some tool steel to make the cutting bit with but all in all I'm quite pleased with how it came out. If it actually works on testing, I'm going to knock out a couple more in different sizes to make a full set

    186 More Best Homemade Tools eBook
    It's not the destination but the journey you take to get there that matters.

  2. The Following 20 Users Say Thank You to Canobi For This Useful Post:

    Andyt (Nov 8, 2018), bigtrev8xl (Jul 21, 2018), emu roo (Jul 3, 2024), flyingsecret (Mar 4, 2018), jjr2001 (Feb 27, 2018), Jon (Feb 26, 2018), JRock (Nov 7, 2018), LMMasterMariner (Feb 27, 2018), MeJasonT (Nov 5, 2020), nova_robotics (Nov 4, 2020), olderdan (Feb 26, 2018), Paul Jones (Feb 26, 2018), PJs (Feb 26, 2018), rossbotics (Feb 27, 2018), Seedtick (Feb 26, 2018), spereira (Jul 25, 2018), Toolmaker51 (Feb 27, 2018), Tule (Feb 27, 2018), YOUCARS (Nov 9, 2020), zarembak (Nov 7, 2018)

  3. #2
    Supporting Member Paul Jones's Avatar
    Join Date
    May 2014
    Location
    Del Mar, California
    Posts
    1,231
    Thanks
    5,810
    Thanked 1,461 Times in 657 Posts

    Paul Jones's Tools
    Canobi,

    The fly cutter looks good and thank you for taking the time showing all the excellent photos and descriptions.

    Regards,
    Paul

    2,500+ Tool Plans

  4. #3
    Supporting Member Canobi's Avatar
    Join Date
    Mar 2016
    Location
    Shrewsbury, Shropshire (UK)
    Posts
    181
    Thanks
    92
    Thanked 364 Times in 98 Posts

    Canobi's Tools
    Not a problem, and thank you for the compliment
    It's not the destination but the journey you take to get there that matters.

  5. #4
    Supporting Member ncollar's Avatar
    Join Date
    Oct 2012
    Posts
    354
    Thanks
    23
    Thanked 181 Times in 126 Posts
    Canobi
    Very nice work and a tool you can be proud of. Please do not take it wrong but if you spin your countersink by hand it will produce a much smoother finish. I am convinced that you will make the set because of how good it works out.
    Nice machining and keep it coming
    Nelson

  6. The Following User Says Thank You to ncollar For This Useful Post:

    Paul Jones (Feb 27, 2018)

  7. #5
    Supporting Member aphilipmarcou's Avatar
    Join Date
    Dec 2016
    Location
    new zealand
    Posts
    58
    Thanks
    134
    Thanked 49 Times in 26 Posts

    aphilipmarcou's Tools
    Hi Canobi,
    Any specific angle for the cutter hole to be at?.

  8. #6
    Supporting Member ncollar's Avatar
    Join Date
    Oct 2012
    Posts
    354
    Thanks
    23
    Thanked 181 Times in 126 Posts
    Canobi
    I just made a big facing cutter. I need a cutter for it and not really sure what size I want to use. My thoughts were to put 4 cutters on it but to get then all in perfect setting would require a tool and cutter grinder. My dis was from 1 inch thick cool roll 5 inches in diameter. I cut the drive pin from an old bar bell weight bar. Cut down to .750 and bore the hole in the disc .004 smaller. I heated the disc on my turkey roaster until it was red hot, nice and slow. When it got there I took the pin out of a glass of frozen water and dropped it into the hole and gave one tap for good measures. When it got cold I put it in a ER32 .750 collet and it had warpped some but not much. Turned it and trued it up and it looks nice. I can not wait to slip a cutter to it. I'll get a pic tomorrow.
    Nelson

  9. The Following User Says Thank You to ncollar For This Useful Post:

    Paul Jones (Feb 27, 2018)

  10. #7
    Supporting Member rossbotics's Avatar
    Join Date
    Dec 2013
    Location
    Florida
    Posts
    731
    Thanks
    1,019
    Thanked 1,696 Times in 404 Posts

    rossbotics's Tools
    Turned out nice
    Comments are always welcome
    Doug

    Subscribe to my you tube channel

    https://www.youtube.com/channel/UCDD..._as=subscriber


    Tool Plans for Sale by rossbotics


  11. #8
    Supporting Member Canobi's Avatar
    Join Date
    Mar 2016
    Location
    Shrewsbury, Shropshire (UK)
    Posts
    181
    Thanks
    92
    Thanked 364 Times in 98 Posts

    Canobi's Tools
    Quote Originally Posted by ncollar View Post
    Canobi
    Very nice work and a tool you can be proud of. Please do not take it wrong but if you spin your countersink by hand it will produce a much smoother finish. I am convinced that you will make the set because of how good it works out.
    Nice machining and keep it coming
    Nelson
    Thank you for the compliment

    I went real slow with the cordless drill for chamfering but will take your advice and make a handle for the countersink so I can chamfer by hand. The finish never seems to come out well with the cordless anyway.
    It's not the destination but the journey you take to get there that matters.

  12. #9
    Supporting Member Canobi's Avatar
    Join Date
    Mar 2016
    Location
    Shrewsbury, Shropshire (UK)
    Posts
    181
    Thanks
    92
    Thanked 364 Times in 98 Posts

    Canobi's Tools
    Quote Originally Posted by aphilipmarcou View Post
    Hi Canobi,
    Any specific angle for the cutter hole to be at?.
    I didn't choose one, I just went for an angle that was useful but felt wouldn't put too much strain on the cutter as it was spinning (I chose to use a 10mm bit for this one as it would be more resistant to flexural forces). However, since you asked, it piqued my curiosity to find out and the angle is 40°.
    It's not the destination but the journey you take to get there that matters.

  13. #10
    Supporting Member Canobi's Avatar
    Join Date
    Mar 2016
    Location
    Shrewsbury, Shropshire (UK)
    Posts
    181
    Thanks
    92
    Thanked 364 Times in 98 Posts

    Canobi's Tools
    Quote Originally Posted by rossbotics View Post
    Turned out nice
    Thank you
    It's not the destination but the journey you take to get there that matters.

Thread Information

Users Browsing this Thread

There are currently 1 users browsing this thread. (0 members and 1 guests)

Bookmarks

Posting Permissions

  • You may not post new threads
  • You may not post replies
  • You may not post attachments
  • You may not edit your posts
  •