If you are like me, you probably have lots of scrap carbide, AKA broken end mills. They frequently break off at the junction of the cutter and the shank. If necessary you can cut worn out carbide end mills with an angle grinder to get the starting blank. For this project I started with a 1/4 inch diameter shank about 1 1/4 inches long. I have used these to engrave marble for a headstone, and smaller versions to engrave PCB material. Be sure to cover the ways and table on your milling machine before starting since the carbide dust produced will be very abrasive.
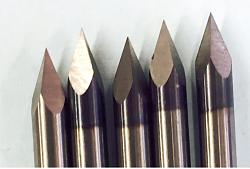
Here is what I want to have as a finished product.
Three sided pyramid engraving bits as shown on e-bay
The tool I use for this is a large diamond wheel from Harbor Freight, P/N 69658. The kit comes with three diamond wheels and mandrels. I use the larger wheel for grinding HSS and carbide cutters. The smaller wheel was used for this project.
To grind the 3 flat faces on the shank, mount it in an index head, rotated to the desired half angle for the cutter. For this tool I wanted a long sharp taper to engrave PCB material to make a circuit board. I wanted the angle shallow so it would not cut too wide of a slot. I selected a 10 degree half angle. For engraving marble I used a 30 degree half angle, and the tool showed no visible wear after quite a bit of use.
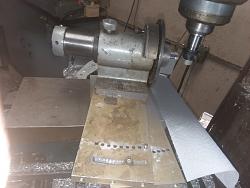
Index head mounted on milling machine, rotated 10 degrees. The carbide is mounted in a 5C collet protruding about 3/4 inch. You need enough stick-out to be able to move the wheel far enough from the point on the Y-axis without hitting the collet.
The diamond wheel is mounted in an ER-16 collet and run at about 2100 RPM. I centered the shank on the diamond wheel vertically, and took small cuts to avoid overheating the wheel. I moved the X-axis until it was removing about .005 inches of material, then moved the table in the Y-axis to make the flat. I removed about .075" of material, then rotated the index head 120 degrees and repeated the process, always stopping at the exact same X-axis value. Another 120 degree rotation and another set of light cuts, and the tool can be inspected. Keep repeating this until you have a sharp point on the carbide. My carbide blank was broken off at a slight angle, so it took a few iterations to get it done.
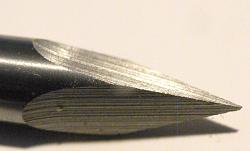
The carbide cutter as ground.
Close up of cutter tip
The surface has significant scratches due to the fairly coarse diamond grit on the wheel. This results in somewhat jagged edges on the tool. It probably would cut OK as is, but I used a finer diamond knife sharpening tool to remove some of the roughness and achieve a better sharp edge.
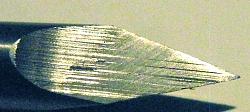
Improved surface finish on cutter
I could have spent a bit more time and achieved a better finish, but decided to see if it would cut as is.
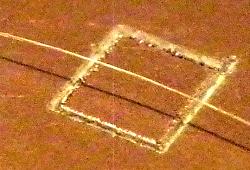
Copper PCB material cut with engraving bit. That is a human hair across the pad for size reference.
This will do what I want, so I call it good for now. I am including a photo of the headstone to show how this type tool cuts marble.
Headstone engraved with 30 degree bit.
The headstone is about 20 inches wide, and was carved using VCarve in BobCad Cam on my CNC miling machine.


 LinkBack URL
 About LinkBacks





 Reply With Quote


Bookmarks