Free 186 More Best Homemade Tools eBook:  
Get tool plans

User Tag List

Page 2 of 2 FirstFirst 1 2
Results 11 to 20 of 20

Thread: Clamp key and catch bar for Pollard tapping head

  1. #11
    Supporting Member tonyfoale's Avatar
    Join Date
    Nov 2016
    Location
    Spain
    Posts
    1,607
    Thanks
    721
    Thanked 2,706 Times in 726 Posts

    tonyfoale's Tools
    Quote Originally Posted by Canobi View Post
    Perdy ♡
    Intersting chuck head design, looks like the alignment screws for the clamp are still present too, so I removed the clamp from mine and took some pics, in case you, or anyone else that's missing theirs will have some kind of reference to make replacements.
    Many thanks, I have wondered what the two small screws were for on mine. However, I am at a loss to understand how the parts that you have shown will have any effect on mine. Like I said, the collet works fine as it is but it is quite obvious that something is missing. I am very puzzled.
    Any more info on yours would be welcomed.
    Download plans for clamps.

  2. #12
    Supporting Member Toolmaker51's Avatar
    Join Date
    Feb 2016
    Location
    Midwest USA
    Posts
    5,334
    Thanks
    7,044
    Thanked 3,011 Times in 1,900 Posts

    Toolmaker51's Tools
    Not only excellent photos, a perfect description of the parts and their interaction. I've known mechanical engineers who couldn't do as well.
    Download plans for clamps.
    Sincerely,
    Toolmaker51
    ...we'll learn more by wandering than searching...

  3. #13
    Supporting Member Canobi's Avatar
    Join Date
    Mar 2016
    Location
    Shrewsbury, Shropshire (UK)
    Posts
    181
    Thanks
    92
    Thanked 364 Times in 98 Posts

    Canobi's Tools
    Quote Originally Posted by tonyfoale View Post
    Many thanks, I have wondered what the two small screws were for on mine. However, I am at a loss to understand how the parts that you have shown will have any effect on mine. Like I said, the collet works fine as it is but it is quite obvious that something is missing. I am very puzzled.
    Any more info on yours would be welcomed.
    Admittedly, in your case it would only be cosmetic, I just saw the screws there and couldn't help but share the info as I daresay others have missing clamps too, even if it simply clears up a mystery as to what the big hole is for.

    I don't know much about my Pollard but I'll share info here as I find it. I may have only used mine once so far but I love it already ♡
    It's not the destination but the journey you take to get there that matters.

  4. The Following User Says Thank You to Canobi For This Useful Post:

    tonyfoale (Mar 4, 2018)

  5. #14
    Supporting Member Canobi's Avatar
    Join Date
    Mar 2016
    Location
    Shrewsbury, Shropshire (UK)
    Posts
    181
    Thanks
    92
    Thanked 364 Times in 98 Posts

    Canobi's Tools
    Quote Originally Posted by Toolmaker51 View Post
    Not only excellent photos, a perfect description of the parts and their interaction. I've known mechanical engineers who couldn't do as well.
    Thanks you very much indeed kind sir
    It's not the destination but the journey you take to get there that matters.

  6. #15
    Supporting Member tonyfoale's Avatar
    Join Date
    Nov 2016
    Location
    Spain
    Posts
    1,607
    Thanks
    721
    Thanked 2,706 Times in 726 Posts

    tonyfoale's Tools
    Canobi,

    I am not 100% clear on how yours works.
    It seems that you have some collets as does mine, tightened by the collar at the bottom, but the pieces that are missing from mine close up onto the square of the tap. Those pieces are free to float laterally for alignment. The collets hold the tap centrally and the other pieces ensure zero slip.
    Is that correct?
    I do sometimes have the tap slip. What is the largest tap shank that you can fit?

    BTW. Are you snowed in around your way?

  7. #16
    Supporting Member Canobi's Avatar
    Join Date
    Mar 2016
    Location
    Shrewsbury, Shropshire (UK)
    Posts
    181
    Thanks
    92
    Thanked 364 Times in 98 Posts

    Canobi's Tools
    Quote Originally Posted by tonyfoale View Post
    Canobi,

    I am not 100% clear on how yours works.
    It seems that you have some collets as does mine, tightened by the collar at the bottom, but the pieces that are missing from mine close up onto the square of the tap. Those pieces are free to float laterally for alignment. The collets hold the tap centrally and the other pieces ensure zero slip.
    Is that correct?
    I do sometimes have the tap slip. What is the largest tap shank that you can fit?

    BTW. Are you snowed in around your way?
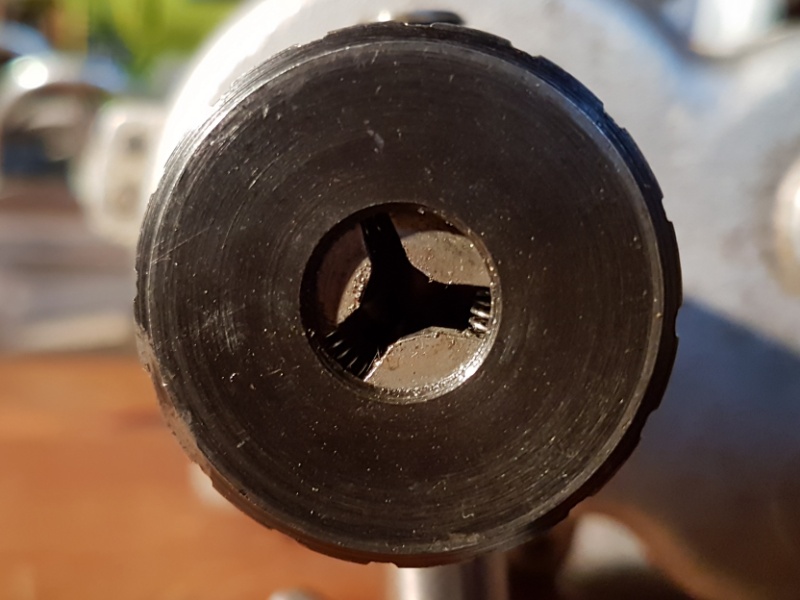
    No collets, mine has three spring loaded jaws:


    The rest is correct though, here is a pic of the clamp with a tap installed, largest I can fit in the chuck is M10:


    Yes, winter pulled a right Columbo on us, haven't seen snow drifts like it since I was a kid back in 82, where I was literally able to sledge from out of the upstairs bedroom window, those were the days...

    There were drifts reaching 6ft in some places this time and I got all exited so I broke out my snowboard again and took the kids out on a sledging trip, only to find the fields were hardly covered at all as it was mostly powder snow and we were having heavy winds at the time, most disappointing

    The snow is already beating a hasty retreat and should be totally gone by Tuesday, just the flash floods to get past now and we should be back to normal..
    It's not the destination but the journey you take to get there that matters.

  8. #17
    Supporting Member tonyfoale's Avatar
    Join Date
    Nov 2016
    Location
    Spain
    Posts
    1,607
    Thanks
    721
    Thanked 2,706 Times in 726 Posts

    tonyfoale's Tools
    Quote Originally Posted by Canobi View Post
    No collets, mine has three spring loaded jaws:
    Much the same.

    Quote Originally Posted by Canobi View Post
    The snow is already beating a hasty retreat and should be totally gone by Tuesday, just the flash floods to get past now and we should be back to normal..
    "Normal" is why I left the UK in 1987.

    Thanks for the extra pix. I'll make something to hold the squares. I'll check my taps to see if there is a limited number of square dimensions, if so then I'll broach some squares into pieces of rod with an OD equal to the large hole. If there seems no standard to the squares then I'll make something like you have.

  9. #18
    Supporting Member tonyfoale's Avatar
    Join Date
    Nov 2016
    Location
    Spain
    Posts
    1,607
    Thanks
    721
    Thanked 2,706 Times in 726 Posts

    tonyfoale's Tools
    My Ettco accepts up to 8 mm shanks so I measured the squares on all my 5, 6 and 8 mm taps and between them there were 7 sizes, 3 metric and 4 imperial even though they are metric taps. here is a list in order of size;
    5/32", 4 mm, 11/64, 3/16", 5 mm, 6 mm, 1/4"

    I have formed an idea for a simple single piece design for a square driver, which should solve the slipping problem that I get sometimes and only take 1/2 hour to make.

    My other tapping head, an AH made in the US, takes up to 1/2" shanks which means up to 12 mm for me.

  10. #19
    Supporting Member tonyfoale's Avatar
    Join Date
    Nov 2016
    Location
    Spain
    Posts
    1,607
    Thanks
    721
    Thanked 2,706 Times in 726 Posts

    tonyfoale's Tools

    Simple version of tapping head

    Quote Originally Posted by tonyfoale View Post
    I have formed an idea for a simple single piece design for a square driver, which should solve the slipping problem that I get sometimes and only take 1/2 hour to make.

    My other tapping head, an AH made in the US, takes up to 1/2" shanks which means up to 12 mm for me.
    Canobi,
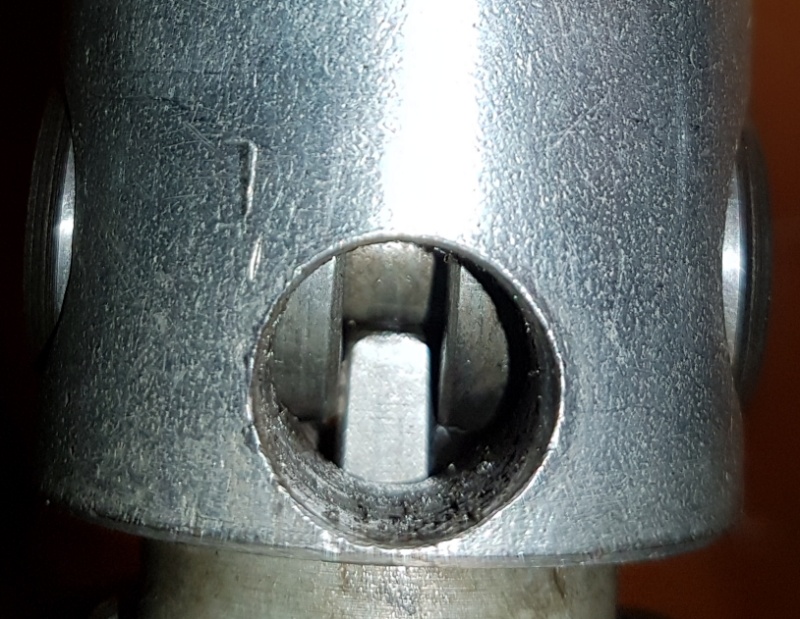
    Thanks to your pix and description I was inspired to make a positive drive on the tap squares. i didn't attempt to copy the stock setup that you have and I went for a very simple to make implementation.

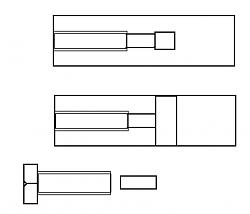
    1/4" is the largest square that I have measured on my 8 mm and smaller taps, so I broached a 1/4" square cross hole in a loose fitting bar. From one end I drilled a hole to take a plug that will bare on one side of the square clamping the tap end. I tapped the outer portion of the plug hole for a clamping bolt to push on the plug.

    Clamp key and catch bar for Pollard tapping head-tapping-head-03.jpg Click thumbnails for full size.
    Sketch showing the pieces.

    Clamp key and catch bar for Pollard tapping head-tapping-head-01.jpg Clamp key and catch bar for Pollard tapping head-tapping-head-02.jpg
    Photos of the actual implementation.

    As the bar is a loose fit in the tapping head it will self centre on the tap square but still provide a positive drive.

  11. The Following 4 Users Say Thank You to tonyfoale For This Useful Post:

    Canobi (Mar 5, 2018), rlm98253 (Mar 5, 2018), Seedtick (Mar 6, 2018), Toolmaker51 (Mar 5, 2018)

  12. #20
    Supporting Member Canobi's Avatar
    Join Date
    Mar 2016
    Location
    Shrewsbury, Shropshire (UK)
    Posts
    181
    Thanks
    92
    Thanked 364 Times in 98 Posts

    Canobi's Tools
    I like it, very neat take on the theme, kudos


    Download plans for clamps.
    It's not the destination but the journey you take to get there that matters.

Thread Information

Users Browsing this Thread

There are currently 1 users browsing this thread. (0 members and 1 guests)

Bookmarks

Posting Permissions

  • You may not post new threads
  • You may not post replies
  • You may not post attachments
  • You may not edit your posts
  •