I previously made a set of toolmakers mini jaws for a Yamakawa 80mm 3-jaw chuck. This is my original chuck for my 7” swing mini lathe and I added the mini jaws (see making the toolmaker mini jaws at Homemade Mini Toolmaker's Jaws - HomemadeTools.net ). However, the mini lathe is now equipped with an ER32 collet chuck and used primarily for small collet work.The 80mm chuck with the toolmaker mini jaws would be a great addition for my larger 12” swing geared-head lathe provided I could hold it with a precision mandrel.
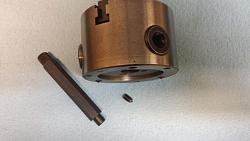
The 80mm 3-jaw chuck now has a mandrel machined from 1045 alloy carbon steel 3.25" round bar stock. The mandrel has an overall length of 3.3” and the shaft dimensions are 1.5” dia. x 2.5” long. The chuck is attached with three M6x1 studs and nuts on the larger end that is 3.150” dia.x 0.375” thick. In addition the larger end has a 0.110” deep step that inserts snuggly into a recess in the back of 80mm chuck. The three holes for the studs were located with M6x1 transfer screws and the holes are 0.257” dia. (Letter F drill). A 0.625” thru hole runs down the center of the mandrel and matches the maximum thru hole diameter in the 80mm chuck.
The Toolmaker mini jaws were re-ground after assembling the 80mm chuck with the mandrel and held in the 6” chuck. Before stating the jaw grinding, a small steel ring was used to pre-load the original (inner) chuck jaws and can be seen in the photos. A Dremel tool with 0.375” dia. grinding stone was dressed in-place on the 12” swing lathe and used to grind the mini jaws true.
A diamond dresser was held firmly with a Noga adjustable arm attached to the locked tailstock, and using the lathe carriage for movement, the Dremel tool and grinding stone were moved under the stationary dressing diamond. This trued-up the entire length of the grinding stone. Before grinding, the smaller chuck and mandrel were assembled and disassembled several times looking for the most accurate hole combination and location in the larger chuck. Witness marks indicate the most accurate mandrel position with the 80 mm chuck and the rear spacer step on the mandrel was marked with a number “1” for locating with the No. 1 chuck jaw of the larger chuck.
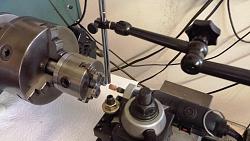
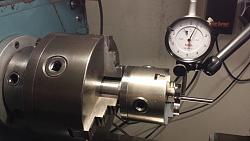
Using a 0.250” gage pin, the measured repeatable TIR of the smaller chuck while held in the larger chuck is 0.0006” at the front of the toolmaker mini jaws and 0.0008” at a distance of 1.5” from the mini jaws. This TIR exceeded my expectations considering the larger chuck has the same TIR depending upon the diameter being held and while always tightened with the chuck key in the master pinon. Even more remarkable is the repeatable 0.0004” TIR measured with a 0.125” gage pin.
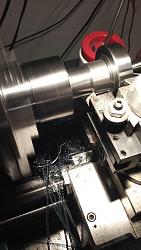
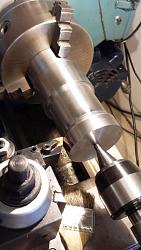
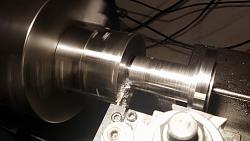
The following photos show some of the steps in machining of the chuck mandrel from 1045 alloy carbon steel round bar stock. All the machining as completed without re-chucking the mandrel in ordered to achieve the best concentricity. DNMP and TNMP carbide inserts were used for most of the machining and an ISCAR GF insert GFR-3J used for parting-off. The final finishing passes for the 1.5” dia. shank section were completed using an A R Warner T15 HSS TCMW-322 insert but in this case, I think I should have continued using the DNMP Kennametal KT315 grade insert (a multilayer PVDTiN/TiCN/TiNcoated cermet turning grade) which produces a mirror-like finish seen on the larger diameter sections and my most favorite insert for finishing work. I plan to make another chuck mandrel to fit a 5C collet dimension for when I finally finish making a 5C collet chuck for the 12" geared-head lathe.


Thank you for looking,
Paul Jones


 LinkBack URL
 About LinkBacks







 Reply With Quote
 Curious if you did that Tape fix on the bearings for the Dremel or just tiny, tiny passes to not load them, after dressing?


 ~PJ
~PJ


Bookmarks