Free 186 More Best Homemade Tools eBook:  
Get tool plans

User Tag List

Page 1 of 2 1 2 LastLast
Results 1 to 10 of 11

Thread: Building an accurate tempering oven

  1. #1
    Supporting Member anthonyget's Avatar
    Join Date
    Oct 2019
    Location
    Kelmarsh, UK
    Posts
    89
    Thanks
    31
    Thanked 153 Times in 42 Posts

    anthonyget's Tools

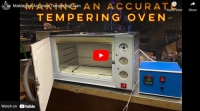
    Building an accurate tempering oven

    Recently I have been having some really annoying problems during the hardening process of my blades. I achieve hardness after the quench, but then, following what I thought was careful tempering, the blades were coming out at around 45 to 50 Rockwell which is no good.
    I finally checked with an oven thermometer and it seemed that although my oven reached 200C (for example) and held that temperature for a litle while, when I checked again after 15 or 20 minutes the temp at crept up to over 220C and sometimes even 230C which made the steel too soft. If I tried to dial the temp down by a tiny bit on the dial, it would go down as 175C. In other words, completely useful for accurate tempering.

    I know I am far from being the first converting a mini oven for this purpose, but I hope a beginner might enjoy learning with me and maybe avoiding the mistakes I made.


    186 More Best Homemade Tools eBook

  2. The Following 16 Users Say Thank You to anthonyget For This Useful Post:

    Carnel (Apr 6, 2021), emu roo (Apr 5, 2021), EnginePaul (Apr 5, 2021), Jon (Apr 2, 2021), lassab999 (Apr 11, 2021), Moby Duck (Apr 12, 2021), MrMetal (Apr 6, 2021), mwmkravchenko (Apr 6, 2021), NortonDommi (Apr 4, 2021), nova_robotics (Apr 9, 2021), rarmintrout (Apr 6, 2021), rayh__ (Apr 5, 2021), rlm98253 (Apr 5, 2021), Scotsman Hosie (Apr 6, 2021), Sleykin (Apr 9, 2021), will52100 (Apr 4, 2021)

  3. #2
    Content Editor
    Supporting Member
    DIYer's Avatar
    Join Date
    Aug 2013
    Posts
    3,055
    Thanks
    793
    Thanked 1,888 Times in 1,683 Posts


    Thanks anthonyget! We've added your Tempering Oven to our Knife Making category,
    as well as to your builder page: anthonyget's Homemade Tools. Your receipt:


    2,000+ Tool Plans

  4. The Following 2 Users Say Thank You to DIYer For This Useful Post:

    anthonyget (Apr 9, 2021), MrMetal (Apr 6, 2021)

  5. #3
    Supporting Member DIYSwede's Avatar
    Join Date
    May 2019
    Location
    Stockholm, Sweden...
    Posts
    634
    Thanks
    417
    Thanked 805 Times in 319 Posts

    DIYSwede's Tools
    Thanks for sharing, Nick - excellent salvaging project, and clever use of the in situ convection fan,
    thus making the temp probe positioning less crucial, and the temp more evenly distributed within.

    A few tips (and your code may vary from mine):
    Use a camera/ cell phone to photograph the gear before and throughout the dismantling,
    thus making sure the heating elements will get connected correctly (in parallel, not in series) also after the mod.
    A crude sketch is also worthwhile, and yet another for the new hook-up.

    I do this regularly at work for most electrical repairs, even though I'm been at it for +30 years...
    Black, blue and green-yellow electric tape is good to have around to mark wires to the appropriate connector,
    as many appliances today only use white internal hookup wire.
    A beeping ohmmeter is also crucial for checking which wire goes where..

    When possible, use fibreglass wound heat resistant wire* for hookup,
    preferably with some protective sheath between the oven & controller.

    Like:*https://www.ebay.co.uk/itm/HEAT-RESI...wAAOxyg7xSaFKF


    All the best
    Johan

  6. The Following User Says Thank You to DIYSwede For This Useful Post:

    EnginePaul (Apr 5, 2021)

  7. #4
    Supporting Member
    Join Date
    May 2016
    Posts
    79
    Thanks
    4
    Thanked 214 Times in 44 Posts

    Don42's Tools
    Nice job! Luck for us that PID controls have become so incredibly affordable. They weren't always so.

    I don't make blades but I did make a PID controlled oven like yours for other lab endeavors. The reason PID control is so much better for this is because the "bang-bang" (on-off) thermostats can have hysteresis of as much as 40 degrees difference as they cycle, meaning that the temp where it switches on can be 40 degrees cooler than the temp where it switches off. The PID control switches the power on and off at a much faster rate, with cycle times of seconds. They use solid state relays because an electromechanical relay would soon wear out. PID controls work by adjusting the percentage of time that the power is on each cycle so the process variable (temperature here) matches the setpoint. Most PID controllers can be made to "auto tune", which means they can "learn" how the particular oven behaves so it will reach setpoint as quickly as possible without overshoot and without oscillating. Once thus tuned, they'll "remember" the internal settings indefinitely until you change them manually or make it autotune again. One must RTFM to discover how to do this with a particular controller. There are at least three variables: proportional gain, integral gain and differential gain. Old PID engineers use different terminology.

    I also made a PID "flat iron" using the 600-watt element from a 30-cup coffee maker I got at Goodwill for $5 and a piece of 1/2" aluminum jig plate for the body. That was for laminating heat-sensitive films.

  8. The Following User Says Thank You to Don42 For This Useful Post:

    DIYSwede (Apr 6, 2021)

  9. #5
    Supporting Member anthonyget's Avatar
    Join Date
    Oct 2019
    Location
    Kelmarsh, UK
    Posts
    89
    Thanks
    31
    Thanked 153 Times in 42 Posts

    anthonyget's Tools
    Yet again Johan, thanks so much for your input.
    I was looking for wire like that. Looks perfect.
    Always helpful. Take care.

  10. #6
    Supporting Member anthonyget's Avatar
    Join Date
    Oct 2019
    Location
    Kelmarsh, UK
    Posts
    89
    Thanks
    31
    Thanked 153 Times in 42 Posts

    anthonyget's Tools
    Quote Originally Posted by Don42 View Post
    Nice job! Luck for us that PID controls have become so incredibly affordable. They weren't always so.

    I don't make blades but I did make a PID controlled oven like yours for other lab endeavors. The reason PID control is so much better for this is because the "bang-bang" (on-off) thermostats can have hysteresis of as much as 40 degrees difference as they cycle, meaning that the temp where it switches on can be 40 degrees cooler than the temp where it switches off. The PID control switches the power on and off at a much faster rate, with cycle times of seconds. They use solid state relays because an electromechanical relay would soon wear out. PID controls work by adjusting the percentage of time that the power is on each cycle so the process variable (temperature here) matches the setpoint. Most PID controllers can be made to "auto tune", which means they can "learn" how the particular oven behaves so it will reach setpoint as quickly as possible without overshoot and without oscillating. Once thus tuned, they'll "remember" the internal settings indefinitely until you change them manually or make it autotune again. One must RTFM to discover how to do this with a particular controller. There are at least three variables: proportional gain, integral gain and differential gain. Old PID engineers use different terminology.

    I also made a PID "flat iron" using the 600-watt element from a 30-cup coffee maker I got at Goodwill for $5 and a piece of 1/2" aluminum jig plate for the body. That was for laminating heat-sensitive films.
    the flat iron is a great idea. Nice one and thanks for getting in touch.

  11. #7
    Supporting Member
    Join Date
    Aug 2016
    Posts
    635
    Thanks
    1
    Thanked 187 Times in 166 Posts

    wizard69's Tools
    Nice Video;

    I've spent years in industry working on process ovens of different types and have to say you did pretty good for you first crack at a improved toaster oven!!! A few comments:

    1. If you expect to e leave the oven unattended, you should seriously consider an over temperature safety of some sort. There are options here but some of the over temp controller look a lot like a PID controller but they are a slightly different animal. You should use a mechanical relay in the safety circuit too.

    2. Somewhat expensive to buy but might be needed here is high temperature insulated wire. You will find out if pretty soon if the wire insulation going to the heaters or other hot parts of the oven, start to melt down. It is the insulation that goes.

    3. You will want to fix that fan as soon as possible. The constant stop and start is not good for the motor. However what might be more important is that air circulation makes a huge, massive difference really in an oven. Even with a fan and fancy ducting it can be hard to keep an even temperature profile in an oven. In a home shop it is pretty hard to tell just how good or bad a temp profile will be in an oven as you need lots of thermocouples carefully distributed to validate. however you can run many test cycles with the one thermoucouple /display you do have with the probe located in different parts of the oven. You may be surprised to find hot/cold spots.

    4. Thankfully in regards to #3 above you have insulated nicely. This is huge for oven control ability.

    5. Doors are always a problem even on huge process ovens. You could most likely improve the oven with a better door though I'm not sure it would be worth it.

    6. Thermcouples do fail and it doesn't hurt to have a spare or two on hand. Of course once you have the spare the original never seems to fail. However thermocouples (TC) are the are a likely item to be changed in an oven over time. Having a TC that can be plugged into a jack on the back of the controller box can be a useful way to quickly swap a TC.

    7. This was over 40 years ago so things may be different today, this was also the USA, but I took an industrial electrical course held at a local tech school. A couple of nights a week for a time period I don't remember. Even though I eventually got a 2 year degree in electromechanical technology, that little bit of after work effort has really paid off over time. As they say a little bit of knowledge goes a long way. I'm not sure if anything similar is offered in the UK and frankly the rules are likely a bit different over there, but if such a course is available it can really help with understanding the "industrial way" of doing things.

    8. The suggestion above about using your sell phone camera is a fantastic one! I'm a certified old fart, set in my ways, yet more and more I will break out the cell phone to record the state of something before tearing it apart. More importantly for an old fart is that it is often a better magnifier than a real magnifying glass. That is i regularly use the cell phone to record small hard to read or even inaccessible labels on parts and then blow them up on screen into something readable. When the smart phone craze first hit I never thought I'd have a need but now it is almost a daily tool to make use of.

    9. It is almost always better to sketch up an electrical schematic before building up an electrical circuit! Even a terrible artist will benefit. That and make use of a wire numbering system recorded on that schematic. Save the schematic, in fact file copies of it, placed in multiple places. You will love yourself 5 years later when having to do maintenance on the controller.

    10. Always make sure your grounding is correct. You should have wires grounding the control cabinet, its loose panels, the oven chassis itself (including the covers) and the inner chamber.

    In any event a quick 10 to help out anybody going this route. Frankly I might have to take the route you have and just go out an buy a proper oven as finding a used one, that is big enough, seems to be next to impossible.

    Again very nice work. Now all we need to see is a nice set of blades coming out of that oven.

  12. The Following User Says Thank You to wizard69 For This Useful Post:

    DIYSwede (Apr 6, 2021)

  13. #8
    Supporting Member DIYSwede's Avatar
    Join Date
    May 2019
    Location
    Stockholm, Sweden...
    Posts
    634
    Thanks
    417
    Thanked 805 Times in 319 Posts

    DIYSwede's Tools
    Thanks wizard69 for your tips!

    I have a few questions/ statements regarding your third point above:
    I thought a convection fan continously whirring the (smallish) oven's air around would even out temp diffs
    (both in space and over time) in any given oven better, than in a similar oven w/o fan.
    For a given oven or melting furnace, wouldn't adding a fan also reduce thermal stress* for the heating element coils,
    and improve heat transfer & ditto speed up to ca + 650C, as the convection adds to the (nearly pure) radiation transfer to the heated object?
    (*for instance as in the case of a few little too tightly spaced, but not touching coil turns that'll fail prematurely)

    Any experiences, explanations and/ or links on why these my assumptions might be incorrect will be instantly and forever appreciated.

    TIA

    Johan

  14. #9
    Supporting Member
    Join Date
    Aug 2016
    Posts
    635
    Thanks
    1
    Thanked 187 Times in 166 Posts

    wizard69's Tools
    Quote Originally Posted by DIYSwede View Post
    Thanks wizard69 for your tips!

    I have a few questions/ statements regarding your third point above:
    I thought a convection fan continously whirring the (smallish) oven's air around would even out temp diffs
    (both in space and over time) in any given oven better, than in a similar oven w/o fan.
    Yes a fan will most certainly help even out the temperature profile in an oven. However you really need careful design of the ducting. Some years ago I got handed a project that required validating an oven that needed tight temperature profile over its entire volume. We are talking less than one degree F. This is probably tighter than you might want to achieve. Also the oven operated at its thermal limits.

    in this case every little thing impacted the temperature profile a lot. Leaky door seals actually had a very big impact on temperature within the oven.
    For a given oven or melting furnace, wouldn't adding a fan also reduce thermal stress* for the heating element coils,
    and improve heat transfer & ditto speed up to ca + 650C, as the convection adds to the (nearly pure) radiation transfer to the heated object?
    It should if the heating element is able to take advantage of the air flow. Some of the better oven designs I worked with had the fan assembly either blowing across or drawing air directly over the elements. The controlling TC was also in that air stream.
    (*for instance as in the case of a few little too tightly spaced, but not touching coil turns that'll fail prematurely)

    Any experiences, explanations and/ or links on why these my assumptions might be incorrect will be instantly and forever appreciated.

    TIA

    Johan
    I wouldn't say your assumptions are incorrect. Sometimes it is the little things that get you when trying to control oven temperatures, like the mention of doors and door seals which can impact oven temperatures and efficiencies greatly. As long as you have an independent temperature monitor so see how the temperatures are being controlled in the oven you will be comfortable about the operating conditions. In other words that temperature indicator should be giving you a lot of confidence as to correspondence between the temperature the controller reads and the actual oven temp.

  15. The Following User Says Thank You to wizard69 For This Useful Post:

    DIYSwede (Apr 7, 2021)

  16. #10
    Jon
    Jon is online now Jon has agreed the Seller's Terms of Service
    Administrator
    Supporting Member
    Jon's Avatar
    Join Date
    Jan 2012
    Location
    Colorado, USA
    Posts
    26,444
    Thanks
    8,100
    Thanked 40,253 Times in 11,777 Posts
    Congratulations anthonyget - your Tempering Oven is the Homemade Tool of the Week!

    Another busy week for us, but this is a very well thought-out build.

    Some more good builds from this week:

    Trailer by Frank S
    Oscillating Spindle Sander by yair feldmann
    Portable Workbench With Vises by Dr.Al
    Lathe Chuck Modification by old_toolmaker
    H Beam Welding Jig by Frank S
    Hammer Drill Cold Chisel Attachment by Eloy Workshop
    Welding Booth by Frank S
    Tool Holder by machining 4 all
    Press Clamp by orioncons36
    Woodworking Clamp by tado creation
    Raising a Drill Head by yair feldmann
    Cyclone Separator by Mazay
    Popup Bench Dogs by Tuomas
    Milling Machine Linear Scale by engineer steve
    Replacement Hammer Handle by Philip Davies
    Table Saw Jig by Didpoolhall
    Bandsaw Sled by SculptyWorks
    Table Saw Top Frame by Didpoolhall
    Quorn Tool and Cutter Grinder Tool Holder by ttmrj
    Angle Clamp by bouboulas


    anthonyget - we've added your tool entry to our All Homemade Tool of the Week winners post. And, you'll now notice the wrench-on-pedestal award in the awards showcase in your postbit, visible beneath your username:


    And, you'll be receiving a $25 online gift card, in your choice of Amazon (US-only), PayPal, or bitcoin. Please PM me your current email address and award choice and I'll get it sent over right away.

    Nice work!

  17. The Following User Says Thank You to Jon For This Useful Post:

    anthonyget (Apr 9, 2021)

Thread Information

Users Browsing this Thread

There are currently 1 users browsing this thread. (0 members and 1 guests)

Tags for this Thread

Bookmarks

Posting Permissions

  • You may not post new threads
  • You may not post replies
  • You may not post attachments
  • You may not edit your posts
  •