Free 186 More Best Homemade Tools eBook:  
Get tool plans

User Tag List

Page 1 of 2 1 2 LastLast
Results 1 to 10 of 13

Thread: Astro Van steering knuckle mods. Making another jig fixture.

  1. #1
    Supporting Member astroracer's Avatar
    Join Date
    May 2012
    Location
    Byron, Michigan
    Posts
    311
    Thanks
    20
    Thanked 576 Times in 174 Posts

    astroracer's Tools

    Astro Van steering knuckle mods. Making another jig fixture.

    Most of the "tools" and fixtures I design and build are because of this Astro Van I am building. It is a Pro Touring style build with a radically dropped and big tired van as the end product. Nothing for this build is "off the shelf". It is NOT a '69 Camaro... So everything I do is one off, just like these front steering knuckles. I had to reconfigure the steering arm to work with a Corvette Steering rack that was used as the basis for the front suspension design.
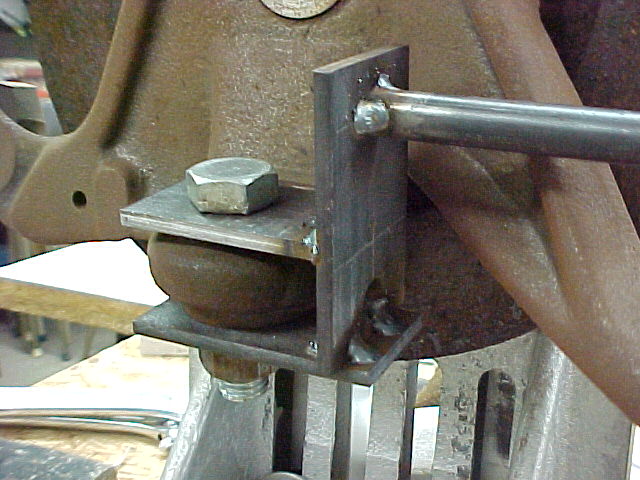
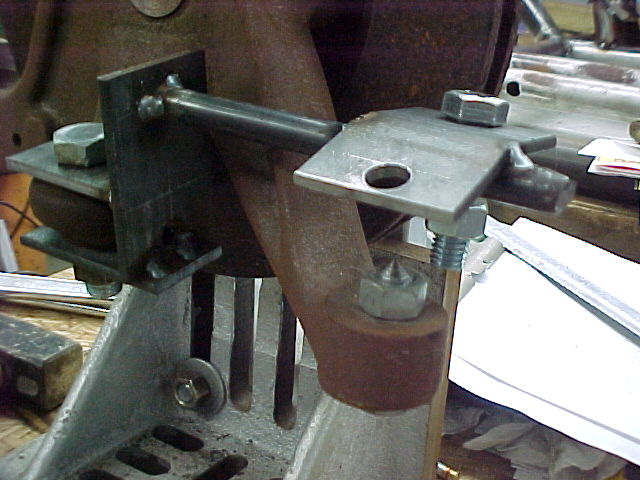
    Here is how I built the fixture to modify both front knuckles.
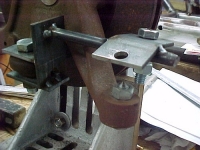
    I bolted two plates together, through the lower ball stud hole.With those in place I welded a short piece of plate, vertically, to those plates. The 1/2" rod extends out to the tierod area that will get modified.


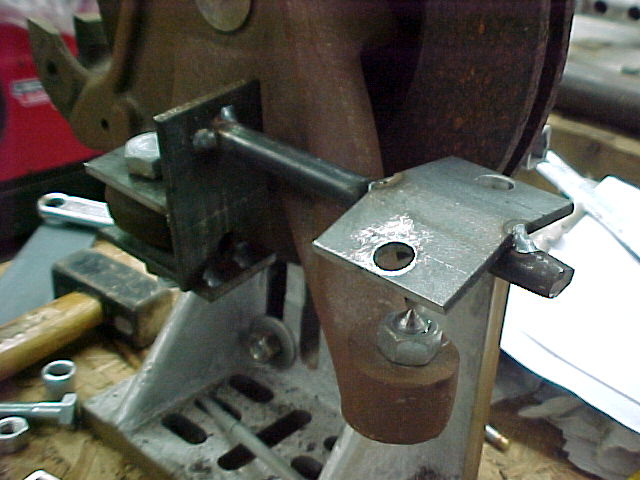
    This is the "working" end of the jig. It is dual purpose so this one jig will work to modify both knuckles. The plate is bent down 15 degrees on both sides. That is the new angle the tierod end will be moved to.

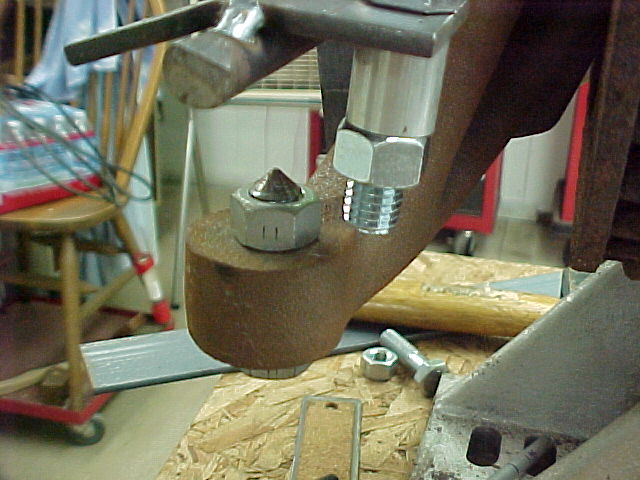
    Here you see the "new" position for the tierod end. The bottom of the aluminum spacer, with the bolt and nut on it. The tierod will get cut off and flipped over 180 degrees and rewelded to the knuckle.

    Continued in next post.

    186 More Best Homemade Tools eBook

  2. #2
    Supporting Member astroracer's Avatar
    Join Date
    May 2012
    Location
    Byron, Michigan
    Posts
    311
    Thanks
    20
    Thanked 576 Times in 174 Posts

    astroracer's Tools
    Cutting off the original arm took some developement work. Cutting it off and flipping it over so that it could be welded back on was the trick.

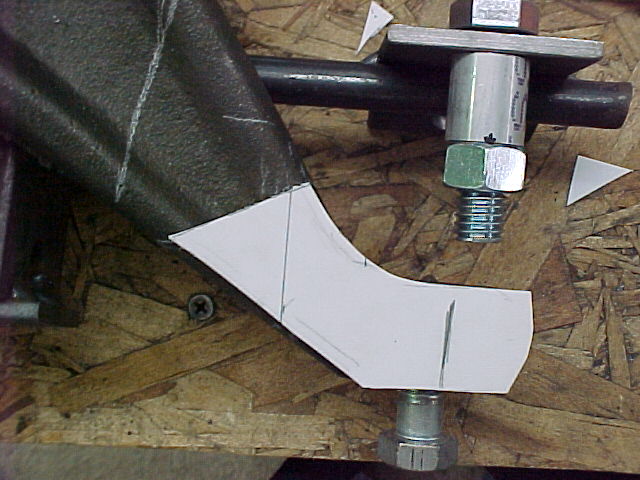
    Developing a cardboard pattern was the only way to do it. After a couple of false starts this is what I came up with.

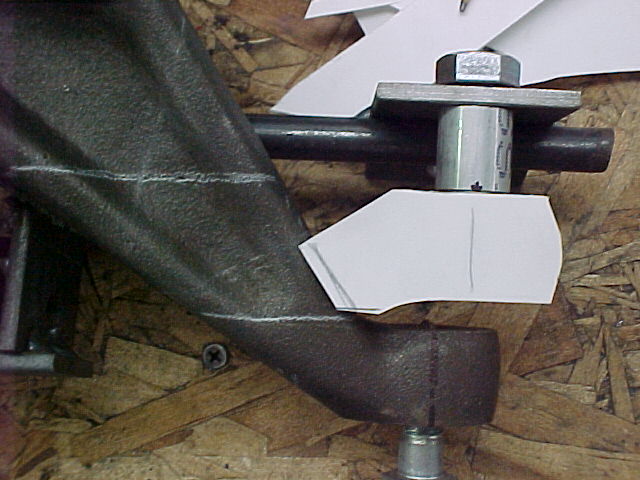
    After a little more adjustment you can see I trimmed it back a bit more. Flipping it over you can see the required cut line, marked in silver pencil, to remove the end.


    After cutting off the tierod end... Flipping it 180 and bolting it into the fixture.

    Mark

    2,000+ Tool Plans

  3. #3
    Supporting Member C-Bag's Avatar
    Join Date
    Aug 2015
    Location
    California, central coast
    Posts
    720
    Thanks
    689
    Thanked 879 Times in 471 Posts

    C-Bag's Tools
    Very cool Mark. And a great idea.....But doesn't the tie rod arm end have a tapered bore? And now it's flipped over.....did I miss something?

    I know exactly what you are up against as I'm always trying to do something there's no off the shelf product for. So it's always the details that make my head ache. So it's always fun to see how others deal with and solve things. Thanks for posting your process.

  4. The Following User Says Thank You to C-Bag For This Useful Post:

    PJs (Feb 3, 2016)

  5. #4
    Supporting Member astroracer's Avatar
    Join Date
    May 2012
    Location
    Byron, Michigan
    Posts
    311
    Thanks
    20
    Thanked 576 Times in 174 Posts

    astroracer's Tools
    Quote Originally Posted by C-Bag View Post
    Very cool Mark. And a great idea.....But doesn't the tie rod arm end have a tapered bore? And now it's flipped over.....did I miss something?

    I know exactly what you are up against as I'm always trying to do something there's no off the shelf product for. So it's always the details that make my head ache. So it's always fun to see how others deal with and solve things. Thanks for posting your process.
    Yes sir, it's an adventure isn't it?
    The work done to the spindle was due to a lot of issues. Most onlookers don't "get" what I am doing but you do, as I see by the question you asked. I will explain and provide a few more pics.
    1). The reworked spindle is a cast steel aftermarket spindle for an Astro Van. The spindle has a designed in 2"drop.
    2). My suspension design was based around a C4 Corvette Steering Rack.
    3). The Astro Van tierod bolts in from the bottom... Guess which way the Corvette tierod bolts in... yup, from the top.
    4). To get the bumpsteer and suspension geometry correct the tierod point had to move up and outboard.
    5). Deep offset wheels were also in the mix and the original location would interfere with the wheel rim. The move got the tierod very well clear of the wheel.
    As you can see, lots of design requirements. The solution was well thought out and the spindle was modified under the guidance of a local fabricator that modifies and welds these spindles all the time for the 4 x 4 guys in the Flint area. Belive me, the modified spindle is MUCH stronger in this area then the original one was.
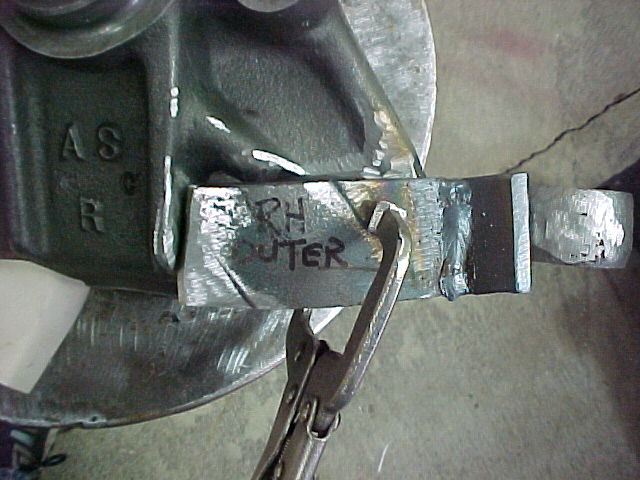
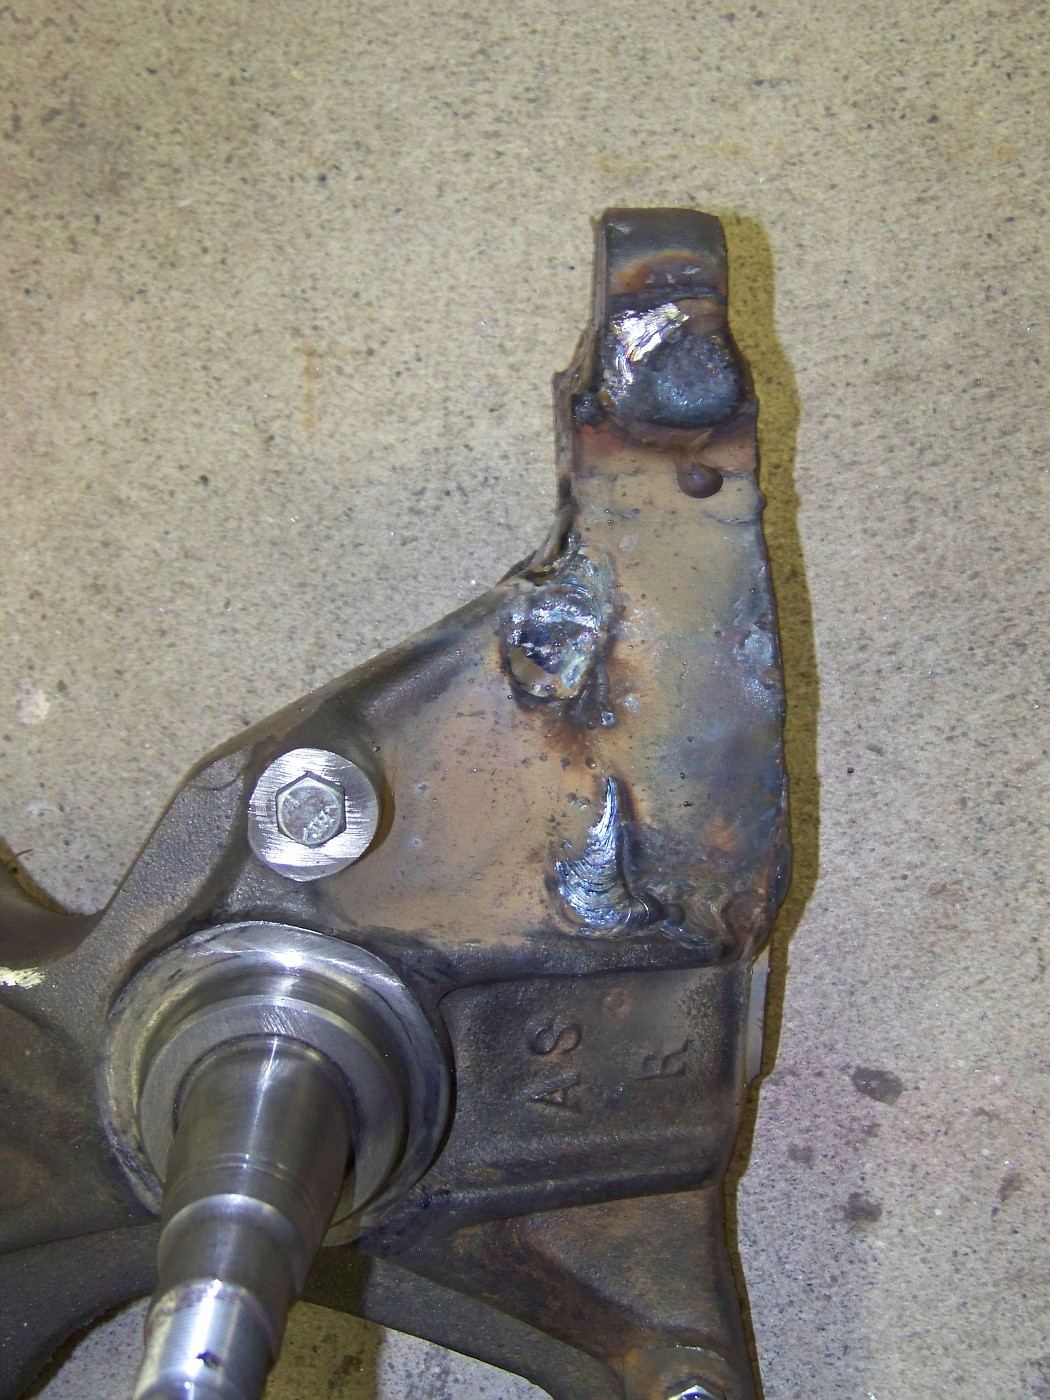
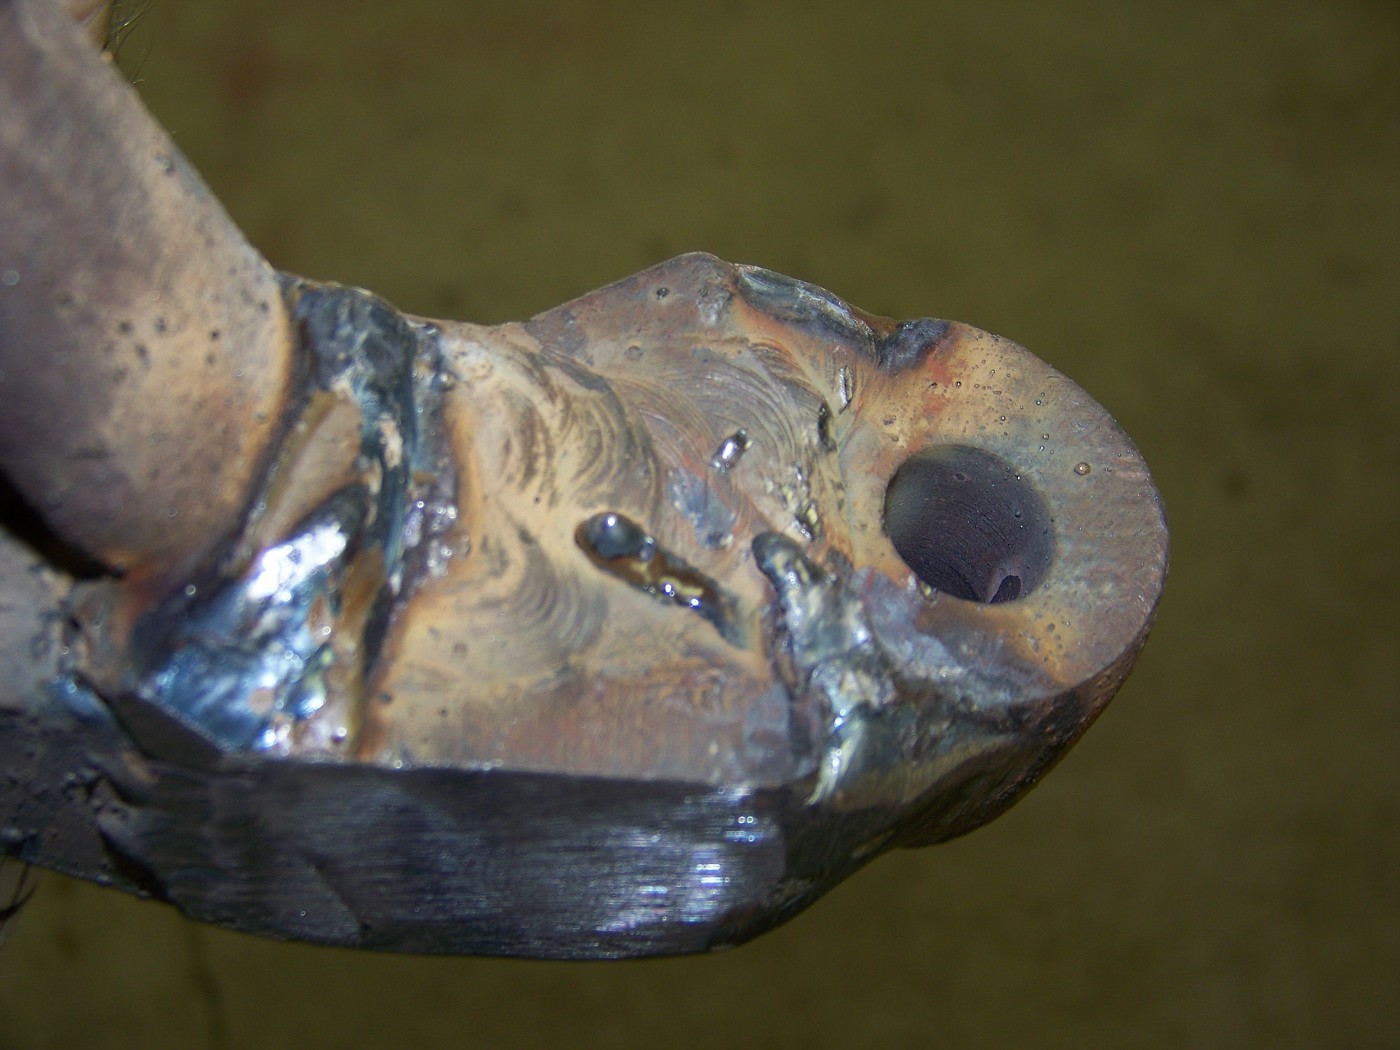
    I did a LOT of grinding on this dude to incorporate 3/8th inch fishplates on either side of the joint. I also extended these plates in, to the base of the spindle.

    Plated on both sides.

    Looking from the top. You can see how much material was ground out so there was room to weld in these gussets.

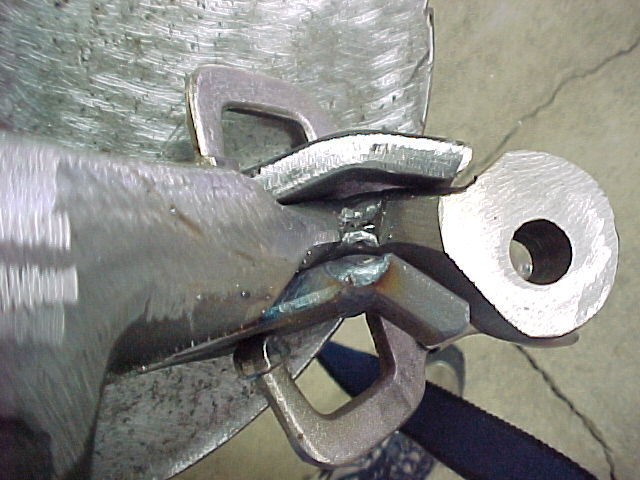
    After welding.

    These were welded up with high nickel content welding rod. Mike took his time and did this welding over a period of three days to keep from burning all of the carbon out of the base metal.

  6. The Following User Says Thank You to astroracer For This Useful Post:

    PJs (Feb 3, 2016)

  7. #5
    Supporting Member astroracer's Avatar
    Join Date
    May 2012
    Location
    Byron, Michigan
    Posts
    311
    Thanks
    20
    Thanked 576 Times in 174 Posts

    astroracer's Tools
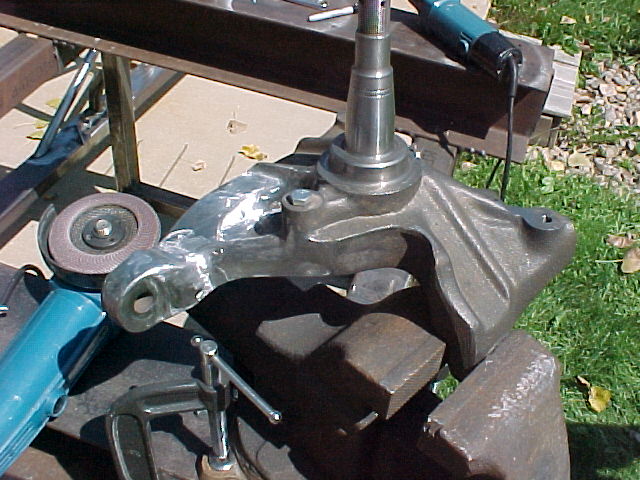
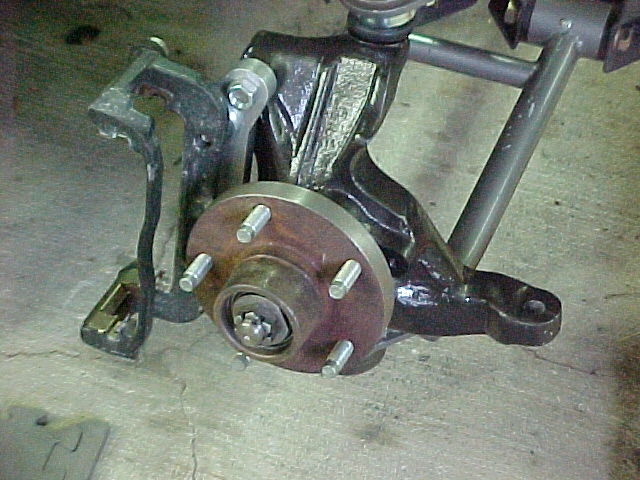
    Looks kind of ugly but, after another three or four hours of grinding and clean up, it looks like it was born that way.


    Installed on the van.

    Mark

  8. The Following User Says Thank You to astroracer For This Useful Post:

    PJs (Feb 3, 2016)

  9. #6
    Supporting Member C-Bag's Avatar
    Join Date
    Aug 2015
    Location
    California, central coast
    Posts
    720
    Thanks
    689
    Thanked 879 Times in 471 Posts

    C-Bag's Tools
    Thanks Mark for the explanation. That worked out great to flip that end over. I could be wrong but I don't remember seeing any tie rod that came in from the bottom. I always thought that was some kind of safety thing so the tie rod couldn't just drop out if the nut came off.

    Steering geometry and alignment is a VERY deep issue. So when I hear of somebody just heating their springs to lower suspension I wince. Then they wonder why it's so squirrelly going down the road, wears out their tires fast and rides like a hay wagon

    Looks like you are doing it the right way that most people couldn't afford to have done. And the finished piece looks OEM.


  10. The Following User Says Thank You to C-Bag For This Useful Post:

    PJs (Feb 3, 2016)

  11. #7
    Supporting Member astroracer's Avatar
    Join Date
    May 2012
    Location
    Byron, Michigan
    Posts
    311
    Thanks
    20
    Thanked 576 Times in 174 Posts

    astroracer's Tools
    Quote Originally Posted by C-Bag View Post
    Thanks Mark for the explanation. That worked out great to flip that end over. I could be wrong but I don't remember seeing any tie rod that came in from the bottom. I always thought that was some kind of safety thing so the tie rod couldn't just drop out if the nut came off.

    Steering geometry and alignment is a VERY deep issue. So when I hear of somebody just heating their springs to lower suspension I wince. Then they wonder why it's so squirrelly going down the road, wears out their tires fast and rides like a hay wagon

    Looks like you are doing it the right way that most people couldn't afford to have done. And the finished piece looks OEM.

    No, it's not a rule as far as I know. The S10 trucks, Astro's and the full size trucks all bolt in from the bottom. Changed many of those spindles and that's the way they are... The cars with deep offset wheels, later model Camaro's and Corvettes will move the tierod end to the top but this is done strictly for wheel clearance, as I had to do for the van.

    Working for GM I was a suspension designer for many years. Designed the DTS and SRX suspensions, along with the Solstice/Skye, Cobalt SS/HHR and some truck stuff. Designing the suspension for the van was fairly straight forward.
    Mark

  12. The Following User Says Thank You to astroracer For This Useful Post:

    PJs (Feb 3, 2016)

  13. #8
    kbalch's Avatar
    Join Date
    Jun 2012
    Location
    Clermont, FL
    Posts
    5,034
    Thanks
    2,275
    Thanked 532 Times in 384 Posts
    Hey Mark,

    I have to say that my first thought was that you're absolutely out of your mind - in the best possible way, of course!

    A very well thought out effort and some first-rate execution. Looks great!!

    I'm a big fan of paper templates, too. Tossing them when I'm done is always a bit wrenching - what if I need them again in the future? It could happen, right?

    Ken

  14. The Following User Says Thank You to kbalch For This Useful Post:

    PJs (Feb 3, 2016)

  15. #9
    Supporting Member astroracer's Avatar
    Join Date
    May 2012
    Location
    Byron, Michigan
    Posts
    311
    Thanks
    20
    Thanked 576 Times in 174 Posts

    astroracer's Tools
    Hey Ken, yea, I got a lot of that with this mod. I did a lot research on it and found a lot of similar modifications for race cars and the like that weren't as stout as my alterations. The 4 x 4 guys do a lot of this to change steering arm angles on lifted trucks. The gentleman I had do the work has a business in Flint that caters to these guys and he eased my fears about welding on the spindle. Cast steel welds just fine and he did a beatiful job on mine.

  16. The Following User Says Thank You to astroracer For This Useful Post:

    PJs (Feb 3, 2016)

  17. #10
    Content Editor
    Supporting Member
    DIYer's Avatar
    Join Date
    Aug 2013
    Posts
    3,055
    Thanks
    793
    Thanked 1,892 Times in 1,687 Posts
    Thanks astroracer! We've added your Steering Knuckle Fixture to our Steering category, as well as to your builder page: astroracer's Homemade Tools. Your receipt:


Thread Information

Users Browsing this Thread

There are currently 1 users browsing this thread. (0 members and 1 guests)

Bookmarks

Posting Permissions

  • You may not post new threads
  • You may not post replies
  • You may not post attachments
  • You may not edit your posts
  •