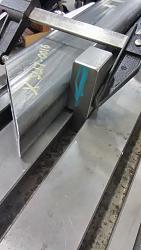
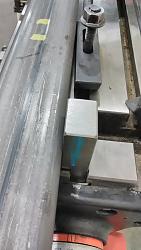
It's common for milling fixtures to have keys to simplify re-mount, such as vises.
Following method applies to material, especially those unwieldy sizes.
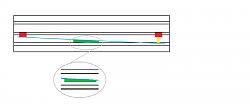
Your table slots should be checked for alignment with table travel; these still work if there is error. Measure with an indicator the total deviation over full travel of table. At shorter distances is simply adjusted with shims proportional to that. ie, If .007 deviation occurs at 20'', a 10'' part needs .0035. Most will find minimal deviation, or correction needed.
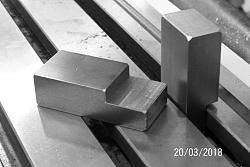
Accurately measure width of your table slots. Photo depicts recent set made, with improvements discovered over time. First set ever were turned to a corresponding diameter. Two narrow bands of contact don't work that well in tee slot. However round keys have excellent contact with material...advantageous at times.
Milling flats is best, right to size of slip fit. These keys are bar-stock so bar clamp assists in setup.

Found offset cut works best, especially to allow clamping hardware clearance, including springs to support clamp on successive parts. Found too, a good idea to mark one side, for visual confirmation of orientation. These are 3 1/2'' high total.
This also works when tapers are needed. Knowing the angles sine, add a temporary spacer of equivalent thickness to front of one key. Imagine a 4'' long, 3° gib is needed. Sine of 3° = 0.141120008. Separate keys by a known amount [by caliper, carefully cut block, tape measure]. Tape measure? Sure can, keys 25'' apart bridged by a straightedge, represent a 6.25:1 ratio. So in space of 25'', off 1/8'' is a mere .02 error.
Multiply 0.141120008 by 25 = 3.528002. Add spacer of 3.528'' as mentioned above. Best to cut a gib longer than finish size, to utilize portion test fitting reveals is correct.


 LinkBack URL
 About LinkBacks


 Reply With Quote


Bookmarks