Free 186 More Best Homemade Tools eBook:  
Get 2,500+ tool plans, full site access, and more.

User Tag List

Results 1 to 7 of 7

Thread: Adjustable Clamping Spacers

  1. #1
    Supporting Member kess's Avatar
    Join Date
    Dec 2015
    Location
    Thessaloniki Greece
    Posts
    161
    Thanks
    83
    Thanked 317 Times in 82 Posts

    kess's Tools

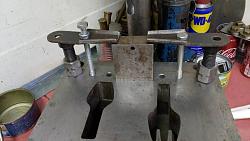
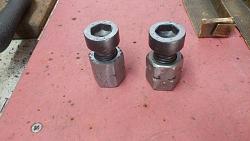
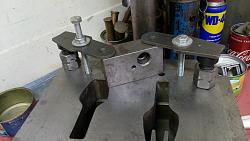
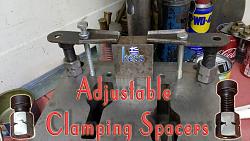
    Adjustable Clamping Spacers


    Materials:
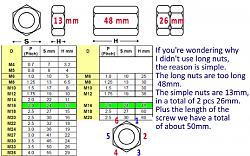
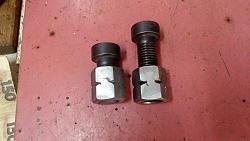
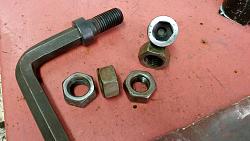
    2 Bolts Low profile Allen socket head M16x35mm and 4 nuts M16.
    Tools:
    Vice, welding machine, angle grinder, file.

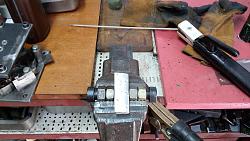
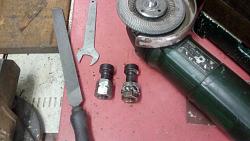
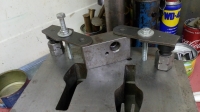
    Place/adjust two pairs of nuts at the vice so as the bolts can screw/unscrew correct and freely.
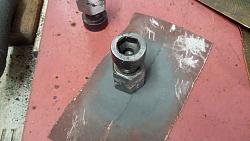
    Tack welds the sides of nuts using the combination:
    single sides 1-3-5 at first and then the even sides 2-4-6.
    Adjustable Clamping Spacers-first-frame_last1.jpg Adjustable Clamping Spacers-img_20200611_135812.jpg

    Adjustable Clamping Spacers-img_20200611_135039.jpg Adjustable Clamping Spacers-img_20200607_165642-epx2.jpg

    Adjustable Clamping Spacers-img_20200607_140930-epx2.jpg Adjustable Clamping Spacers-img_20200607_122545.jpg

    Adjustable Clamping Spacers-img_20200607_123805.jpg Adjustable Clamping Spacers-img_20200607_133427.jpg

    Adjustable Clamping Spacers-img_20200607_140534.jpg Adjustable Clamping Spacers-untitled-1.jpg

    186 More Best Homemade Tools eBook

  2. The Following 3 Users Say Thank You to kess For This Useful Post:

    Jon (Jul 9, 2020), mwmkravchenko (Jul 16, 2020), Toolmaker51 (Jul 8, 2020)

  3. #2
    Content Editor
    Supporting Member
    DIYer's Avatar
    Join Date
    Aug 2013
    Posts
    3,055
    Thanks
    798
    Thanked 1,897 Times in 1,692 Posts


    Thanks kess! We've added your Adjustable Clamp Spacers to our Clamps category,
    as well as to your builder page: kess's Homemade Tools. Your receipt:


    2,500+ Tool Plans
    New plans added on 01/17/2025: Click here for 2,706 plans for homemade tools.

  4. #3
    Supporting Member Crusty's Avatar
    Join Date
    May 2019
    Location
    Dry Gulch, Tx
    Posts
    749
    Thanks
    220
    Thanked 854 Times in 325 Posts

    Crusty's Tools
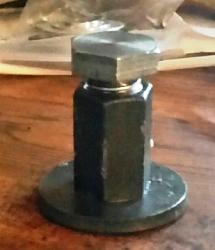
    I use this same method for making machinist jacks, though I just use coupling nuts for the bases. I keep a variety of different bolt lengths on hand to make my supports work in the distance range that I need and sometimes I weld a thick SAE washer onto the nut for a wider base.


    Adjustable Clamping Spacers-machinist-jack.jpg
    If you can't make it precise make it adjustable.

  5. #4
    Supporting Member kess's Avatar
    Join Date
    Dec 2015
    Location
    Thessaloniki Greece
    Posts
    161
    Thanks
    83
    Thanked 317 Times in 82 Posts

    kess's Tools
    Ηι Crusty,
    Yes the washer makes the nut more stable.
    Thanks for sharing.

  6. #5
    Supporting Member Crusty's Avatar
    Join Date
    May 2019
    Location
    Dry Gulch, Tx
    Posts
    749
    Thanks
    220
    Thanked 854 Times in 325 Posts

    Crusty's Tools
    It does make it more stable but I've found that if a reasonably large diameter bolt is used then there's no need for the base because the coupling nut is stable enough by itself.
    If you can't make it precise make it adjustable.

  7. #6
    Supporting Member Toolmaker51's Avatar
    Join Date
    Feb 2016
    Location
    Midwest USA
    Posts
    5,338
    Thanks
    7,048
    Thanked 3,021 Times in 1,905 Posts

    Toolmaker51's Tools
    Coupling nuts are handy bits of hardware. For some unknown reason they are chamfered more than corresponding size hex nut. So Just like Crusty describes, but inverted, I've used bolt head as the foot. Just sand or file the grade stamping off, so it doesn't 'walk' while adjusting.
    Sincerely,
    Toolmaker51
    ...we'll learn more by wandering than searching...

  8. #7
    Supporting Member kess's Avatar
    Join Date
    Dec 2015
    Location
    Thessaloniki Greece
    Posts
    161
    Thanks
    83
    Thanked 317 Times in 82 Posts

    kess's Tools
    Hi Toolmaker51,

    I have rectified the head of the screw as well as the seat of the base on the lower nut.
    I also marked each pair of welded nuts with numbers (so I know which side is the right seat).


    2,500+ Tool Plans

  9. The Following User Says Thank You to kess For This Useful Post:

    Toolmaker51 (Jul 10, 2020)

Thread Information

Users Browsing this Thread

There are currently 1 users browsing this thread. (0 members and 1 guests)

Tags for this Thread

Bookmarks

Posting Permissions

  • You may not post new threads
  • You may not post replies
  • You may not post attachments
  • You may not edit your posts
  •