Free 186 More Best Homemade Tools eBook:  
Get tool plans

User Tag List

Results 1 to 9 of 9

Thread: 3/4-16 to MT2 Spindle Adapter

  1. #1
    Supporting Member astroracer's Avatar
    Join Date
    May 2012
    Location
    Byron, Michigan
    Posts
    311
    Thanks
    20
    Thanked 573 Times in 174 Posts

    astroracer's Tools

    3/4-16 to MT2 Spindle Adapter

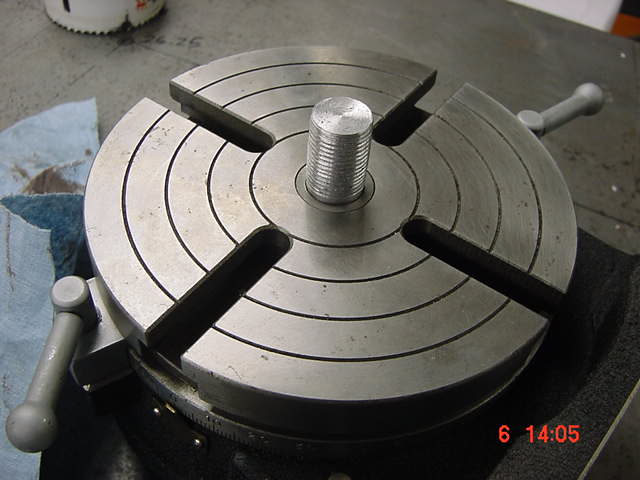
    I have a small MEAD H/V 6" Rotary Table and I needed to adapt a small 3" Sherline chuck to it. The chuck has 3/4-16 threaded back and the rotary table is an MT2 Taper.
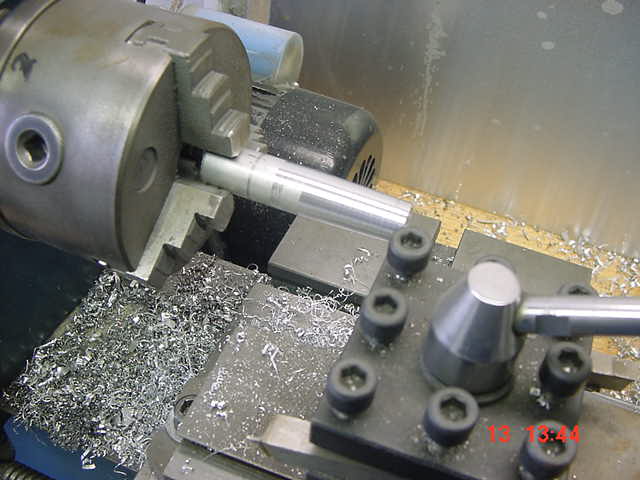
    I used a piece of 11/16th diameter aluminum to make the spindle adapter, you 'll see why so small shortly. Chucked up in the lathe I set the angle tool post at about 1.5 degrees and started cutting.

    Once I had it close I started checking the fit and adjusting the angle until it fit in nice and tight with no slop. I don't really know what the angle is but it is a little under 1.5 degrees on my tool post.

    I drilled and tapped the back side for a 1/4-20 "draw bolt" to pull it tight into the table.
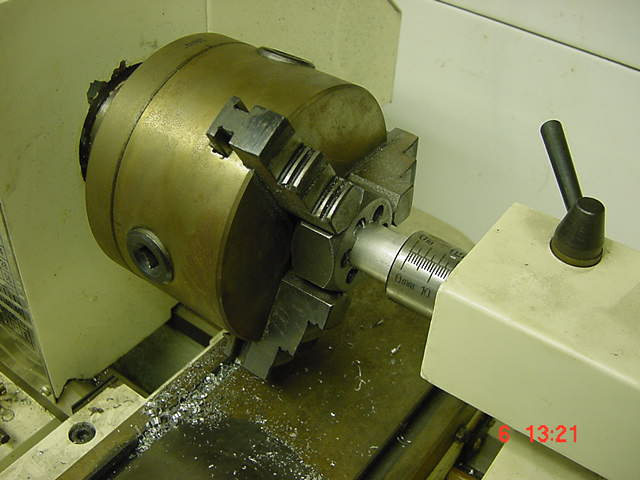
    I had a few miss-steps getting this project off the ground. Trying to thread the end, with that 3/4-16 die was not working. I couldn't get the thread to be parallel to the body of the rod. The only solution was to put on the taper THEN thread it in the lathe with the adapter slipped into the MT2 tailstock.

    This worked well and got me a concentric thread. I left the threading die "loose" in the lathe chuck so it could follow the thread out of the chuck. With the tailstock locked down I rotated the lathe chuck by hand and got the die threaded on about the length of the die.

    Next post

    186 More Best Homemade Tools eBook

  2. #2
    Supporting Member astroracer's Avatar
    Join Date
    May 2012
    Location
    Byron, Michigan
    Posts
    311
    Thanks
    20
    Thanked 573 Times in 174 Posts

    astroracer's Tools
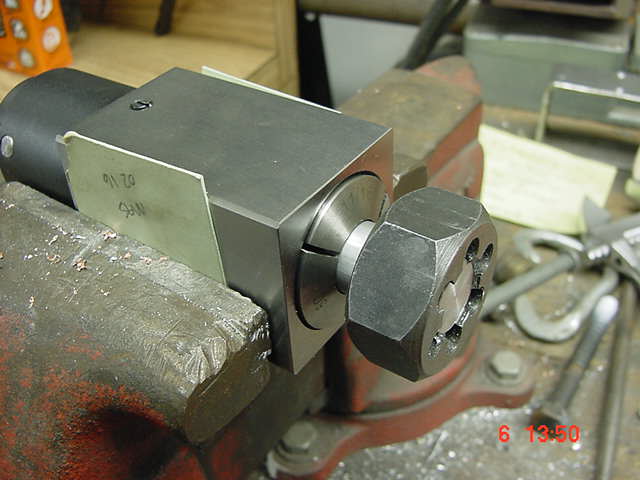
    The reason I went small on this is, I couldn't get the die started square, no matter how hard I tried, with a piece of 3/4" stock. The die would just peel the end off. With the 11/16th stock it had the ability to start a bit deeper in the die and it wasn't cutting as much off so I was able to get it to start square and concentric which is what this piece needs.
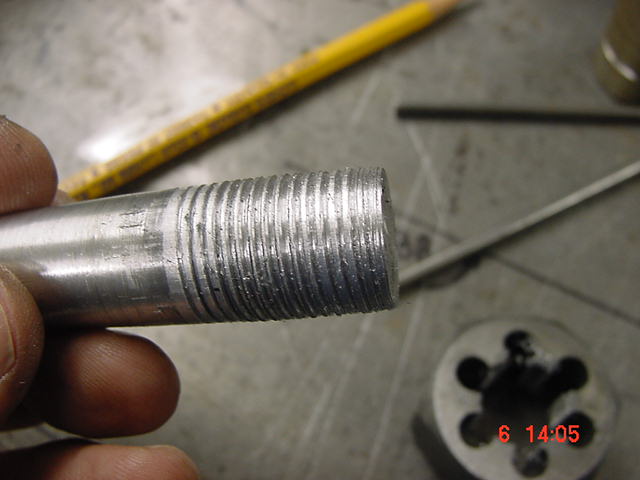
    Well, after I had the threads started in the lathe I did as much as the taper grip would let me. After it started spinning I pulled the spindle out and set it up in a collet block in the vise to finish the threading. Once I had it threaded I backed the die off and turned it around so the sharper "trailing" side could finish cutting the threads all the way to the shoulder.

    After taking it out of the collet block.

    Mounted in the table with the draw bolt pulling it in tight.

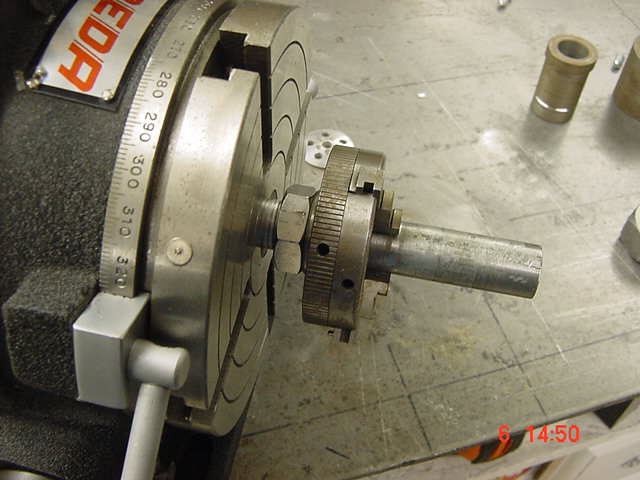
    The chuck attached and locked in place with a jam nut.

    Now, on to adding detents to that spindle I was talking about previously.
    Mark

    2,000+ Tool Plans

  3. The Following 3 Users Say Thank You to astroracer For This Useful Post:

    C-Bag (Mar 6, 2016), Paul Jones (Mar 7, 2016), Vyacheslav.Nevolya (Mar 9, 2016)

  4. #3
    Supporting Member C-Bag's Avatar
    Join Date
    Aug 2015
    Location
    California, central coast
    Posts
    720
    Thanks
    689
    Thanked 879 Times in 471 Posts

    C-Bag's Tools
    Thanks Mark. I love seeing I'm not the only one on the planet who's "just want to get from A to B" takes them back around by way of Z just to get to B I learn a lot from those kinds of excursions but I sometimes can't figure out a good plan of attack and sometimes I just chicken out.

    I needed almost the same thing for adapting my 3" chuck to my 10" rotary table. I ended up getting a MT2 arbor blank that has machinable end ($12+shipping and tax), then chickened out and sent to my brother who's the real machinist and had him cut the big oddball threads my HFT 9x20 lathe uses. After seeing your excursion I wish I would have at least tried to mess with single point cutting the threads. Now that Marv gave me the wonderful tip of practicing on PVC first. But who knows if my lathe can cut that thread......Next project.

    Thanks for posting.

  5. The Following User Says Thank You to C-Bag For This Useful Post:

    Paul Jones (Mar 7, 2016)

  6. #4
    Supporting Member Paul Jones's Avatar
    Join Date
    May 2014
    Location
    Del Mar, California
    Posts
    1,231
    Thanks
    5,810
    Thanked 1,459 Times in 657 Posts

    Paul Jones's Tools
    C-Bag,

    I am sure that after you start practicing with PVC doing single point threading on your lathe you will find it really easy. Marv has a great idea about using the PVC material first for practice because it won't hurt your lathe or you if something goes wrong.

    Good luck, Paul
    Last edited by Paul Jones; Mar 7, 2016 at 12:00 PM.

  7. The Following User Says Thank You to Paul Jones For This Useful Post:

    C-Bag (Mar 7, 2016)

  8. #5
    Supporting Member C-Bag's Avatar
    Join Date
    Aug 2015
    Location
    California, central coast
    Posts
    720
    Thanks
    689
    Thanked 879 Times in 471 Posts

    C-Bag's Tools
    Thanks for the encouragement Paul. The whole process seems overwhelming right now. I asked my SO to find my copy of Machinery Handbook that had dissapeared when we moved. To be fair I found that years before I even had my lathe or mill so it got "tidied" because I didn't even have an application yet so it was sitting around gathering dust. Bless her heart she doesn't like clutter and that's anything that is not being used.

    But Marks project made me crack that book for the first time. And the section on single point threading while only two pages long is throughly daunting. There is a threading guide plate on the lathe, but right now it looks like Chinese, or Greek . Guess I'll hunt up the old pete222/tubalcain vids on single point threading and see if I can get it to stick to my Teflon brain.

  9. #6
    Supporting Member Paul Jones's Avatar
    Join Date
    May 2014
    Location
    Del Mar, California
    Posts
    1,231
    Thanks
    5,810
    Thanked 1,459 Times in 657 Posts

    Paul Jones's Tools
    C-Bag,
    I like the YouTube videos by pete222/tubalcain for his explanation of single point threading. In fact he just published a new video on single point threading for Imperial-based lathes missing the thread dial (this method also applies to cutting metric threads on lathes designed to cutting threads per inch). However, you will have to watch his earlier videos for all the setup details he skips in this video. He is a wonderful teacher. Let us know how this turns out.
    Regards, Paul
    Last edited by Paul Jones; Mar 7, 2016 at 12:01 PM.

  10. #7
    Content Editor
    Supporting Member
    DIYer's Avatar
    Join Date
    Aug 2013
    Posts
    3,055
    Thanks
    793
    Thanked 1,880 Times in 1,677 Posts
    Thanks astroracer! We've added your MT2 Spindle Adaptor to our Machining category, as well as to your builder page: astroracer's Homemade Tools. Your receipt:


  11. #8
    Supporting Member
    Join Date
    Dec 2015
    Posts
    19
    Thanks
    1
    Thanked 45 Times in 11 Posts

    bbutcher85's Tools

    Cutting precision tapers

    Quote Originally Posted by astroracer View Post
    I have a small MEAD H/V 6" Rotary Table and I needed to adapt a small 3" Sherline chuck to it. The chuck has 3/4-16 threaded back and the rotary table is an MT2 Taper.
    I used a piece of 11/16th diameter aluminum to make the spindle adapter, you 'll see why so small shortly. Chucked up in the lathe I set the angle tool post at about 1.5 degrees and started cutting.

    Once I had it close I started checking the fit and adjusting the angle until it fit in nice and tight with no slop. I don't really know what the angle is but it is a little under 1.5 degrees on my tool post.

    I drilled and tapped the back side for a 1/4-20 "draw bolt" to pull it tight into the table.
    I had a few miss-steps getting this project off the ground. Trying to thread the end, with that 3/4-16 die was not working. I couldn't get the thread to be parallel to the body of the rod. The only solution was to put on the taper THEN thread it in the lathe with the adapter slipped into the MT2 tailstock.

    This worked well and got me a concentric thread. I left the threading die "loose" in the lathe chuck so it could follow the thread out of the chuck. With the tailstock locked down I rotated the lathe chuck by hand and got the die threaded on about the length of the die.

    Next post
    Nice job. I also made a similar adapter for my 8 inch rotary table but for a MT3 taper and a 1.5-8 thread to fit my Atlas chuck. I discovered when cutting tapers that it works well to use a dial indicator mounted on the compound. I have another 2" travel dial indicator mounted on my lathe bed to measure travel. To measure the taper just move the carriage some known distance and measure the change in the first dial indicator. You can find exact dimensions of Morse tapers on the internet or in Machinery's Handbook.

    Bob

  12. The Following User Says Thank You to bbutcher85 For This Useful Post:

    Paul Jones (Mar 10, 2016)

  13. #9
    Supporting Member astroracer's Avatar
    Join Date
    May 2012
    Location
    Byron, Michigan
    Posts
    311
    Thanks
    20
    Thanked 573 Times in 174 Posts

    astroracer's Tools
    Hi Bob, thanks for the tip on the dial indicator. What this little job taught me was to develope the O.D's of the taper first. For a #2MT the head and tail diameters are .700 and 0.576, 2.56 inches apart. Grooving the material to these diameters gives an excellant visual to get the taper turned to the right size.
    Mark


    2,000+ Tool Plans

  14. The Following User Says Thank You to astroracer For This Useful Post:

    Paul Jones (Mar 10, 2016)

Thread Information

Users Browsing this Thread

There are currently 1 users browsing this thread. (0 members and 1 guests)

Bookmarks

Posting Permissions

  • You may not post new threads
  • You may not post replies
  • You may not post attachments
  • You may not edit your posts
  •