Free 186 More Best Homemade Tools eBook:  
Get 2,500+ tool plans, full site access, and more.

User Tag List

Page 1 of 2 1 2 LastLast
Results 1 to 10 of 18

Thread: 28" wood / coal forge build

  1. #1
    Supporting Member Frank S's Avatar
    Join Date
    Aug 2015
    Location
    Peacock TX
    Posts
    11,714
    Thanks
    2,226
    Thanked 9,207 Times in 4,399 Posts

    Frank S's Tools

    28" wood / coal forge build

    For 55 years I have wanted my own forge for the past 50 years I have made do with either a rose bud on a torch or tossed together small temporary forges when I needed one.
    A while back I had to replace one of my 8n tractor rims because the old one would not hold air if I wanted to mount up tubeless.
    What better use for an old rim than to make a forge out of it. Actually I don't really have the time to build a forge right now, with trying to mine and haul fill for my shop but I have an excavator with a broken drive and a bent drive sprocket that if I had a forge I could repair the drive then use the excavator to mine with and either the loader of the backhoe or the 863 Bobcat that I am repairing to haul and level the fill with so I said BUILD THE STUPID THING frank and be done with it at the very worst you can use it as a means of heating the shop next winter LOL
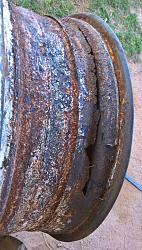
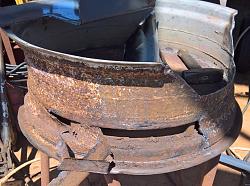
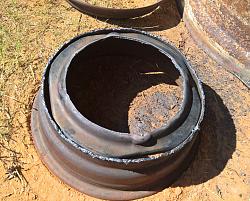
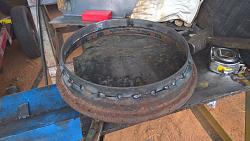
    Ok 28" tractor rim salvaged from my 8n
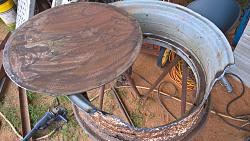
    the bottom of the forge is a 26" diameter 1/4" plate the previous property owner used as a lid for his burn barrel
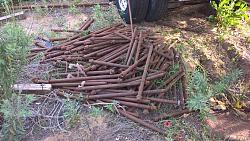
    the legs were taken from my stock of 100s of salvaged sprinkler down pipes
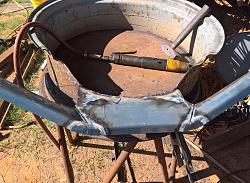
    the apron was made out of a piece of auction scrap I bought years ago
    that is the basic list of materials for the forge itself More about the toyere later
    28" wood / coal forge build-wp_20200511_18_26_51_profor.jpg
    28" wood / coal forge build-wp_20200502_12_40_07_profor.jpg

    28" wood / coal forge build-wp_20200517_13_14_20_profor.jpg
    It seemed like a good idea to remove the rotted out band
    28" wood / coal forge build-wp_20200517_15_50_14_profor.jpg
    Starting the apron
    28" wood / coal forge build-wp_20200517_17_19_04_profor.jpg

    28" wood / coal forge build-wp_20200518_15_51_38_profor.jpg
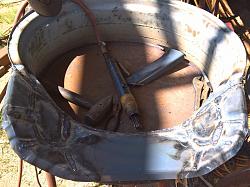
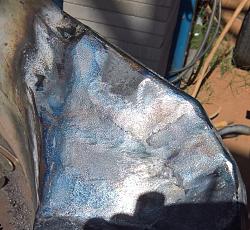
    after welding and grinding the welds I used my needle scaller to give it a hammered effect
    28" wood / coal forge build-wp_20200518_16_16_10_profor.jpg
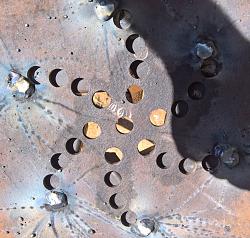
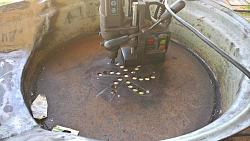
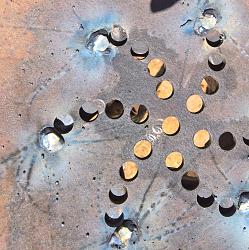
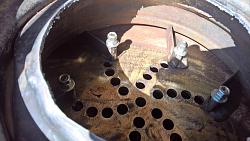
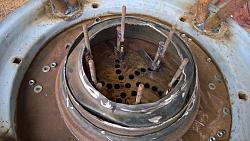
    drilling the air holes for the toyere I decided that I wanted an iris for air control and flame modulation this is why the holes are drilled in a spiral
    28" wood / coal forge build-wp_20200519_12_50_16_profor.jpg
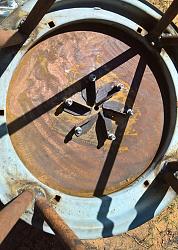
    Shown here the iris is closed leaving only a single hole exposed
    28" wood / coal forge build-wp_20200521_16_01_55_profor.jpg
    Open phase 1
    28" wood / coal forge build-wp_20200521_16_02_29_profor.jpg

    186 More Best Homemade Tools eBook
    Never try to tell me it can't be done
    When I have to paint I use KBS products

  2. The Following 9 Users Say Thank You to Frank S For This Useful Post:

    baja (May 26, 2020), Crusty (May 24, 2020), Drew1966 (May 31, 2020), DuayneI (May 24, 2020), Jon (May 25, 2020), rossbotics (Jun 1, 2020), Scotsman Hosie (May 26, 2020), Scotty12 (May 25, 2020), Sleykin (Jun 1, 2020)

  3. #2
    Supporting Member Frank S's Avatar
    Join Date
    Aug 2015
    Location
    Peacock TX
    Posts
    11,714
    Thanks
    2,226
    Thanked 9,207 Times in 4,399 Posts

    Frank S's Tools
    Forge post 2
    Open phase 2
    28" wood / coal forge build-wp_20200521_16_03_16_profor.jpg
    open phase 3
    28" wood / coal forge build-wp_20200521_16_04_03_profor.jpg
    full open
    28" wood / coal forge build-wp_20200521_16_04_58_profor.jpg
    the blades of the iris are made from bed frame angle left over from the battery box hold down project
    28" wood / coal forge build-wp_20200521_16_26_08_profor.jpg
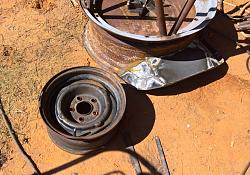
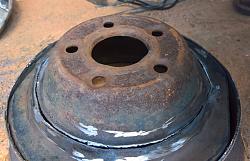
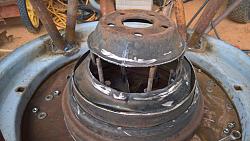
    The main body of the toyere will be this 14" car rim
    28" wood / coal forge build-wp_20200521_16_36_13_profor.jpg
    with the center removed the iris blades open all the way to the edge of the rim when fully opened
    28" wood / coal forge build-wp_20200521_16_41_03_profor.jpg
    I really should clean the torch tip shown here the second bead of the rim is removed
    28" wood / coal forge build-wp_20200521_16_47_40_profor.jpg
    the center is placed upside down
    28" wood / coal forge build-wp_20200522_15_34_20_profor.jpg
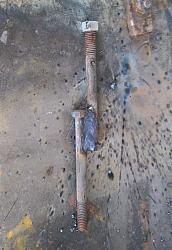
    Requiring a way to open and close the iris blades I selected these used bolts and welded them together to give me the offset I needed to make them center over the pivot of the blades
    28" wood / coal forge build-wp_20200523_11_05_46_profor.jpg
    showing the control rods welded to the iris blades
    28" wood / coal forge build-wp_20200523_12_19_39_profor.jpg

    2,500+ Tool Plans
    Never try to tell me it can't be done
    When I have to paint I use KBS products

  4. The Following 6 Users Say Thank You to Frank S For This Useful Post:

    baja (May 26, 2020), Crusty (May 24, 2020), Drew1966 (May 31, 2020), DuayneI (May 24, 2020), Scotsman Hosie (May 26, 2020), Sleykin (Jun 1, 2020)

  5. #3
    Supporting Member Frank S's Avatar
    Join Date
    Aug 2015
    Location
    Peacock TX
    Posts
    11,714
    Thanks
    2,226
    Thanked 9,207 Times in 4,399 Posts

    Frank S's Tools
    Forge post 3
    showing how the center is going to be fitted over the control rods
    28" wood / coal forge build-wp_20200523_12_21_02_profor.jpg
    Hammering out the center on Moilneer (Thor's hammer) the name given to what I use for an anvil by my wife
    28" wood / coal forge build-wp_20200523_12_43_36_profor.jpg
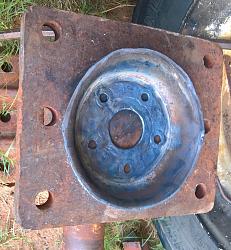
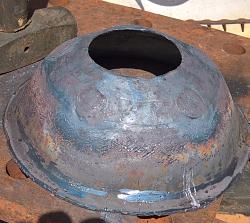
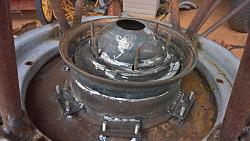
    the lug hole welded up and the cone shape started for the center of the toyere
    28" wood / coal forge build-wp_20200523_15_51_25_profor.jpg
    final shape
    28" wood / coal forge build-wp_20200523_16_00_26_profor.jpg
    More to follow tomorrow
    Never try to tell me it can't be done
    When I have to paint I use KBS products

  6. The Following 7 Users Say Thank You to Frank S For This Useful Post:

    baja (May 26, 2020), Crusty (May 24, 2020), Drew1966 (May 31, 2020), DuayneI (May 24, 2020), Scotsman Hosie (May 26, 2020), Sleykin (Jun 1, 2020), Toolmaker51 (May 25, 2020)

  7. #4
    Supporting Member Frank S's Avatar
    Join Date
    Aug 2015
    Location
    Peacock TX
    Posts
    11,714
    Thanks
    2,226
    Thanked 9,207 Times in 4,399 Posts

    Frank S's Tools
    So far not getting much done today
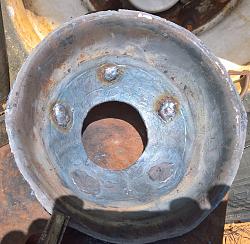
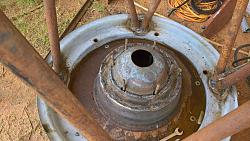
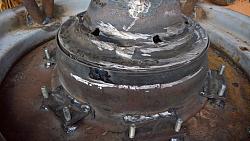
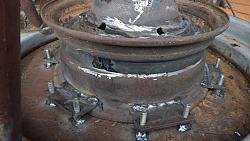
    Have the cone welded to the toyere housing and the slots of the rim welded up where the center piece was riveted to it. Everything is roughed together and before I can go further to tube around the iris blade control stems I need to make the bolting clamps to hold things in place then it is all about some much needed clean up to the welds
    Initial fit up
    28" wood / coal forge build-wp_20200523_16_12_05_profor.jpg
    welded up
    28" wood / coal forge build-wp_20200524_11_24_34_profor.jpg
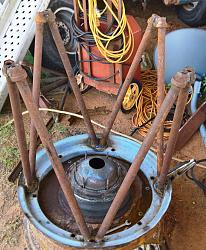
    this pic shows a better view of the legs there will be some bracing but this can not be done until I have completed the toyere and the iris controls
    28" wood / coal forge build-wp_20200524_11_24_43_profor.jpg
    Never try to tell me it can't be done
    When I have to paint I use KBS products

  8. The Following 5 Users Say Thank You to Frank S For This Useful Post:

    baja (May 26, 2020), Drew1966 (May 31, 2020), DuayneI (May 24, 2020), Scotsman Hosie (May 31, 2020), Sleykin (Jun 1, 2020)

  9. #5
    Supporting Member Frank S's Avatar
    Join Date
    Aug 2015
    Location
    Peacock TX
    Posts
    11,714
    Thanks
    2,226
    Thanked 9,207 Times in 4,399 Posts

    Frank S's Tools
    I did get a bit more done in-between having my mechanic neighbor come over for a chat and before the storms started to set in
    28" wood / coal forge build-wp_20200524_18_18_01_profor.jpg

    28" wood / coal forge build-wp_20200524_18_21_45_profor.jpg

    28" wood / coal forge build-wp_20200524_18_18_10_profor.jpg

    28" wood / coal forge build-wp_20200524_18_19_45_profor.jpg

    28" wood / coal forge build-wp_20200524_18_39_56_profor.jpg

    28" wood / coal forge build-wp_20200524_18_40_18_profor.jpg
    Never try to tell me it can't be done
    When I have to paint I use KBS products

  10. The Following 5 Users Say Thank You to Frank S For This Useful Post:

    baja (May 26, 2020), Drew1966 (May 31, 2020), madmick77 (May 24, 2020), Scotsman Hosie (May 26, 2020), Sleykin (Jun 1, 2020)

  11. #6
    Supporting Member Frank S's Avatar
    Join Date
    Aug 2015
    Location
    Peacock TX
    Posts
    11,714
    Thanks
    2,226
    Thanked 9,207 Times in 4,399 Posts

    Frank S's Tools
    quite a bit of progress today all things considered
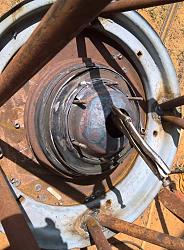
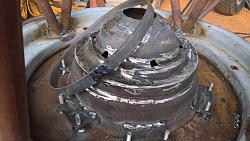
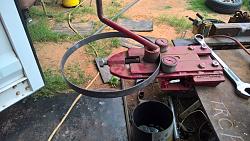
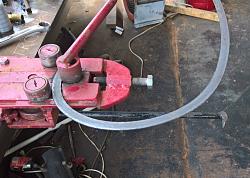
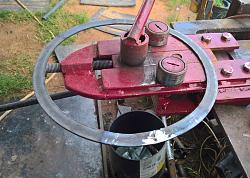
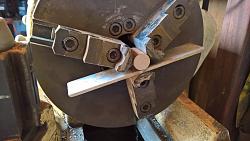
    First off I had to make a retaining ring for the iris blade control disk
    the retaining ring is 1/8 by 3/4" flat bar bent the hardway. I used my bender roller to accomplish this
    Bender roller combo
    28" wood / coal forge build-wp_20200525_10_15_38_profor.jpg

    28" wood / coal forge build-wp_20200525_11_02_57_profor.jpg
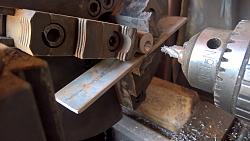
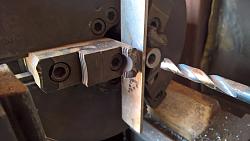
    setting up for offset drilling of the iris blade stem support sleeve
    28" wood / coal forge build-wp_20200525_12_58_14_profor.jpg

    28" wood / coal forge build-wp_20200525_12_59_11_profor.jpg

    28" wood / coal forge build-wp_20200525_13_00_32_profor.jpg
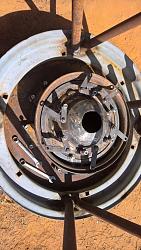
    the retaining ring the stem supports and the control linkages are now in place
    I just have to weld on some bolts to the control disk then make a flange and "T" for the air supply and the cleanout of the toyere then the underside will be pretty much done
    28" wood / coal forge build-wp_20200525_16_32_43_profor.jpg
    Never try to tell me it can't be done
    When I have to paint I use KBS products

  12. The Following 9 Users Say Thank You to Frank S For This Useful Post:

    baja (May 26, 2020), clydeman (May 25, 2020), Drew1966 (May 31, 2020), Jon (May 25, 2020), Lee Bell (May 25, 2020), Scotsman Hosie (May 26, 2020), suther51 (May 25, 2020), thevillageinn (May 25, 2020), toeless joe (May 25, 2020)

  13. #7
    Supporting Member Scotsman Hosie's Avatar
    Join Date
    Apr 2017
    Location
    Salt Lake City, UTAH
    Posts
    359
    Thanks
    4,937
    Thanked 85 Times in 60 Posts

    Scotsman Hosie's Tools
    Jesus, Frank — you da man! There's some serious vision, design, and engineering went into putting that together. Not anything like I'm used to seeing in a "wheel forge."

  14. #8
    Supporting Member Fluffle-Valve's Avatar
    Join Date
    Oct 2015
    Location
    Duston, Northampton, UK
    Posts
    583
    Thanks
    86
    Thanked 102 Times in 83 Posts
    I had to Google '8n'... And found this.

    I have a 1972 Land Rover Series III Truck Cab/Pick-Up and a 1962 Land Rover Series 2a Carawagon Camper.

  15. #9
    Supporting Member Frank S's Avatar
    Join Date
    Aug 2015
    Location
    Peacock TX
    Posts
    11,714
    Thanks
    2,226
    Thanked 9,207 Times in 4,399 Posts

    Frank S's Tools
    Quote Originally Posted by Scotsman Hosie View Post
    Jesus, Frank — you da man! There's some serious vision, design, and engineering went into putting that together. Not anything like I'm used to seeing in a "wheel forge."
    I went overboard in some areas and underboard in others.
    One thing I would have done differently had I taken the time to think it through while I was building it is the way the iris blades are connected.
    At the start while figuring out their placement shape and pivoting at first I had thoughts of simply extending a flat tab out from the end of them but they go through more than 90° of rotation, this would have required some seriously long slots in the perimeter of the toyere housing up next to the bottom of the forge. Had I done it that way it would have been next to impossible to get a reasonable enough air seal in order for the blower to be able to deliver enough air through the bottom of the forge to create a good burn.
    Now looking back at it I see it would have been much easier for me to have not mounted their pivots to the forge bottom which inturned caused me to have to make the gilflirted offset control rods so I could make them rotate concentrically to the mounting studs.
    Once I struck upon the idea of utilizing the 2nd smaller rim as the housing after I cut out the center I had to figure out how to go from a 9 inch diameter hole down to say 3 1/2 inches for the ash drop and the air delivery this was when I cam upon the idea of inverting the center and welding it back in place but I wanted it to have a continuous inward slope which meant forging it to a cone shape, I think this turned out well in keeping with how I wanted the results to be, the gradual deep cone shape will insure good ash flow downwards the guide sleeves for the iris rods and will allow minimal air leakage.
    Where I went radically overboard is in the complexity of the stupid build. first off the mounting of the toyere housing could have just as easily been accomplished with only 3 tabs and 3 bolts I elected to use 6 tabs and 12 bolts simply because I could and besides how else am I ever going to use up over 400 lbs of 3/8 nuts in my life time given that I am not currently involved in production manufacturing any more .
    I could have as easily used 7/16 , 1/2" ,5/8 or even 7/8" nuts as I probably have similar quantities of those as well.
    After looking at this thing what I could have done was to have mounted the iris blades on a long straight stem then used a loner sleeve and had them mounted to the housing itself this would have greatly simplified the build and if I find out later on the offset stems give me problems it will be easy enough to modify
    Never try to tell me it can't be done
    When I have to paint I use KBS products

  16. The Following 3 Users Say Thank You to Frank S For This Useful Post:

    baja (Jun 1, 2020), Scotsman Hosie (May 26, 2020), Sleykin (Jun 1, 2020)

  17. #10
    Supporting Member JoeVanGeaux's Avatar
    Join Date
    Jun 2018
    Location
    Magnolia, TX
    Posts
    168
    Thanks
    160
    Thanked 58 Times in 44 Posts

    Frank's Forge

    Awesome piece of work! BUT, I can't tell you how much I was looking forward to seeing a video of your forge in action at the end of your posting!

    So.... how about a video?? Please??

  18. The Following User Says Thank You to JoeVanGeaux For This Useful Post:

    Sleykin (Jun 1, 2020)

Thread Information

Users Browsing this Thread

There are currently 1 users browsing this thread. (0 members and 1 guests)

Bookmarks

Posting Permissions

  • You may not post new threads
  • You may not post replies
  • You may not post attachments
  • You may not edit your posts
  •