Free 186 More Best Homemade Tools eBook:  
Get 2,500+ tool plans, full site access, and more.

User Tag List

Page 3 of 5 FirstFirst 1 2 3 4 5 LastLast
Results 21 to 30 of 45

Thread: 12” x 37” Lathe Tailstock Clamp Improvement

  1. #21

    Join Date
    Jun 2017
    Posts
    1
    Thanks
    0
    Thanked 1 Time in 1 Post

    Mill

    Quote Originally Posted by Paul Jones View Post
    I have problems with my lathe tailstock

    I don’t access to a mill that can do this work so I used two rectangular 3/8” thick by 5” wide CRS 1018 platese.

    .
    Paul, I know this was almost two years ago now and may or may not see this, but I am like under 10 mins away, call it Bastanchury/ Placentia with a 9 x 42 Enco Mill, DRO and X powerfeed in the garage AKA the Shop if you have need again for a Mill. Drop me a note and and it's yours to use. Enjoyed the write up. I am out looking for and Enco ( or clone ) tailstock 12" and how I found this.

    Dan

    Download plans for tailstock.


  2. The Following User Says Thank You to Log_on Bob For This Useful Post:

    Paul Jones (Jun 7, 2017)

  3. #22
    Supporting Member olderdan's Avatar
    Join Date
    Jun 2016
    Posts
    795
    Thanks
    1,464
    Thanked 1,594 Times in 472 Posts

    olderdan's Tools
    Nice solution to an all too common problem, it seems that manufacturers pay more attention to the parts you can see than the ones we cant.
    I am about to post a lever conversion on an old lathe that cured the problem in a similar fashion.
    Nicely presented post as ever, I am still working on that but I guess you have been doing it longer than me, gives me something to aim at.
    Regards
    Olderdan

    Download plans for tailstock.


  4. The Following User Says Thank You to olderdan For This Useful Post:

    Paul Jones (Jun 13, 2017)

  5. #23
    Supporting Member Paul Jones's Avatar
    Join Date
    May 2014
    Location
    Del Mar, California
    Posts
    1,231
    Thanks
    5,810
    Thanked 1,461 Times in 657 Posts

    Paul Jones's Tools
    Thank you Dan and Olderdan for the comments, offers and feedback.

    Looking forward to seeing Olderdan's tailstock lever conversion. In addition to making a larger clamping plate, one of the easiest and best improvements to my tailstock clamp was changing the bottom clamping nut to a Nyloc Nut rather than a conventional nut. The Nyloc Nut is a kind of locknut with a nylon collar insert that resists turning. The action of clamping and un-clamping the tailstock plus the constant lathe vibrations would eventually loosen the bottom clamping nut, and reduce the mechanical advantage range of the clamping arm. There are ways to use a brass tipped set screw to lock the bottom nut in place but I found the Nyloc Nut to be the easiest solution.

    Paul

  6. #24
    Supporting Member Y-geo's Avatar
    Join Date
    Aug 2017
    Location
    west london
    Posts
    32
    Thanks
    54
    Thanked 22 Times in 13 Posts

    Y-geo's Tools
    Hi,
    neat design Paul wish my conquest lathe could be modded like this ! I went with this Mod at first:-


    to keep the foot aligned to the ways when re-assembling the tool post to the ways. Steve used two screws to do this but since my machine "shop" is
    only days old I used a roll pin as a guide instead.

    Steve also came up with this secondary tailstock lock:-


    Which while not ideal in a space limited shop it does work

    hope these are of some use to the smaller lathe owners
    S & F
    Y-Geo

  7. The Following 4 Users Say Thank You to Y-geo For This Useful Post:

    NickP (Aug 8, 2017), Paul Jones (Aug 6, 2017), Ron 2 (Aug 16, 2017), Seedtick (Aug 8, 2017)

  8. #25
    Supporting Member Paul Jones's Avatar
    Join Date
    May 2014
    Location
    Del Mar, California
    Posts
    1,231
    Thanks
    5,810
    Thanked 1,461 Times in 657 Posts

    Paul Jones's Tools
    Y-Geo,

    I like your double locking modification on the tailstock. I had used a Kant Twist clamp at the back of my tailstock as a poor man's version of your double locking method before I made the larger locking foot. Your clamping method is quick to set and release.

    Thank you for showing what you made,
    Paul Jones

  9. The Following User Says Thank You to Paul Jones For This Useful Post:

    Y-geo (Aug 6, 2017)

  10. #26
    Supporting Member Paul Jones's Avatar
    Join Date
    May 2014
    Location
    Del Mar, California
    Posts
    1,231
    Thanks
    5,810
    Thanked 1,461 Times in 657 Posts

    Paul Jones's Tools
    Everyone,

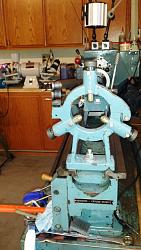
    Just in case you had this question. I re-used the original bottom locking plate from the tailstock on the original center rest for the lathe. My used lathe included many accessories but the original center rest was missing its bottom locking plate. The original bottom part from the tailstock fit perfectly on the center rest and no need to make yet another replacement.

    12” x 37” Lathe Tailstock Clamp Improvement-reuse-tailstock-locking-plate-center-rest.jpg

    I want to replace the brass tips on the center rest with small ball bearing rollers. I would like to see if anyone else has examples of this type of center rest modifications for adding ball bearing rollers or know of examples on the Internet.

    Thank you,

    Paul Jones
    Last edited by Paul Jones; Aug 15, 2017 at 09:12 AM. Reason: forgot the attachment

  11. #27
    Supporting Member Y-geo's Avatar
    Join Date
    Aug 2017
    Location
    west london
    Posts
    32
    Thanks
    54
    Thanked 22 Times in 13 Posts

    Y-geo's Tools

    Cool

    paul,
    I had this bookmarked as "interesting" :-
    about making a steady from scratch BUT it does show the roller bearings you are thinking about

    More along the same line but with a good talk about the why's and wherefore's :-

    Part 1


    Part 2


    HTH certainly food for thought
    S & F
    Y-Geo

  12. The Following User Says Thank You to Y-geo For This Useful Post:

    Paul Jones (Aug 15, 2017)

  13. #28
    Supporting Member Y-geo's Avatar
    Join Date
    Aug 2017
    Location
    west london
    Posts
    32
    Thanks
    54
    Thanked 22 Times in 13 Posts

    Y-geo's Tools
    Paul,
    Also dug these out my "library" of modding a chinese steady :-

    Part 1


    Part 2


    Part 3
    S & F
    Y-Geo

  14. The Following User Says Thank You to Y-geo For This Useful Post:

    Paul Jones (Aug 15, 2017)

  15. #29
    Supporting Member Frank S's Avatar
    Join Date
    Aug 2015
    Location
    Peacock TX
    Posts
    11,714
    Thanks
    2,226
    Thanked 9,207 Times in 4,399 Posts

    Frank S's Tools
    There you are Paul Jones Y-geo beat me to it LOL
    Never try to tell me it can't be done
    When I have to paint I use KBS products

  16. The Following 2 Users Say Thank You to Frank S For This Useful Post:

    Paul Jones (Aug 27, 2017), Y-geo (Aug 15, 2017)

  17. #30
    Supporting Member Paul Jones's Avatar
    Join Date
    May 2014
    Location
    Del Mar, California
    Posts
    1,231
    Thanks
    5,810
    Thanked 1,461 Times in 657 Posts

    Paul Jones's Tools
    Thank you to Frank S and Y-geo for the interesting examples.

    Looks like a fun project and will be a significant improvement over what I have today.

    Regards,

    Paul

  18. The Following User Says Thank You to Paul Jones For This Useful Post:

    Y-geo (Aug 15, 2017)

Thread Information

Users Browsing this Thread

There are currently 2 users browsing this thread. (0 members and 2 guests)

Tags for this Thread

Bookmarks

Posting Permissions

  • You may not post new threads
  • You may not post replies
  • You may not post attachments
  • You may not edit your posts
  •