Free 186 More Best Homemade Tools eBook:  
Get tool plans

User Tag List

Page 7 of 7 FirstFirst 1 2 3 4 5 6 7
Results 61 to 69 of 69

Thread: 1/32 model train car mold procedure

  1. #61
    Supporting Member machiningfool's Avatar
    Join Date
    Jul 2015
    Location
    Seffner Florida
    Posts
    266
    Thanks
    0
    Thanked 273 Times in 146 Posts

    machiningfool's Tools
    Thanks Paul, I have noticed that procedure helps. 1/32 model train car mold procedure-img_0564.jpgHere are some more parts for the truck, still mocking up. *I combined the spring cross bars with the mounting plate, so it makes it a little easier to assemble. Bob.

    186 More Best Homemade Tools eBook

  2. The Following User Says Thank You to machiningfool For This Useful Post:

    Paul Jones (Jul 13, 2016)

  3. #62
    Supporting Member machiningfool's Avatar
    Join Date
    Jul 2015
    Location
    Seffner Florida
    Posts
    266
    Thanks
    0
    Thanked 273 Times in 146 Posts

    machiningfool's Tools
    Thanks Paul. The mock up of the truck is finished, here is the truck. Bob1/32 model train car mold procedure-img_0565.jpg1/32 model train car mold procedure-img_0566.jpg1/32 model train car mold procedure-img_0567.jpg

    2,000+ Tool Plans

  4. #63
    Supporting Member Paul Jones's Avatar
    Join Date
    May 2014
    Location
    Del Mar, California
    Posts
    1,231
    Thanks
    5,810
    Thanked 1,461 Times in 657 Posts

    Paul Jones's Tools
    Bob,
    The trucks look impressive. Looking forward to seeing these on the heavyweight passenger cars.
    Paul

  5. #64
    Supporting Member machiningfool's Avatar
    Join Date
    Jul 2015
    Location
    Seffner Florida
    Posts
    266
    Thanks
    0
    Thanked 273 Times in 146 Posts

    machiningfool's Tools
    Thank you Paul. I am gearing up to make the cars shortly, Bob.

  6. The Following User Says Thank You to machiningfool For This Useful Post:

    Paul Jones (Aug 2, 2016)

  7. #65
    Supporting Member machiningfool's Avatar
    Join Date
    Jul 2015
    Location
    Seffner Florida
    Posts
    266
    Thanks
    0
    Thanked 273 Times in 146 Posts

    machiningfool's Tools
    I have been trying to get the perfect shape for the F cab windshield and I made a pattern for a mold. The shape has been scaled from the full size to 1:32 and is made with the seal. I loaded the program on my Anilam controller and had to delete all of my other programs just to get this file on my machine, about 4000 steps.1/32 model train car mold procedure-img_0568.jpg Here is the beginning of the operation. Bob.

  8. The Following User Says Thank You to machiningfool For This Useful Post:

    Paul Jones (Aug 2, 2016)

  9. #66
    Supporting Member machiningfool's Avatar
    Join Date
    Jul 2015
    Location
    Seffner Florida
    Posts
    266
    Thanks
    0
    Thanked 273 Times in 146 Posts

    machiningfool's Tools
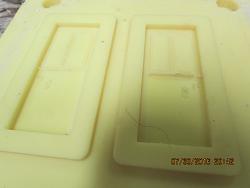
    Here is what I have been doing in the last few days. I made a mold of the heavyweight doors so that they will open and be a split door. *I am still trying to make the perfect E and F series windshields. *I am trying to make the windshields, so that I may retro fit them into any one gauge E or F series loco. *I am designing them so that when installed in the loco, there will be no glass to make it easier for painting and then there will be a ring in the shape of the windshield, to be installed from the inside to hold the glass in. *I am using .020 Lexan for the glass, also making the side windows for the loco, and here are some pictures of the patterns and molds. Bob.1/32 model train car mold procedure-img_0570.jpg1/32 model train car mold procedure-img_0571.jpg1/32 model train car mold procedure-img_0572.jpg1/32 model train car mold procedure-img_0573.jpg
  10. The Following User Says Thank You to machiningfool For This Useful Post:

    Paul Jones (Aug 2, 2016)

  11. #67
    Supporting Member machiningfool's Avatar
    Join Date
    Jul 2015
    Location
    Seffner Florida
    Posts
    266
    Thanks
    0
    Thanked 273 Times in 146 Posts

    machiningfool's Tools
    1/32 model train car mold procedure-img_0574.jpg1/32 model train car mold procedure-img_0575.jpg1/32 model train car mold procedure-img_0576.jpg *Well here are the glass panels. *I cut them with a tool that I made, a vinyl cutter. *This tool was made to cut just .005 material, but I ran it through twice and it scored the .020 Lexan enough so that it broke away clean. They came out just like I wanted them to. *I have to draw just one more part to complete the assy. then I will attempt to install them in an MTH cab and the other cab that I made the mold for. Here are some pictures. Bob.

  12. The Following User Says Thank You to machiningfool For This Useful Post:

    Paul Jones (Aug 2, 2016)

  13. #68
    Supporting Member Paul Jones's Avatar
    Join Date
    May 2014
    Location
    Del Mar, California
    Posts
    1,231
    Thanks
    5,810
    Thanked 1,461 Times in 657 Posts

    Paul Jones's Tools
    Bob,
    I like your clever use of the "scoring" method with the CNC inscribing technique. This would be very precise for any type of model making.
    Thanks Paul

  14. #69
    Supporting Member machiningfool's Avatar
    Join Date
    Jul 2015
    Location
    Seffner Florida
    Posts
    266
    Thanks
    0
    Thanked 273 Times in 146 Posts

    machiningfool's Tools
    I should have described the cutting tool a little better. The blade in the cutter rotates 360 degrees and protrudes about .005 in. The blade is mounted with a spring loaded pad and moves about .250 in. for uneven surfaces. The blade was purchased at a vinyl cutting supply store and adapted to my tool. Thanks Paul. Bob.


    2,000+ Tool Plans

  15. The Following User Says Thank You to machiningfool For This Useful Post:

    Paul Jones (Aug 2, 2016)

Thread Information

Users Browsing this Thread

There are currently 2 users browsing this thread. (0 members and 2 guests)

Bookmarks

Posting Permissions

  • You may not post new threads
  • You may not post replies
  • You may not post attachments
  • You may not edit your posts
  •